Following on with my current theme of using up my bits of scrap from other projects, here's my latest efforts.
As will be obvious, it's nothing fancy, merely some crates really crudely stuck together.
I made no attempt at squaring them off nor did I make any attempt at accurate measurements for them. Most measurements being done by eye.
This intial batch was made primarily from lollipop stiicks, some of which are of the actual used variety, whilst others were bought many years ago for the princely sum of 67p (for 100 sticks). The sticks are about 100mm long (excluding the rounded ends) and about 10mm wide. In addition to the loolipop sticks I've also used those ubiquitous coffee stirrers.
This second batch of crates uses the coffee stirrers solely.
They're made in exactly the same fashion as the ones above and easier to make as the stirrers are thinner than the lolly sticks and consequently easier to cut.
In the future, if I make any more of these crates then I'll be sticking to the coffee stirrer variety.
Here's a photograph of the two varieties of crate side by side .
There is of course a very practical point for making these models, in that not only do they provide cover for our heroes but they also add to the scenic aspect of our games.
I've purposely left these crates loose so that they can be utilised in more situations and as can be seen in the photographs a two-high barricade of them can appear very substantial.
There is also another aspect to these that is not apparent from the other photographs and that is that, not only are they hollow but they also have a side missing.
I had the idea that once a box was opened it could be turned over to reveal what was inside - it was one of those thoughts that made sense at the time.
They can still be used as an indication of a crate having been searched though.
Currently in the pipeline:- Operation DFS Winter bed-sale is almost complete and should be blogged about next week; more Urban Road terrain has been started; my cottages ar3e currently having roof tiles added (individual tiles - they're no fun at all); work on my tenements has continued, but very slowly and I made a building during the England game this week (yes, I was that bored) - I would have had it finished too if the match hadn't picked up a bit in the second half.
Well, that's all for this week, comments, as always, are both welcomed and appreciated.
Finally, to those I haven't already welcomed to my blog - "Welcome!" - (that would be aimed at my two new followers, Chris and Kris) I hope that you find something of interest here.
And I will let the dead leave, And let the dead roam the earth, And they shall eat the living, The dead will overwhelm all the living! - The Epic pf Gilgamesh
Welcome to my blog, the story of my continuing journey into the World of Zombie Wargames.
Monday, 15 October 2012
Monday, 8 October 2012
Fruit and Veg
The consequence of all this is that my wargames' room table looks like the above two photographs most of the time (yes, there is a table somewhere beneath all the crap). A few of my current projects can be seen in the photos, but I'm not going to going to expand upon these until a future date.
One of the side-products of having so much going on is that there is a lot of "rubbish", offcuts or whatever left over and I'm a great believer in "It'll come in handy", so I tend to keep most of the bits and pieces, in the hope that they'll be useful - one day.
Some of the stuff I've used recently is shown in the photograph on the right: Lollipop sticks, coffee stirrers, cocktail sticks, cardboard and modelling putty (it used to be called plasticene when I were a lad).
Adding the bits and pieces to the various units for the fruit and veg wasn't as hard as I though it was going to be.

Here are three photographs showing the finished article along with Bob (I've always thought of him as Bob the builder even though he's probably a road-sweeper), for scale.The model is about 12cm long (4.5") and about 4cm wide (1.5"). It is about 25mm (1") tall to the highest point on the centre divide.
I've tried to represent carrots, bananas, apples, lemons, parsnips, oranges, cabbage, lettuce and potatoes with varying degrees of success. These were chosen simply because of their ease to make - pineapples were right out !
My biggest disappointment was with the bananas, but I was quite pleased that most everything else came out ok. As is the way with these things, everything is over scale by necessity, but it's not too noticeable.
At each end of the stand is a small shelf that I decided to put on representations of brown bags and a scale mainly because it looked too bare and I couldn't think of anything else to fill the space with - I thought it would have looked a bit strange just left as it was.
Some of the products have been given a gloss varnish, but most are varnished in matt although this doesn't really show up very well in the photographs (I blame the rubbish photographer).
My next mini-project will be the mass production of beds made from scrap bits and pieces. The prototype is shown here in this last photograph, alongside a WWG bed for comparison.The bed took me about an hour to make and paint; for a first -time effort I'm quite pleased with the result. My paint-job is of course up to my usual standard (one step off piss-poor), but in my defence it was a bit rushed..
That's all for this week, and as always comments are both welcomed and appreciated, thanks for taking the time to look, I hope that there is something here to interest you.
Monday, 1 October 2012
Sofa so good
My attempts at card modelling have, to say the least, been less than inspiring. I, like many others I suspect, was seduced into attempting it by the modelling expertise of others (I'm looking at you Vampifan). The photograph on the right shows a typical box-type structure that is meant to represent a sofe (settee ?). Unfortunately it is typical of my attempts at card modelling - an abomination of something, but quite what remains unknown.Continuing on from using my bits of scrap left over from my current builds, I've again utilised the scraps of cork and a few bits of foam-board left of from my urban terrain build.
The photograph shows all the necessary pieces make some chairs and sofas with.
The dimensions for the sofas vary, depending on the number of seating spacess, but they are basically the same for all seating. Five pieces make up each piece of furniture; a back; two arm-rests, a base and the seating.
All the cork pieces are about 4mm-5mm thick.
The base is 10mm x 15mm (per "seat"), on top of that is a piece 10mm x 15mm approx. - (and again, per "seat").The arms are approximately 15mm square, whilst the back is about 20mm tall, 15mm per "seat" long with an additional 5mm added to each end to allow for the arms-rests.
When assembled the first few prototypes looked like this:I was very happy with the results and from the above photograph I'm sure you can make out my attempts at making a few different styles.
Altogether I had enough bits of cork left to make eighteen sofas (from two to four seat capacity and around about twenty chairs.(You can just make out the black painted ones in the background)
The photograph above left shows the first coat of paints applied to them (actually two coats, as cork soaks up paint like nobody's business). When they've thoroughly dried out, I'll be giving them a dark wash and then some high lighting Some will be given a matt varnish, to represent fabric, whilst others will be given a gloss varnish to represent leather.

Finally just to show the comparison between my homemade sofa and my wreck of an attempt at a card one:
Well, that's it for this week, I hope you find something here ot interest you and as usual, all comments are welcomed and appreciated.
Monday, 24 September 2012
Scrap Scenery
I'm currently making buildings (tenements and cottages) and in-between sessions of waiting for things to dry out I've also been making bit and pieces from scrap. The photo on the right shows varying sized palettes made from matchsticks and coffee-stirrers. The latter I actually bought rather than having to collect them; they cost about £1.50 for 1000. The matchsticks are from a bag I bought many years ago from a hobby shop but I suspect they'll be about the same price.
The photograph to the left shows the matchsticks in their original form, then two glued together, then two sets of two glued together. These make the central supports for the palettes.
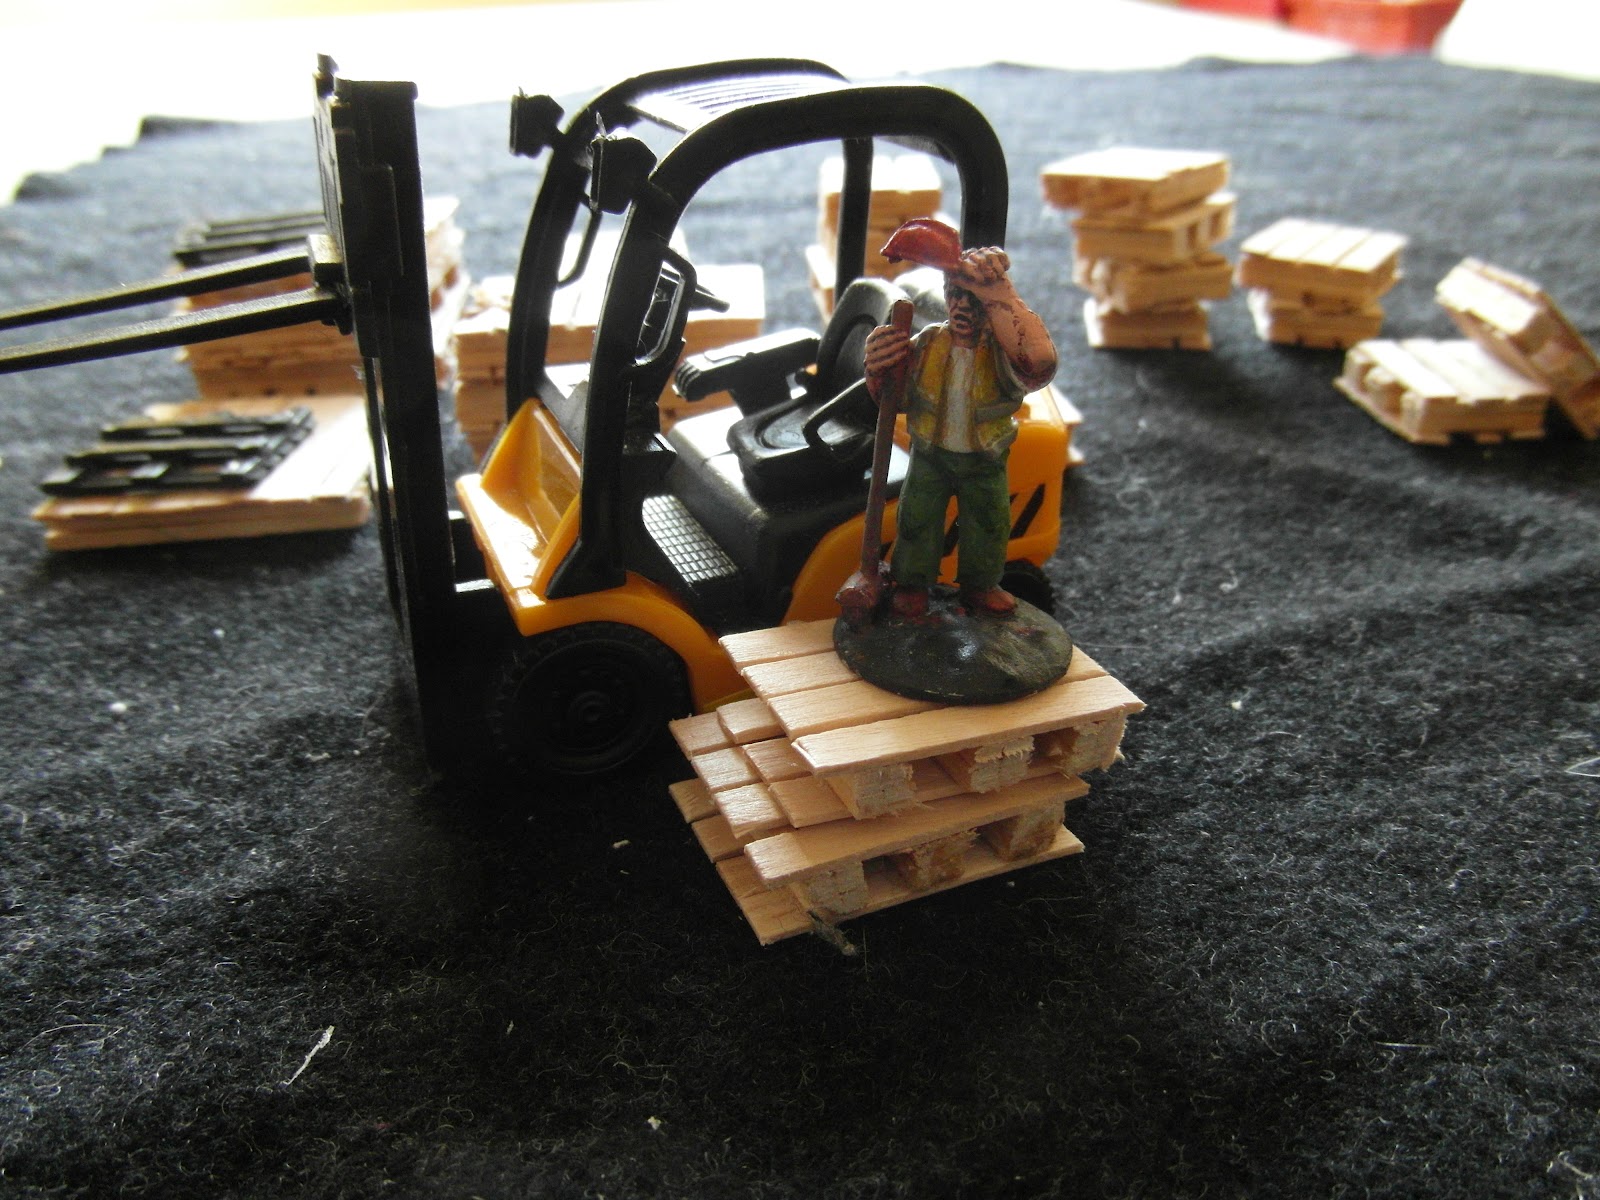
In the photograph above you can see the black plastic ones that came with the fork-lift (from Tesco's). I couldn't really decide which size I preferred so I made several different sizes, there is after all no standard size for a pallette.
The matchstick bundles of four were glued to the stirrers on one side, left to dry, cut to size then the process was repeated for the other side, making the finished palette. I haven't actually put any paint on them as yet but I will paint a few eventually; as it is they are perfectly usable in their current state.
The photograph on the right show a Foundry figure on a couple of palettes for scale purpose (he's barely visible in the first photo); the fork-lift seat shows what a close match for scale it is.
This photo shows five piles of "bricks" that I made in about an hour. They are merely four pieces of 5mm foamboard (from the windows of the tenements I'm making), glued together then scored into 1cm x 5mm x 5mm "bricks". - a huge size for actual bricks, but perfectly acceptable for my wargaming purposes. The colour of these appears to be very red, but they are meant to represent new bricks - they will be toned down and matt-varnished
All those scraps of coffee-stirrers that I have an abundance of were also put to use to make this pile of planks. This was a very simple case of gluing the sticks in a rough stack. The inside of the stack is actually hollow and would have shown the rounded ends of the sticks facing the insides. I'll probably put a paint wash over this (eventually) but it isn't at the top of my to-do list .The piece, whilst not completely finished, is sufficient to be used in its present state.
The final photograph shows both of the above pieces for comparison purposes.

All of these pieces can easily be used together in a variety of situations, a builders yard, a demolition site or a building site for example; all of course proving that essential cover for our miniatures.
I'll take this opportunity to welcome my two newest followers Dave VanDam and Captain Richard, I hope that you find something here to interest you.
That's all for this week, thanks for taking the time to look and as always comments are both welcomed and appreciated.
The photograph to the left shows the matchsticks in their original form, then two glued together, then two sets of two glued together. These make the central supports for the palettes.
In the photograph above you can see the black plastic ones that came with the fork-lift (from Tesco's). I couldn't really decide which size I preferred so I made several different sizes, there is after all no standard size for a pallette.
The photograph on the right show a Foundry figure on a couple of palettes for scale purpose (he's barely visible in the first photo); the fork-lift seat shows what a close match for scale it is.
This photo shows five piles of "bricks" that I made in about an hour. They are merely four pieces of 5mm foamboard (from the windows of the tenements I'm making), glued together then scored into 1cm x 5mm x 5mm "bricks". - a huge size for actual bricks, but perfectly acceptable for my wargaming purposes. The colour of these appears to be very red, but they are meant to represent new bricks - they will be toned down and matt-varnished
All those scraps of coffee-stirrers that I have an abundance of were also put to use to make this pile of planks. This was a very simple case of gluing the sticks in a rough stack. The inside of the stack is actually hollow and would have shown the rounded ends of the sticks facing the insides. I'll probably put a paint wash over this (eventually) but it isn't at the top of my to-do list .The piece, whilst not completely finished, is sufficient to be used in its present state.
The final photograph shows both of the above pieces for comparison purposes.

All of these pieces can easily be used together in a variety of situations, a builders yard, a demolition site or a building site for example; all of course proving that essential cover for our miniatures.
I'll take this opportunity to welcome my two newest followers Dave VanDam and Captain Richard, I hope that you find something here to interest you.
That's all for this week, thanks for taking the time to look and as always comments are both welcomed and appreciated.
Monday, 17 September 2012
Final Fade Out
![]() |
| Image from THW's site |
Although nothing is cast in stone, following on from THW's "After the Horsemen" rules, which featured the addition of skills and a greater number of attributes, to make for a more role-play style of game, FFO promises to have much of the same.
The additional skills of "Savvy" and "People" as separate skills to the all-encompassing Reputation (Rep) are useful ideas although I can't foresee the "Savvy" skill being used that much when its novelty wears off after a few games. Separate Shooting and Melee skills would to my mind have been of greater use. However, one of the greatest features of THW's rules is their adaptability to one's own needs. If you don't like a rule, just change it or ignore it, it won't have that much effect (if any) on the overall enjoyment of the game.
There appears to be a lot more detail put into the "bells and whistles" aspect of the game, which I personally like. Attention to detail in rules, where appropriate and where it doesn't detract from the flow of the game is welcomed and can of course be ignored if it proves annoying or a nuisance.
There will be changes of course that may appear to be changes, for changes sake, such as being able to fight four opponents simultaneously instead of six. Again though, if the changes don't appeal to you then you can always revert to the original ATZ rules.
Will I be buying the new rules ? - Undoubtedly, although I can't see me using them without having a bit of a tinker with them to give me the game I want. I'll certainly be using separate Shooting and Melee skills for example. there's a reason why our Gold Medallist in the Men's Double Trap, Shooting event (Peter Wilson), didn't also win the fencing competitions !
That's it for this week, thanks for taking the time to look.
All comments are of course welcomed and appreciated.
Monday, 10 September 2012
White Flags and Rubble
Even though I've got "United States of the Dead" as my current read, I've actually finished that book and what I thought was the last (fifth) book "Dead Surge" in the series "White Flag of the Dead". The fifth book doesn't actually complete its story-line and ends on a bit of a cliff-hanger, so that there is a good chance that there is a sixth book to come.
As I've stated previously all of the book suffer from poor proof-reading a thing that I'm generally no too tolerant of, but as you can surmise from the fact that I've now read all five current books in the series and I'm looking forward to a possible sixth that it hasn't bothered me that much.
There have been a few times when I've winced at a typo ("lances" rather than "glances" threw me a little) but there is a cracking story that more than makes up for them.
As I've said in previous blogs the general overall story follows the concepts in Sean T Page's book "War Against the Walking Dead". Books one and two deal primarily with survivors trying to re-establish some form of normality after what they term "The Upheaval".
There are of course a lot of formulaic situations within the series, but book 3 (America the Dead) and book 4 (United States of the Dead) follow the same story-line which to be truthful is a bit contrived, but nevertheless is still entertaining.
Throughout the series the Zombies (they're always referred to as such) do change and develop, but they do so very slowly and more or less in what has become an accepted formula.
The "White Flag" of the series refers to the instruction to leave a white cloth from a window or on a mailbox to indicate to the authorities that someone in the household has become infected - a nice idea I thought and one that could well be used.
As a by-product to my Urban Road building I was left with long strips of cork tile 4mm-5mm wide and 304mm long. On a whim I decided to try and make some rubble with them.
The result of my efforts can be seen in the photograph to the right, although the "red-ness" of the bricks appears far brighter in the picture than it does in reality.
The lengths of cork were cut into smaller bits, anywhere from 1cm to 5mm in length and put into a plastic yoghurt style pot. I added a basic acrylic red colour and stirred until I thought that the bricks were sufficiently covered. When they were all but dry, I next added a smaller amount of a darker red and again stirred, but this time the objective being to get some paint on most of the bricks, not to cover them completely.
This process was continued with brown and a touch of black. In-between the various colours, the bricks would be separated roughly by hand as the drying paint tends to act like a glue too. This of course resulted in some of the cork breaking (which added to the textures and colours) and there were some pieces stuck together, which were left.
As a final touch a very small amount of powdered filler was added to the mix, which again added to the colouring of the bricks.
The final photograph give some idea of the scale of the pile of rubble that I've made, the figure being a foundry workman.
I'm currently trying to mass-produce buildings for my campaign and I'll be needing some ruins as well as complete buildings no doubt. The rubble will add some easy detailing to any ruin I make and it could also be useful in a construction/demolition site as well as a stand-alone piece of cover for any bit of wasteland. It took little to no effort to make and for a first-try I thought it came out pretty good, so much so that I'm considering making more.
Well, that's it for this week, thanks for taking the time to look; all comments are of course welcomed and appreciated.
Finally if I haven't already welcomed you, then "Welcome" (that's you "the DM's Revenge"), I hope you find something here to interest you.
As I've stated previously all of the book suffer from poor proof-reading a thing that I'm generally no too tolerant of, but as you can surmise from the fact that I've now read all five current books in the series and I'm looking forward to a possible sixth that it hasn't bothered me that much.
There have been a few times when I've winced at a typo ("lances" rather than "glances" threw me a little) but there is a cracking story that more than makes up for them.
As I've said in previous blogs the general overall story follows the concepts in Sean T Page's book "War Against the Walking Dead". Books one and two deal primarily with survivors trying to re-establish some form of normality after what they term "The Upheaval".
There are of course a lot of formulaic situations within the series, but book 3 (America the Dead) and book 4 (United States of the Dead) follow the same story-line which to be truthful is a bit contrived, but nevertheless is still entertaining.
Throughout the series the Zombies (they're always referred to as such) do change and develop, but they do so very slowly and more or less in what has become an accepted formula.
The "White Flag" of the series refers to the instruction to leave a white cloth from a window or on a mailbox to indicate to the authorities that someone in the household has become infected - a nice idea I thought and one that could well be used.
As a by-product to my Urban Road building I was left with long strips of cork tile 4mm-5mm wide and 304mm long. On a whim I decided to try and make some rubble with them.
The result of my efforts can be seen in the photograph to the right, although the "red-ness" of the bricks appears far brighter in the picture than it does in reality.
The lengths of cork were cut into smaller bits, anywhere from 1cm to 5mm in length and put into a plastic yoghurt style pot. I added a basic acrylic red colour and stirred until I thought that the bricks were sufficiently covered. When they were all but dry, I next added a smaller amount of a darker red and again stirred, but this time the objective being to get some paint on most of the bricks, not to cover them completely.
This process was continued with brown and a touch of black. In-between the various colours, the bricks would be separated roughly by hand as the drying paint tends to act like a glue too. This of course resulted in some of the cork breaking (which added to the textures and colours) and there were some pieces stuck together, which were left.
The final photograph give some idea of the scale of the pile of rubble that I've made, the figure being a foundry workman.
I'm currently trying to mass-produce buildings for my campaign and I'll be needing some ruins as well as complete buildings no doubt. The rubble will add some easy detailing to any ruin I make and it could also be useful in a construction/demolition site as well as a stand-alone piece of cover for any bit of wasteland. It took little to no effort to make and for a first-try I thought it came out pretty good, so much so that I'm considering making more.
Well, that's it for this week, thanks for taking the time to look; all comments are of course welcomed and appreciated.
Finally if I haven't already welcomed you, then "Welcome" (that's you "the DM's Revenge"), I hope you find something here to interest you.
Monday, 3 September 2012
Urban Terrain Boards - Part Two
Next up was the painting of the various "sections" of the boards.
Basically there are three main parts to each board.
First, the road itself, a black base was used as I wanted a tarmac look and it gives a good definition between road and pavement.
Next, the pavement. I started with a general grey colour that was increasingly lightened.
This photograph on the left shows the same boards as above but from the opposite side of the table.
It is just possible to make out the various shades of colours used on the waste land parts of each board.
To assist my somewhat shaky hands I used masking tape about 5mm apart for the centre line and the width of the masking tape as the gap between the lines.
This left a nice gap of about 25mm between each line.
The final masking tape effect was rather like a ladder.
Rather than actually painting the lines I used a sort of stipple approach with a fairly stiff brush.
The ladder effect of the masking tape can more easily be seen from the photograph to the left.
The test piece used in the above photograph can also be seen in the top-right of the photo.
The masking tape has been removed to reveal a straight dotted centre line which wasn't too bad in my opinion and at the very least suitable for wargaming on, even if not to exhibition or demonstration standards.
This photograph shows the masking I used at each junction where the pedestrian crossings will be.
I've seen various designs of these and decided to go with the diagonal striped variety.
These are enclosed within two broad stripes, which alone would have been adequate as markers for the crossings.
The three pieces of masking tape that are joining the pavements at right angles provide the enclosing border lines of the crossings.
One thing I had learned from the practice piece was that painting the lines a pure white was a mistake. They looked far too pristine, so I darkened them a little as I went along and although it won't show up in the photographs, it was well worth the trouble.
The next task was to paint the diagonals on the cross-walks, which I did using a 5mm stiff nylon "chisel" head brush.
I'm not the best in the world at keeping a steady hand whilst trying to paint a straight line, nor am I that good at keeping a uniform thickness, but with another brush ready to cover mistakes I eventually got to the stage where I was fairly happy with the overall results.
As far as finishing painting I was almost done, all I had left to do was paint the edges of each board a darkish grey to finish them off.
You can see that the curved road still has to have its centre line completed, but that is a minor task that will be done when I'm having a steady-hand day.
The roads also had various greys and browns added to them in both washes and highlights, so they didn't appear as a harsh black.
There were a few minor problems and hiccups that I encountered when making these boards. First up was the problem of using two different sized cork tiles, one set I used was metric, at 300mm a side and the other older set I used was Imperial at 1ft a side (about 304mm) which meant I had to trim about 4mm overlap from a lot of the boards. (There was an unexpected bonus because of this which I'll relate in a future blog.)
The next potential problem I encountered was in trying to purchase more tiles, my two local DIY stores, either didn't stock them (B&Q) or had them at 3.2mm thick (Wickes), As my current tiles are approximately 5mm thick these won't match up too well - so its back to the drawing board (or the interweb) for my next terrain boards. I have one to finish from the above "set" and two bigger boards planned, each 600mm x 1200mm.
The final photo shows a mock-up of the layout with my meagre collection of buildings in situ.
If I was to attempt this project again I would widen the roads to 150mm, rather than the 100mm that they currently are and I'd also plan to have all the materials I needed before I started out, probably with a few extra bits too.
Before anyone asks, I've no intention of adding street-lamps, traffic lights, or anything else of that ilk. The main reason being one of practicality, tall slender things tend to get knocked over if not affixed and broken if they are. In addition, this is a wargaming set-up; it's not meant to have details to the n'th degree like a model railway layout. If features don't add anything to the game (for example - cover) then I think its hardly worth the extra trouble of modelling them. I will however be adding the usual street furniture that one might expect, skips, garbage cans etc.
That's it for my Mark 1 Urban Terrain Boards, all comments are of course welcomed and appreciated.
If anyone is lurking out there whom I haven't already said "Hi" to then "Hi" I hope you find something here you like.
Subscribe to:
Posts (Atom)