Welcome to my blog, the story of my continuing journey into the World of Zombie Wargames.

Monday 25 March 2013

Billboards (2)

The world is now a much brighter place, but I haven't managed to do anything at all over the last week, luckily though I had allowed for this situation and split my finished billboards into two posts for just this situation.

Here's another of my larger sized, free-standing, billboards, probably not suitable for the roof-tops of buildings.

The construction of this and all the other ones I've made follow the same lines, namely coffee-stirrers, either glued together in strips of four or used singly for cross-braces.

All the actual "Bills" were taken from the Interweb and most, if not all, had to be photo-manipulated in some way or other as they were all taken from real-life ones at an angle to the viewer etc.
 The above two photos show the same signs, obverse and reverse. The Wine one is not one of my favourites, due its lack of colour, but I do like the Planters one.

Another pair of signs, the Hip Hop one is probably my least favourite. The Fisher-Price billboard has a lolly-stick glued to the bottom of the rear supports, this was for the extra weight to keep it stable.
All the smaller boards have a tendency to easily topple forward, but that shouldn't be a problem when they're butted up against the parapet of a building roof.
The final billboard of my current batch, nothing spectactular, but it was one of the last batch (I made them in 4's) which were made altogether as a sort of production line, rather than individually.
Finally here's a couple of photographs of posters that I haven't turned into billboards.
The first two have  a backing and surround, whilst the last two are merely prints.
The American Kennel club one features in one of the first batch of billboards and may end up just stuck to the side of a building.
These two could end up just stuck to the side of buildings too, with a suitable backing.

I don't think I'll be rushing to do any more Billboards in the near future, twelve (with a potential for sixteen) is more than enough.

Laslty let me welcome my latest followers "Clearco Miniatures" (you can find their site here - it's well worth a visit) and Alvaro, here's hoping you guys find something of interest here. If I've missed any new followers. sorry, (I blame the drugs)

That's it for this week, as always your comments are both welcomed and appreciated.

Monday 18 March 2013

Billboards (1)

"I can see my house from here."

Whilst waiting for things like glue to set and models to dry out I tend to tinker around with bits and pieces and over the last few weeks I've been putting together some billboards for my "city".
They're all more or less made the same way other than this first one.
This particular billboard is the largest of the twelve I've managed to finish, it stands about 6 inches high and the "base" measures about 6 inches  deep by 5 inches wide. (15cm x12.5cm x 15cm - hwd).
Because of its height there is a gantry just below the sign (you can see Sid standing on it in the photograph.) - these would  probably have lighting etc on them but would be a pain to make and serve little purpose in a game. There may even be  an access ladder integral to the structure but again I've left this out and couldn't spot one anyway on those I've looked at.
This is also the only billboard I've made that has the "pads" on the supports. The pads are meant to represent concrete foundations for the whole thing and are made from scraps of foamboard gunked up.
The poster sits on a piece of card and the gantry is a piece of plastic canvas that I've shown used for quite a few things previously.
All the supports, crossbeams and so on are made from coffee stirrers.
All the uprights and angled "legs" are a bit more substantial and are four coffee stirrers glued together.
The coffee stirrers I use are a bit on the flimsy side and tend to warp a little when glue is applied to them so I clamp them together whilst the glue dries (PVA) . Bulldog clips and some cheap plastic clamps do the trick nicely.
The four-layer stirrers are a bit to thick to cut, even with a heavy-duty craft knife, so I use a razor saw instead.
The two photographs above  show the obverse and reverse of the same two billboards. Bo are constructed in a similar fashion from stirrers. The "Beer" billboard was one of the first that I
started and I had many problems with it, but these were overcome as my design of these improved.
Both of these models would be equally at home on buildings or on the side of a road, especially the smaller one.
 This is another one of the larger billboards and follows the same design as those above, except for the extra small supporting legs sticking out of the front main uprights.  Without this extra support the models are very prone to falling forward, which I'm sure would be a pain in the proverbial during a game.

The above two are no different to the others save that I've used some matchsticks on the reverse of the boards (which you can barely make out) representing some form of support and for a bit of variety.
All the posters for my billboards came from  the Interweb and as far as I'm aware are actual photographs of billboards.

That's it for this week, next week I'll put the remaining six billboards that I've completed  on my blog, providing I can see well enough to do it as I have an eye operation this week !

It just remains for me to welcome my three latest followers, "CPBelt, Warhamster and Mistersam", so - "Welcome guys", I hope you find something here that interests you.

As always, comments are both welcomed and appreciated.

Monday 11 March 2013

More Flats

I've been continuing my efforts to pad out my table with buildings in a push to get some gaming done. Here are a couple more of my latest efforts.
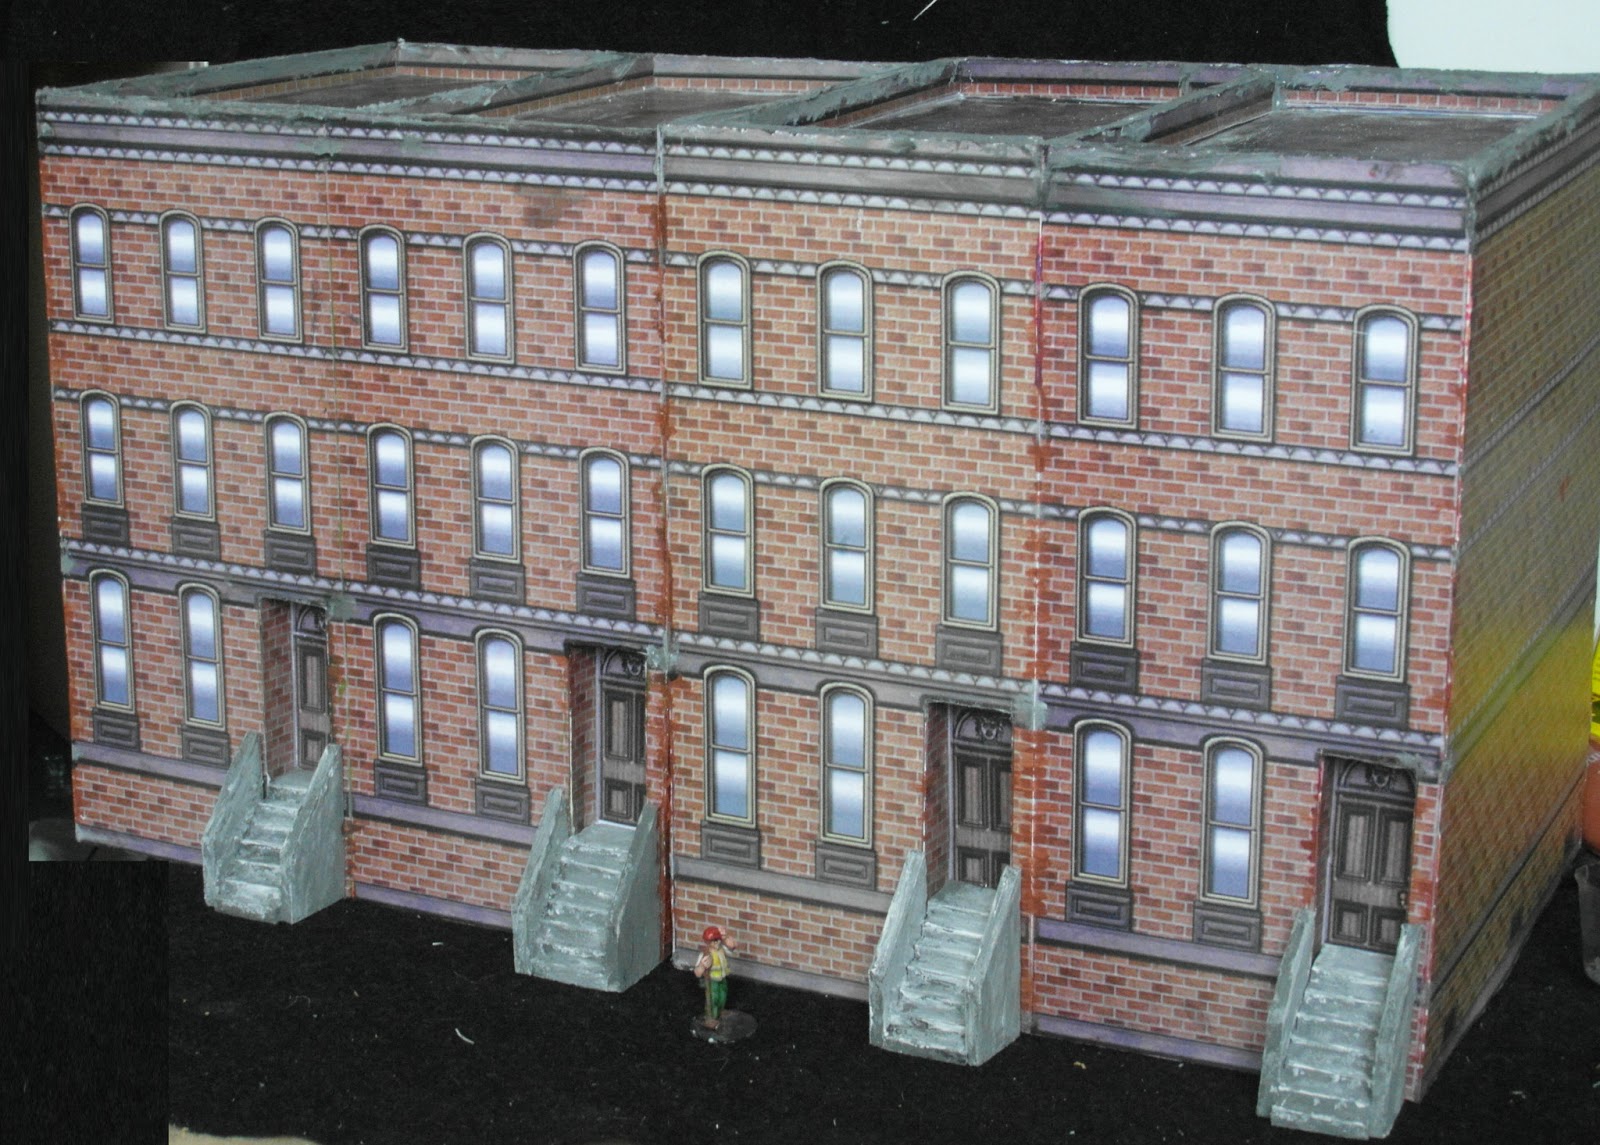
First up is this building from Fat Dragon Games.
You can see that I've made a complete pig's breakfast of the roof (which doesn't lift off)
The model itself is really nothing remarkable as it only consists of the front and three identical sides.
The "stairs" included in the model were actually 2D and were thus flush with the front !Following on from my tenements' stairs I scratch built the front stairs for this building almost identically to those.
 As the front door was flush with the sides of the building I indented it using a duplicate sheet.
The rear of the building initially was identical to the sides and would have made for an even more boring building than it already was.
One spare doorway later and I had a back door..
I added stairs again scratch built from foamcard and angled them  for variety (and it also provides for a very nice shooting position too). 

Whilst the building isn't one of my favourites, with more time and effort spent on it I think it would be a very nice model.
Overall dimensions are about 17cm x 17cm x17cm (17cm ~ 6.75") so it's a cube  !

My  next effort was actually the first of my various flats to be completed but it had many complications along the way.
Again, this a Fat Dragon model of their McDoom's burger joint. The sign on the roof is meant to be on a post somewhere in the parking lot, but I haven't finally decided what exactly I'll be calling this place yet.
The roof was quite tricky to build but I put that down to my card-fu skills. Like all the flat-type models I've made, the walls are foamcard, as are the roof surrounds, but because of the anlged slopes on this model's roof I reinforced these with  card, being much easier to work with in this particular case,
This next view shows the entrance on the short side of the building , which I didn't like that much.
I'd originally intended to have some form of interior to this model but the sheets I'd prepared to put on the inside printed out the wrong size  (twice) so once more I was beaten by technology and the interior is blank.
Unlike my other flats this one actually does have a floor inside though, so I can actually detail it at some later stage but I doubt it'll happen.

The final picture shows the rear and the last side of the building and once more nothing remarkable.
In the original model there is provision to have a few variations in colours, windows etc and there is also a side counter for the drive-through aspect  though I haven't made that feature for this model.
The model's dimensions are about 17cm x 14cm x10cm high.

In other news, this is the last of my current batch of "flats" and next week I'll be showing the billboards that I've been producing. I've built eight so far and have painted up four of those to what to me is a satisfactory standard. In addition the board that McDoom's sits on in the photographs above is the latest addition to my terrain boards. It's another standard 60cm x 60cm board with a single straight section of wide road on it (20cm), so nothing really new.

As always, comments are both welcomed and appreciated.

Monday 4 March 2013

Flats

The title to this week's blog is really a play on words as the term "flats" refers not only to the British use of the word referring to apartments, but also to the theatrical use of scenery.
To pad out my board with scenery, I've made a few shells of buildings. That is to say that they're nothing more than four walls and a roof.
 The photograph to the right shows my first attempt.
The original building comes from the Microtactix set "Twilight Street Set 2 - Apartment". I've done a few things to the original to better suit my needs, hence there are no windows on the sides of the building , nor are there any basement windows, both of which featured in the original.
The original model is more suited to smaller figures rather than 28mm figures so I also enlarged the orginal by about 50%.
The original model measured about 8cm wide by 15cm deep and 19cm high whilsy my enlarged version is approximately 12cm x 22.5cm x 28cm.
I've also put two models together to make a larger model still although internally there is no dividing wall.
The model is made from printed sheets stuck to foamcard, but the front steps were entirely scratch built from foamcard.
It was much easier to build he steps from foamcard as my attempt at paper folding steps was bad, very bad.
I also noted that the top step went directly to the door, rather than having a small landing, which I thought wrong and I've allowed for just such a one in my model. 
Of course, two  apartment blocks don't make a neighbourhood, so a built another model of the same block.


I fully intend to make at least two more of these models , they were quick to make and fairly easy for me as I really didn't have any measuring to do.
 The edging is a bit rough and ready in parts and the roofs really do need some roof furniture to set them off, even if its just roof exits, but they're usable enough for me as background scenery as they are.
Other than the printing time,  I spent about a couple of hours on each build about an hour making the steps and probably a further hour edging  and finishing off the roof.
These were the first of several shell-type buildings I've been working on amongst other on-going projects.

That's all for this week, I only have to welcome my latest follower "The Happy Whisk" and to say as always, comments are both welcomed and appreciated.