Welcome to my blog, the story of my continuing journey into the World of Zombie Wargames.

Monday 30 November 2015

Are We Nearly There Yet ? (Street 5)

The Blue Sun General store and not a front for anything else, officer.
This week has seen some signage added and the roofs given some colour (by way of print-outs)
The first building will be fairly familiar to anyone that uses any of Tommy-Gun's free printed models and is the Blue Sun  general store.
The sign sits slightly proud of the main building and doubles as a positioning aid when placing the upper floor onto the lower.
The world famous "Soapy Waters", Laudromat (sp?)
The second building is the famous "Soapy Waters", Laundromat. This sign I picked up whist randomly surfing the interweb thing for just such things. I thought it just "cartoony" enough to be amusing and not so much that it wouldn't be unfeasible as a real-life laundromat.
(Note though, I think it was stretched a bit in photoshop to fit the width oif the building.)
The third building, but "What is it ?" I hear you ask.


The more discernible will also note the change in brickwork around the front entrance after the recent famous 'lost door' incident (pass me the aspirin).
The third building has had n awning adding that extends around its other side and now maybe you can see the reason for the slight indent in the street's frontage. The awning gives an additional anchorage point too, butting on to "Soapy Waters". The original awning should have been twice the height, but faced with yet another fitting problem I cut it down as a quick fix.
The signage for the third building requires the upper floor to be attached and reveals it to be a burger joint. Once more I'm sure a lot of you out there will recognise this particular fictitious burger chain.
 The sign comes from a photograph of  a screen-shot taken from my TV screen, then manipulated in photoshop way back in 2012, when I was no more than a novice with photoshopping things. I'm pretty sure I could make a slightly better job of it now, if I could be bothered, but  I reckon it's acceptable enough for a wargame standard table-top game.
Photograph of the entire street


View showing temporary roof furniture
The street is about 23" long (about  57.5cm), including the 'indent', it's about 10" deep (25cm) and to the top of the roof parapet is  about 6" (15cm), so it has quite a large footprint, but still fits onto one of my terrain boards (as above).  The roofs were given their rather boringly bland concrete grey textures and I've temporarily added some of the HVAC units for the photograph as I haven't decided yet which I'll use.
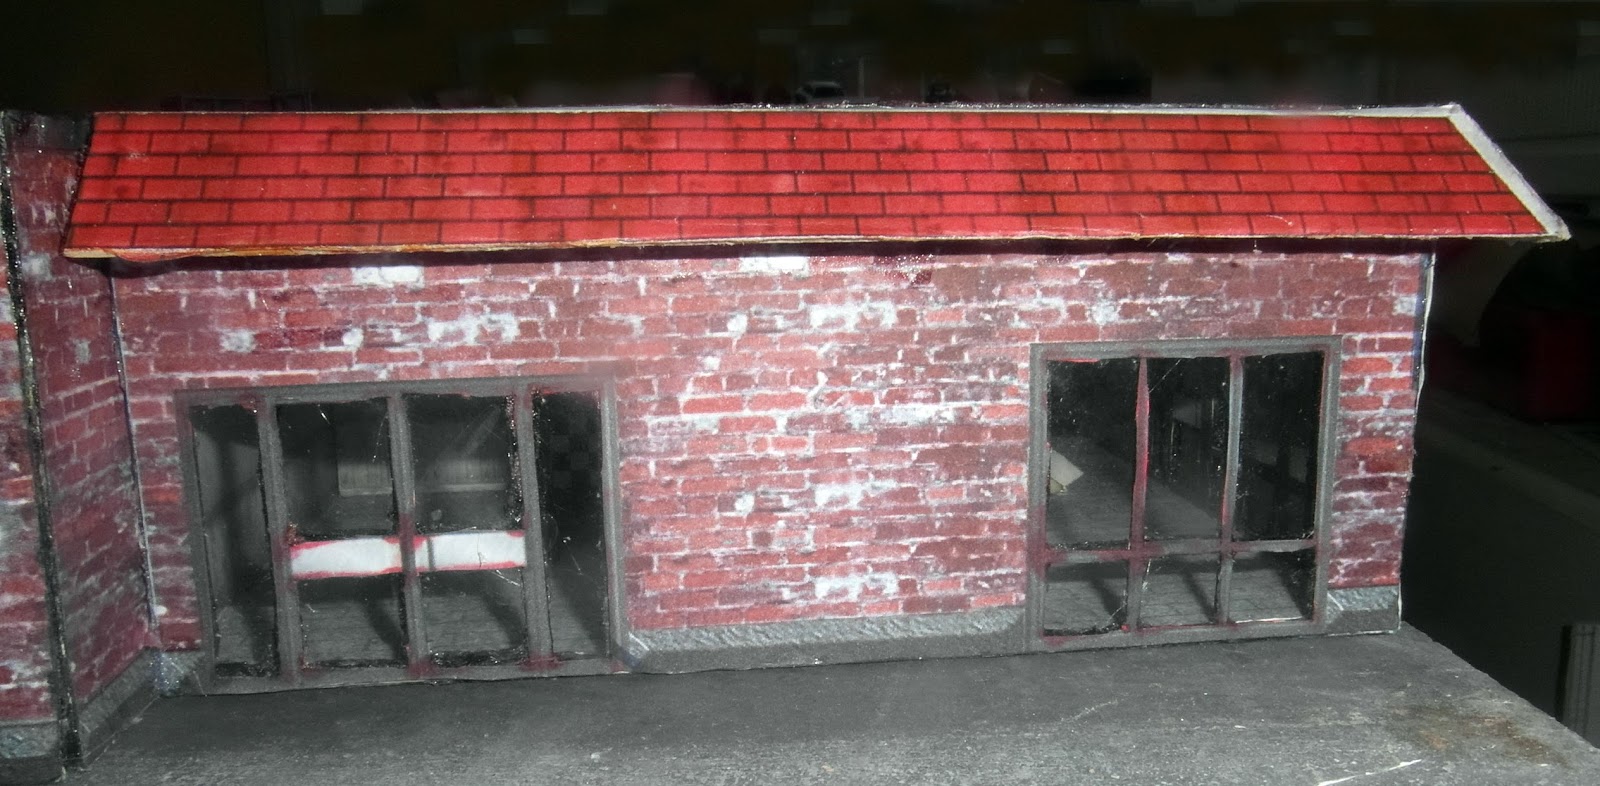
Side view of the burger Joint
Rear view of the street.
The rear of the building still needs a lot of work to finish it off.
Blue sun has a roller door to be added (one more thing lost over the years) and there is a set of stairs yet to be made (and therein lies another tale of woe)
The photograph does show one of the few 'working' doors on this model in the rear of the burger joint.
 This close-up view of the centre building shows the three doors that give access to the upper floors - the left and right ones 'work' though I'm not happy with either.
The centre, upper, door is yet another bodged job as the two 'sides'  of the door were not the same door and a reserve door had to be fitted. The architect for this whole bodged project would surely have been sacked ? (Allowance have to made though as he was heavily drugged at the time).
There is still a staircase that needs adding; the landing will be on the left the stairs will run left to right across the back wall of "Soapy Waters" down to the ground, near the ground floor window.

Rear view of the "Blue Sun"
Side view - "Food-o-Rama" !

The only interesting thing about the final side is how few windows it has.


And that, as they say is that. Other than the external staircase to add, this model is in a playable state, even if the interiors (or lack thereof) leave a lot to be desired and as I have already cut-out the interior for one of these three I'll be fitting that together over the next week and posting about my progress next time

That's it then for this week, I hope you've found something of interest.

My other blog has also been updated and the post can be found HERE

Monday 23 November 2015

The Street (4)

Aaarggh!
Another week and another problem, the photograph on the right shows it better than I can explain.
As I'd measure and re-measured (I always do) the dimensions for the internal floors for the three buildings, I was pretty confident that when I cut the paper pieces out for the floors, they would fit with ease and would require no more than a trim.
It seems however that printers have 'settings' which if not attended to, makes them feel unloved and so they f*ck you over by printing within their pre-set margins rather than to their maximum and can also reduce the size "to fit".
Double Aargghh !
This has happened for both the end buildings' upper floors (see left) and no matter which way I fiddled with them, neither would fit the other.
Rather than bodge the job, which would have been very unsatisfactory I've put this particular job on hold until I can get a re-print of the flooring.


Boring corner pieces
Frustrated by the flooring (or rather the lack thereof), I decided to move onto the roofs, a straight-forward enough job as the roofs are merely drop-in sheets of foam-board, cut to size.
Attaching the corner supports, using my widget.
I cut out four triangular corner supports for each of the four roofs from scraps of foam-board, more or less right angled (Foam-board is great for pressing into whatever it is your gluing it too, so it doesn't have to be 100% accurate). 


I also made a widget out of another scrap of card, this time with a fairly accurate ninety degrees cut into it. This would be used to get all the heights of the four corner bits the same.
The widget had to be cut slightly different for each of the three buildings as they varied slightly, not in height, but in what internal details I had included (or not as in the case of the third building).


Add caption


 Prior to cutting the actual foam-board I made some rough and ready templates from cereal boxes, which allowing for mistakes was far cheaper than doing the same with foam-board.
It wasn't just a matter of  measuring and cutting out four rectangles as I've mentioned previously the three building in my street were anything but 'rectangles'.


Oops

The third building's roof had the extra problem I mentioned previously, when I'd designed (read slapped together) this I omitted to include the roof parapet pattern on all four internal walls - You can probably imagine my displeasure on realising this and such words as "Oh bother" and "Deary me" were obviously bandied about.
 The slight gap you can see between the corner support and the roof parapet would be covered by the thickness of the foam-board used for the roof - just in case you were wondering.
Rear view of the roofs in place.
Having cut the templates out for the roofs, fitting the foam-board versions was a lot easier and they came together quite quickly, though possibly they'll be too tight a fit once the printout for the roof is added (they may also be coloured by hand as I haven't decided yet) and once more I'll be awaiting these being printed.
The roof will also need to have some roof furniture added, if for nothing else other than to have something to hold on to take the roofs off !
There's still quite a lot of work to be done on this model, the rear staircase (another tail of yet another disaster), the rear roller-door to the first building (on the right in the above photograph) and of course all the internal detailing (aarghh) and as I've already got some of the internal detailing "ready to go" this is what I'll be posting next week.

So, until next week, that's it and if you're reading this I hope you've found something of interest. this week,


If you wish to find out what I've been up to on my Gladiator blog you can find out HERE.


Monday 16 November 2015

The Street (3)

The upper floor's floor
Having completed all the walls and glued the ground floor walls together it was time to take a look at how at how the upper floor's floor would fit atop the ground floor.
I used a single sheet of foam-board for this purpose with two rabbets cut into it to accommodate the dividing walls of the ground floor. It would of course have been a much easier task to have just cut the ground floor walls by a centimetre in the first place, but it was another one of those problems that was par for the course for this build.
The rabbets "Highlighted" with black marker
 The roof with its two rabbets cut into it was a very floppy piece of foam-board and was handled very carefully to avoid tears. (both the rips and the water variety of tear).
All but two edges of this floor also had rabbets cut into them so that the floor would sit on the ground floor walls and the foam would sit inside.
The reason the two sides were left uncut this way was that two walls of the left-moist building had slight extensions to the outside portions of their walls and would act ans an 'anchor' point for the whole of the upper floor.
Once the upper floor walls were carefully aligned with the ground floor ones (and where necessary cut  to size) they were all glued in place.
The front view.


The resulting structure can be seen in the photograph on the right
The most interesting thing that can be said about this model, so far  is that you can see through the downstairs windows (bottom right)
I don't particularly like the basic 'box' shapes of most model buildings and therefore I off-set the right-hand building by about an inch.
The rear view (fairly interesting imo)
I did have other ulterior motives too, which  I explain next time.
The rear also had to be a bit more interesting than just an plain back wall too, so as can be seen from the photograph the off-set building also juts out further than the others, whilst the centre building is much smaller than the other two with a walkway connecting all three.
There will of course be a stairway up to the second floor!
Aarggh!!!
It wouldn't be typical of one of my builds if there wasn't some major alignment troubles along the way too.
As can be see in the photograph  two of the upper walls on the off-set building's rear didn't align at all and a minor bit of modelling was in order.


And relax....
It should be obvious from this photograph just how much out of alignment the two wall were!


I

"Ooooh look , doors and stuff"
If I manage to shake the lurgy I caught whilst on my southern sojourn I'll show what I managed to do with this:  -->


Concrete and wood -- luverly
And this: -->


More "thrilling" instalments of this marathon build next week and I hope anyone reading this is enjoying it a lot more than I did building it !

My other blog (HERE) features more gladiators for the arena, this time a w.i.p. on my Velites.

Monday 9 November 2015

The Street (2)

Wonky walls fitted.
Not much progress to show (again) this week, but at least this time it's not because I spent most of the time searching for the building pieces I'd already made.
After the various unfinished walls had been finished - involving yet more windows to cut out, I had decisions to make concerning the doors.
No great improvement once the floors had been added.
I originally started this model with the full intention of having  opening doors, but this causes problems with floor height as the door has to clear the floor  when open and leaves and obvious 'step', up into the building. I don't particularly like this idea and instead opted for an internal floor that left the doors flush with tabletop and none-opening.  In-game I see no great advantage to having opening doors even if it does give a bit more 'realism' and they've seldom been a major factor in the games I've played so far.
For the floors I've used the same artist board as I have for the walls, covered in prints from various WorldWorksGames buildings.
The right-most building, which I'm surer many of you will recognise has had a dividing wall added, about 1cm shorter than the other wallas  to accommodate a foamboard roof for the second floor. It has also had  the flimsy doors replaced with a more substantial one from another model. The door don't open and merely butt onto the floor, the internal door is however open able as I'd made this way back at the start of this three years ago!
The two other buildings in 'the street' also had their problems, the centre one was meant to have a doorway, leading into the building. This door went awol and I improvised a make-shift one from other pieces.
In the  picture the internal front wall of the left-most building was printed back to front and was cut very carefully into three parts and re-glued onto the front wall. The two cuts can easily be seen in the picture despite my attempt at hiding them.

This week's post has been a bit rushed as I've been away for the week-end and not in the best of health either, but I'm keeping my fingers crossed for next week as I'll have a lot more time and will be showing the progress I'll have made on the 'upstairs'.


I've also gained a couple of followers I'd like to welcome "Monkey Lite" (for whom I can't find a blog and  da Gobbo Grotto at Dagobbosgrotto - don't miss his excellent current build

My other blog HERE  features Roman legionaries this week.

Monday 2 November 2015

The Street (1)

The bits, some finished most not.
I decided to try and finish off a project that I started three years ago (for the first mention of it see here), I think the major reason why it was never finished was that the material I was using was art board rather than the foamboard I use now for nearly all my buildings.
It took me almost a week to find the relevant pieces, cunningly hidden in plain view for the most part.
The "street" was intended to be  a block of three shops and it still is despite my misgivings now about the whole thing. I didn't want to actually 'waste' all the effort I'd gone through to get this far on this project all those years ago.
At the time I  started this I was taking about thirty tablets a day for breakfast alone and miscellaneous other medications throughout the rest of the day too.
The two photographs above and to the left will testify to the fact that I was the equivalent of being under the influence when I'd started this.
There are whole walls cut out and not glued to here counter-parts, windows panes still needing to be cut into card and doors still needed fitting (and finding in one case).
I also didn't have my original sketches of how I wanted to fit the whole thing together, which definitely would required another search. The basis of the whole build were buildings from "Tommy Gun" and two MicroTactix (all freebies).
I did photoshop a lot of each model to get to my final versions and also to enable some internal detailing for each of the 'shops'.
A sketch of the third building.
I did find the sketches I'd made of all three 'shops' and even some of their internal detailing.
The next thing to do was to complete all the walls; there are a total of 16 external wall forming the perimeter of the block and four internal walls that were the dividers between the three premises on two  levels.
A quick sort through of what I actually had, was made and some priorities were established, namely completing the final walls, door windows etc. that still needed doing.
This task of course was not going to be any easier as upon inspection of the pieces I did have, one wall had bee printed back to front), whilst another's front and back didn't match and was about half an inch out.
The task had suddenly gotten a lot more difficult than I'd imagined.
Trying to get some semblance of order into the build.
I did eventually get some order into the various parts .
The picture on the left is missing a mere four walls, all of which had to be completed before much further progress could be made and the whole thing assembled.
Assembling of course was going to bring a whole new set of problems.
The whole of the second story (it''s a two-story block) had to lift off to reveal the ground floor AND sit tightly on it; there has to be a floor on the ground floor and the upper floor as well as fitting a roof.

As this was started with Art-board  it would really have to finished using the same materials too, which again brings on a yet another complication - fitting the corners ! With foamboard one wall would have a rabbet cut into it whilst the other butted into it -  but this artist board stuff ?
Floors always cause problems too, you can either glue the walls around the floor or on top of it, both having their own advantages and disadvantages.
Whilst I haven't set a deadline for completion of this build I'll be working on it no more than an hour or so four times a week and I reckon it'll take about four weeks to get some semblance of a building  at the end of it.

That's it for this week, next week I'll be posting more about this wip.

In other news I seem to be gaining and losing a single follower on a regular basis, which is odd, but probably par for the course for "Blogger" and it's not anyone I can actually pin down !

Over on my other blog HERE, you can see my attempt at painting a statue