I finished painting the Barn to a standard I was happy enough with and added some detail to the interior. I decided to go with the archetypical red and white seen on so many US barns (and is still as typical today as it was during the 19th century)
The exterior didn't require that much extra done to it.
After undercoating in black spray I used a very bright red red almost like a highlight.
The base was used as a pallet whist I added the various shades of red that I added as I built up the colours on the barn itself.
The two rough pieces of planking to the left centre of the photo are for the loft .
The clockwise tour of the barn, showing the left side (viewed from the front)
The rear of the barn whose only difference to the front is the narrower doors.
The rear and back of the lean-to with a bit of the base detailed. That gravity defying chain on the rear door still bugs me.
The side lean-to shed. I added some flock to the base on a very limited basis, the base was many different colours and shades of brown, which was then painted a dark green in the places where I would add the flock. My flock is home-made - one of many different mixes I made years ago.
The photo on the right shows the inside of the lean-to roof, to which I have added a bar of sprue, to prevent the roof sliding off; it would of course not be necessary if the roof wasn't of the "lift-off" variety.
Moving on to the sparse internal detailing:
A view of the front upstairs, with the loft "planks" in place. There's really so little detail in the interior not just to accommodate figures, but mainly because I just couldn't be arsed.
The rear upper loft, again with a minimal amount of detail. Currently I've left both the front and rear upper floor pieces removable.
The ground floor with a stack of wood by the corner, some form of rag and a pile of newspapers.
In the opposite corner to the wood pile I've put an old tire, which brings the interior at least into the 20th/21st century!
There's not that much space in the lean-to for anything other than figures, so I added some "straw", made from coarse string, cut into short lengths and patted down into a pool of PVA glue.
The cut-out from the shed into the barn proper should really have had some framework added to it but it was an oversight.
The final detailing in the rear corner was this bench/desk made from card in about ten minutes, again with minimal detailing added from bits and pieces.
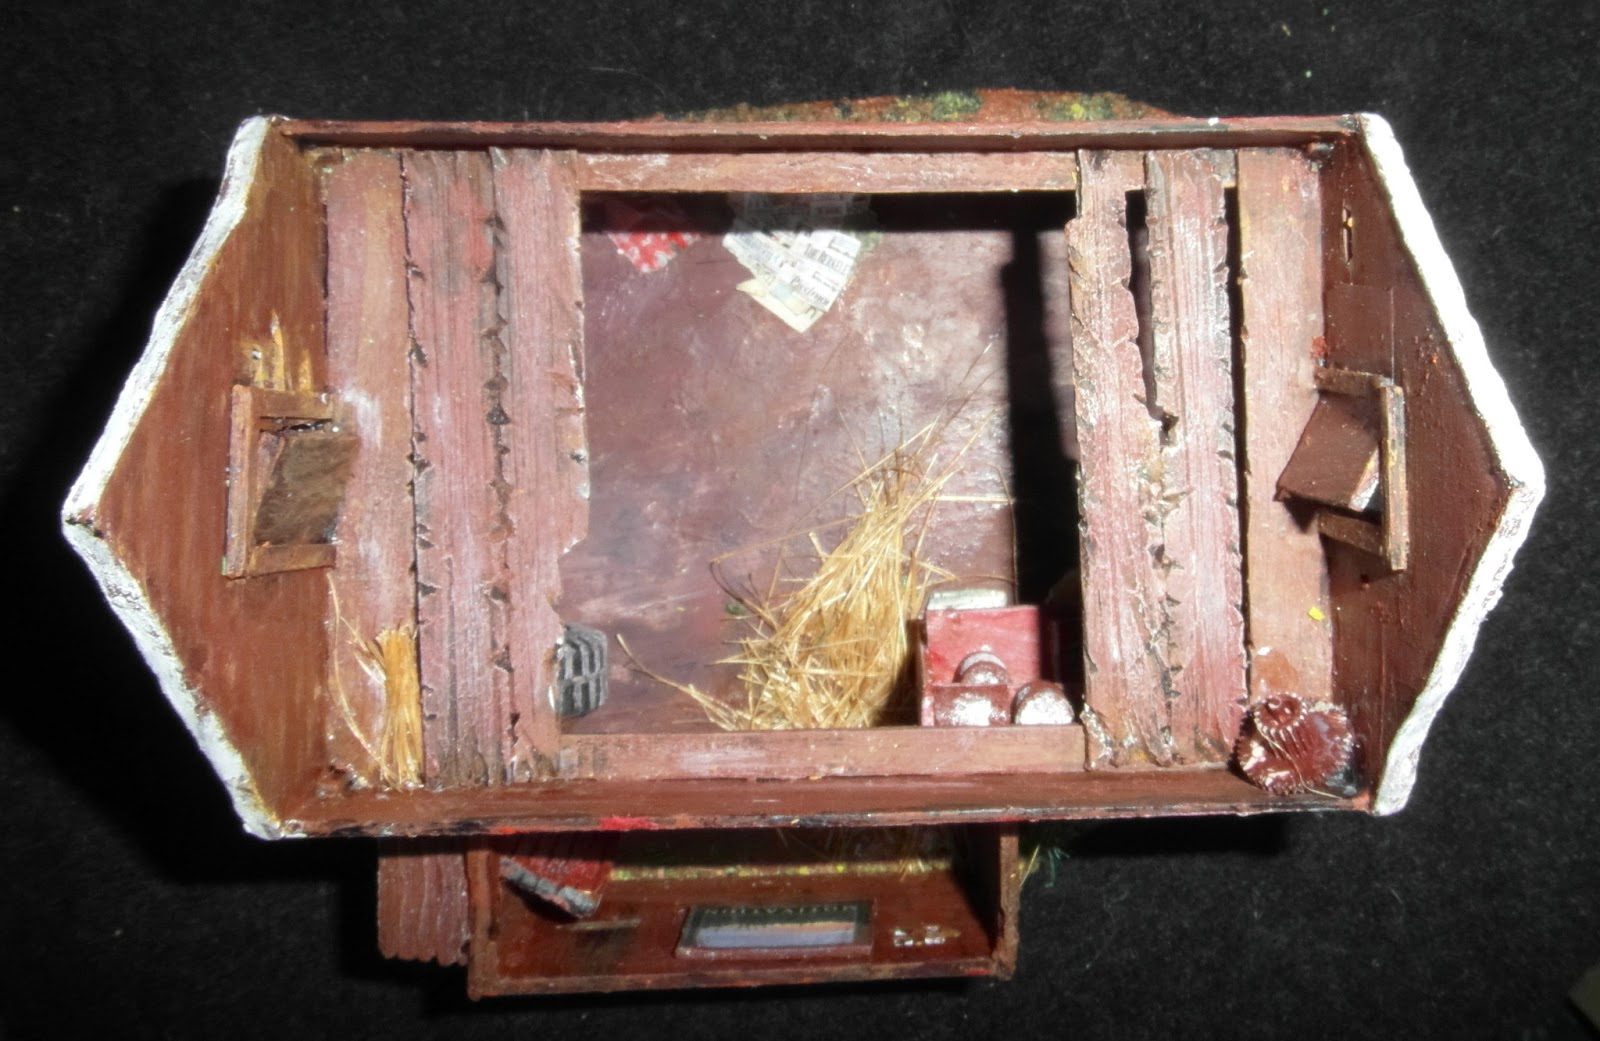
The view from above, in the lean-to a motivational poster can just be made out on the wall.
The whole barn measures just less than 5" lengthways and just over 3" width-ways (125mm x 75mm); the lean-to footprint is about 1¼" x 2 ¾" (30mm x 70mm).
The height is about 4½" to the barn roof ridge and about 2 ½" to the eaves, the lean-to is substantially shorter.
Just to show that there is space for figures in the loft space, here's Sid for a size comparison.
And that's it for this week, I've already made a half-hearted start on the "Perry" Farmhouse.
As ever your comments are both welcomed and appreciated.


That looks suitably dilapidated. Nice work able to be used in any European or American setting from the late 18th Century onwards I would think. I might have to get one. Excellent work.
ReplyDeleteThanks Clint, I'm still undecided as to whether it was value for money or not, but it's still a very good model.
DeleteNicely done, I like the stuff inside, makes it very playable in a game. Have you thought about a barn quilt?
ReplyDeletehttp://barnquiltinfo.com/
Thanks PS, the inside detail does help in a game.
DeleteAs for barn quilts I'd never heard of them but thanks for the info, I had intended to make a larger gambrel roofed barn and if I do I'll add a quilt - they're quite an eye catcher.
It looks great, I really like the interior detailing...except the tyre...I hope I'm wrong to say its one of your kids' LEGO!
ReplyDeleteI haven't a clue where the tyre came from, it's just what I had on hand, but it may well be Lego - I thought it was just the sort of large tire a tractor or some other large farm machinery may have
DeleteThe barn turned out great
ReplyDeleteThanks HW
DeleteGreat job mate, i love the straw on the floor
ReplyDeleteThanks ShintoK, the "straw" was probably the easiest of all, I didn't even have to paint it !
DeleteNice job interior and exterior. The Chain is obviously hooked on a nail to prevent injuries ala health and safety or something.
ReplyDeleteThanks Brummie, I'd thought of the chain on a nail too, in case anyone asked, but at least I can now add a reason behind it too.
DeleteWhat a wonderful piece of work, functional with a hint of grotty.
ReplyDeleteThanks AL
DeleteVery nice, really atmospheric.
ReplyDeleteThanks Irqan
DeleteGreat work and I like details of the interior too.
ReplyDeleteThanks Tito.
DeleteV nice. All you need now is a murder
ReplyDeleteMurder in the Red Barn ? - Sounds like an Agatha Christie novel.
ReplyDeleteI agree with Colin! I couldn't stop from hearing "Murder in the Red Barn" by Nick Cave as I was reading your entry.
DeleteLooks good!
Joe
Sorry, I meant Tom Waits! For some reason, I was also thinking "Red Right Hand" by Nick Cave.
DeleteJoe
Thanks Sapper, unfortunately the author is a complete unknown to me.
Delete