 |
| Internal wall with gantry - what a pain is was |
 |
| External wall with the internal wall of the 'annex' |
The majority of the painting on the main structure (i.e. the four main walls) and the two external add-ons have all been finished too. (that is to say the stairs and small annex). I have a little painting left to do on the external brickwork and then the whole thing will be assembled.
 |
| Two 'sides' of the combined structure. |
Rather than paper to hide the obvious MDF joins I used thin card (cartridge paper probably) as I did with the smaller offices building.

Here's what it looked like after it's initial priming.
The card is hardly noticeable and well worth the extra ten minutes or so work imo.
 |
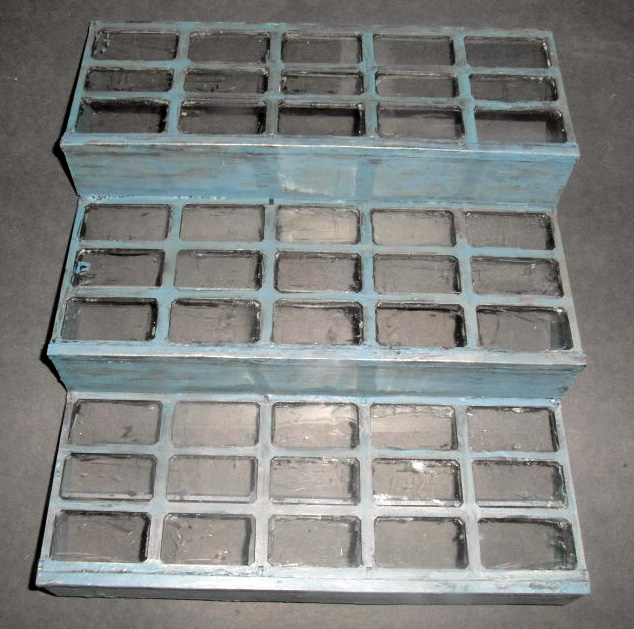
| Stairs (who'd have thought?) |
The finished article has been painted in my usual style of 'grot', covering many of the mistakes, thumb-prints, dripped glue etc. primarily a blue grey (hardly noticeable I know) for the flooring, with yellows for the railings, all covered with a wash of dark brown for the grime aspect.
Some lighter brown rust effects were added to the structure too, but once more the cameraman failed to get a good shot of these.
 |
| Compulsory boring picture |
The photograph on the left shows the roof and floor of the small annex, which I'll be designating as an office rather than the boiler house (so no chimney). They're sitting on the main floor (the base) of the building which after its initial prime spraying of grey has been used as a palette to clean my brushes on - hence the multitude of watered-down colours - it's an effect I really like, but I guess others won't.
 |
| Fairly boring roof, but in close-up |
Here's a close-up photo of the annex/office roof clearly showing the three bevelled edges and the straighter edge that will align with the main wall of the main building.
It's had my usual grey car-primer as a base colour to which I added a very dark metallic paint colour then a dark silver highlight followed by a wash of black.
 |
| "Don't look at me - I'll break" |
I've halved the number of windows by affixing card to them and topping them with another length of card folded into a 'v' for the roof ridge.
Initially I was going to have it fully 'glazed' so to speak, but the roof decided it was too flimsy for such nonsense and wouldn't play along.
Gluing in the perspex pieces was yet another example of piss-poor planning on my behalf (I should have done it pre-assembly); the thin 2mm MDF with glue added (initially making it weaker), the precise nature of Sarissa building (they're not called Sarissa Precision for nothing) combined with my inept stubby-fingered handling resulted in a pig's breakfast of a build. - But it will be sorted !
This next week will see me attempt to see if it will all still assemble into something resembling the model I originally intended to build. I still have a lot (believe it or not) bits that have to be added to the model and the roof to attend to, but it is getting there.
 The more attentive among you may also have noticed that my reading gadget thing has changed to the THW pirate rules "And a bottle of Rum". I had these bought for me November 2015 along with "Free Ports" in one of the many
 Pirate games are one of those genres that many (if not all) wargamers have had an inkling to try - me included. (I posted about my own efforts in this direction years ago - you can see the post here)
Unfortunately I've never found a set of piratical rules that embodied all I wanted in a single game, such as swashbuckling (the old Yaquinto game Swashbuckler did it for me), ship -to ship action (AH wooden ships and Iron men) and land combat. However these rules encompass all the major elements I like about pirates and what I like about THW rules in general (though I will of course be amending bits of them as I go along). A major plus of the rules is that many of the ideas I'll be incorporating into my Zombie rules too (though I'll be avoiding zombies in my pirate games).
I still have that old Yaquinto game, Safe in one of the cupboards it probably will not get another outing which is a shame. The building looks great, the Kick Boards on the stairs and gantry are excellent touches (Health and safety needs them). Over all I am impressed. It may have taken you longer than you first thought but it looks the business.
ReplyDeleteThanks Clint, I did spend many, many hours getting run-through in "Swashbuckler", my copy is very much the worse for wear, but still playable. It has taken me even more time to 'fix' than some of my own scratchbuilds and it seems to be taking an absolute age to paint.
DeleteWell definitely worth all the fiddling around in my opinion as you are creating a special piece of work - the thin card idea is inspired.
ReplyDeleteThanks Michael, just the encouragement I need and I'm also inspired by a couple of wips onFacebook too that also take a different slant on the same building. Without encouragement and criticisms from others I doubt I'd do anything.
DeleteWell it certainly looks good so far.
ReplyDeleteI've an idea on how you could really make all your MDF buildings unique ... Paint them pink with yellow polka-dots! It'd be a good icebreaker when new people come over to your blog, at the least :))
[permission to tell me to go away is granted]
Thanks Roy, (I think). The uniqueness I seek is mostly because I get bored seeing the same buildings over and over again in many games without any effort being made in their presentation. The simple feat of just tiling them makes them 'pop' - as well as polka dots I guess.
DeleteI love the uniqueness you're creating here Joe. The trouble with MDF buildings are the sameness on the tabletop, for my Sarissa buildings I "wallpapered" the town houses with craft paper just to make the buildings mine!
ReplyDeleteGood job buddy
Thanks dGG, I hought I wouldn't be the only one that want's to have a building that's mine. I did notice your wallpaper in one of your recent bat-reps - great, simple idea.
DeleteVery cool factory! The gantry/stairs turned out very well, I can't wait to see the overall. It should be a great building for the tabletop.
ReplyDeleteThanks N667, assembly of the main wall wil be underway this week, enabling me to put all the extra bits I want onto it. even if I don't get the roof looking the way I want it, it'll still be a great feature.
DeleteGreat progress it takes longer than you think to paint mdf buildings!
ReplyDeleteThanks HW, it certainly is taking a lot longer and a lot more paint than expected too. I believe though that the 'pressure' put on by blogging does encourage more effort into making better looking terrain, scenery, buildings and figures - which is a good thing.
DeleteNice work, Zab. You are definitely a hard working and successful building engineer.
ReplyDeleteThanks Jay, but really I've just got too much time on my hands.
DeleteFantastic progress Joe! The addition of the card on the stairs is a great touch. All my non-printed stuff gets a crap wash to give it that lived in feel too.
ReplyDeleteThanks Bob, I've always been a bit reticent about giving a wash to my card buildings, mainly because I'm too worried about them warping. But it's worth a try I guess rather than rely on the quality of the print having to look grimy.
DeleteI didn't mean I washed my printed stuff. I only wash my non-printed stuff. Sorry for the misunderstanding.
DeleteThis comment has been removed by a blog administrator.
DeleteYeh, sorry about that Bob, my bad. I did realise what you meant
DeleteVery impressive progress Joe!
ReplyDeleteTHanks AL, but like the Forth Bridge used to be... will it ever be finished ?
DeleteProgressing very nicely Joe. It will look magnificent when completed.
ReplyDeleteThanks Brummie, it will certainly be an interesting centrepiece for a game.
Delete