Welcome to my blog, the story of my continuing journey into the World of Zombie Wargames.

Monday 28 March 2016

IT

Lo
The prototype
I've been quite busy this last week, by my standards at least, but as usual not just with one particular thing. I've been preparing several different things to add some internal detail to my Factory offices and as can be seen by the photograph it's a computer ! (OK its only a screen atm)
I have tried to do computers like the one shown previously, normally as "one-offs" for a particular model, and I only really needed one or at most two to give some interior detail to the factory office.

The first three stages,(top to bottom)
However  I did have a thought to mass-produce them like daGobbo (though not with the same degree of success) and here's the results.
Using a strip of scrap card from the factory unit I marked out the size of the screens. I won't be using this card again, it really is rubbish to cut accurately as can be seen by the many torn and ragged bits, despite using a new scalpel.
The resultant framework was glued to a piece of scrap foamboard which when dried had the back layer of card stripped from it and the foam then smoothed out with a file, giving a nicely rounded back to the screens.
Prototype and bases at the top and examples of the various supports .


The next two stages were (1) to cut a scrap of mdf (Again from the ever helpful Factory build), file the edge off to a wedge shape and glue it to the back, then (2) glue the whole thing to a small base , which I cut from a better piece of card.
Along the way I filed any rough patches on the screen fronts and generally tidied up the fronts.
The results, whilst not great were sufficiently usable for my needs (to represent computer screens). 
A quick lick of paint


Some quick dabs of various colours to represent the various icons for a typical desktop screen and a gloss varnish was enough imo to declare them finished (which really means I was sick of them)
The overall effect is OK and the build wasn't difficult - just frustrating at times) and I do have another idea to make some more of these, using a different technique and to make them smaller as these could easily double as flat-screen TVs.
Dividing wall (pretty boring huh?)
More progress on the Factory Office was the wall shown on the right, which will act to give two rooms upstairs.
Once more a bit of scrap MDF from the kit served as the dividing wall, cut an filed to fit.
A door was added by merely adding a frame and a scrap of card for the door itself (on both sides I hasten to add). The small amounted of detail that can be seen on the door was added using a craft knife - not unlike the details on the original doors, minus the use of a laser and the windows!
Two quick scratch-built desks
Lots of progress made on this new build.
A couple of "desks" were quickly knocked out of the scrap from windows using two pieces from each bit of window scrap. I'm not entirely happy with these particular ones and they may well be gazumped by more  others. One desk is destined to be glued to the diving wall (above), to give some extra needed support to it as it will we used to remove the upper floor
 to give access to the lower area.
Finally this week I've been making a lot of progress on the second Sarissa Building , their Large Factory Building. 
I'm more or less following the same processes as I followed with its smaller brother, so the internal walls will all have 'glass' windows (perspex obviously), the card inserts will all be supplemented with additional card to reach the corners, windows will have lintels and sills on the outside and frames on the inside etc.
The  major deviation I made with this build is to assemble the four main walls with their inserts first before and  before gluing them to the base they'll be painted.
Currently I've also decided not to add the chimney stack and will be using the building annex it sits on as an yet another office,

That's it for this week and as usual if you've taken the time to look then I hope that there was something here of interest. Comments, as always are welcomed and appreciated.


Monday 21 March 2016

Factory Offices (MDF 5)

Front of building with Sid for scale.
The factory Office is finished, even after yet another week with a hospital visit, I still managed to finish off the little that remained to be done on this build.
The 'little' in question was mainly the roof, with hatch and affixing the doors that  were still detached.
The roof I'd already painted too, so that should have been a bonus, but I really didn't like the positioning of the hatch. A quick rotation of the roof allowed me to have the hatch in the corner opposite to the door  (a more logical place in my mind).
 The 'hatch' however was a different story, the one supplied with the kit was merely a cut out square of MDF and an engraved square within it !
  The 'hatch' piece is larger than the hole it covers (why there is one there in the first place baffles me) and I looked for the cut-out piece from the hole to use on top  of the hatch. Alas it was one of those bits of scrap that had fallen from the frame somewhere within the  packing process and not at my end I hasten to add.
Using the hatch as provided as the base for a better overall looking one I cut a  square of MDF from the scrap frames to sit atop the large base.
I rounded the corners of both the top piece and base, added a recess for a handle and fitted some pieces to represent hinges and an handle.
The result can be seen in the photographs below.
hatch, before and after painting


Sid wondering if it's locked.
I also took the opportunity to give the roof a bit of texture, using PVA and a sprinkling of sand. Colouring would be multiple washes of a lot of different colours and even though it looks very grey in the photographs, it really isn't. The texture can be easily seen in the photograph to the right.

Sid, on the inside, looking out
There wasn't that  much to do internally, although I did have to file away a little off two sides of the middle floor to allow the floor to be lifted in and out easily. This in turn led to me having to make an additional two supporting strips to better support the floor.
To me the height of the windows looks odd internally. As can be seen in the photograph, there is little clearance between the floor and the window-sill and not that much room between the top of Sid's head and the ceiling (where the blue  stops above the window).
No holding guns up in the air upstairs ! 
The large double doors downstairs were glued in place, slightly ajar, as was the single door. And that, more or less was all that had to be completed. (still took me ages though)

The back of the building
Front and stairs.
Stairs
The ventilation side and front
Overall I'm very pleased how this has turned out and I've learnt a lot of lessons throughout the build. I should have painted much more of the model before assembly, especially the stairs. The card wall insets should also have been glued in place before painting and assembly.The former would have prevented warping  and would have allowed me easier access for my clamps whilst the glue dried..
The extra bits needed for the corners would also have been a lot easier to cut and insert if the model hadn't already been assembled  and would have made painting the interior a lot simpler. The internal window frames, that seemed a good idea at the time, were a pain when it came to the centre floor being removed, leading to a lot of filing. The roof, like the centre floor, is a very tight fit and really needs something to grasp to enable its easy removal.
I'll be putting a lot of what I've learnt into practise with my next MDF build, but I doubt I'll be giving another blow-by-blow account like this epic tale has been.
I am however not quite finished with this build, after all it's just an empty shell at the moment and a bit of internal detailing is already  planned. and started., but that for another time.

That's all for this week, thanks for taking the time to visit and I hope that there was something of interest herein.

Monday 14 March 2016

Factory Offices (MDF4)

Continuing with the ongoing saga of my MDF Factory Building and prompted by Colgar6 (see last
Almost there !
week's post's comments). I too wondered why it was taking me so long to complete despite my dedicating at least an hour a day. In an effort to finish this build once and for all, I bit the bullet and doubled my effort to at least 2 hours a day and knowing I had yet another hospital appointment this last week, on one day I managed a full six hours, be though it in two shifts.
Despite all my effort though I did run out of time (and to be fair, enthusiasm too).
Whilst I'm by no means a perfectionist as you have probably noticed by my painting skills (- or lack thereof) but I do like a building to have some semblance of reality.
The holey floor (though not of Anitoch)
So the first problem I needed to tackle in the 'race' to finish was the middle floor. As can be seen in  the photograph to the left, it is neither completely rectangular not whole.
The two extra 'bits on the long side (each sticking proud by approximately 1mm) are the supports for the floor! The intention is being that they will sit on the slots cut into the inner wall inserts. 
The renovated floor, cut down to a rectangle.

The hole however would have has no use  in a real building, it's not for an internal staircase but as far as I can tell it to enable the gamer to insert his finger and remove the inner floor. - great if you don't mind less space for figures to stand and maybe the occasional one falling through the hole. It also occurred to me that any internal fittings had to accommodate the the angled removal of the floor (to release it from the slots.).
With all of the above in mind, I used the hole insert that came with the kit, scored it to look like the planking of the rest of the floor and glued it back in place. It's not perfect but adequate and will be disguised or hidden by office furniture,  

The two inert walls,.
I was actually multi-tasking on several things so,whilst waiting for one thing to dry, I was painting something else.
I decided to go for a colour scheme of blue (as in so many of my builds), a deep greyish-blue for the doors and a lighter blue for the upstairs internal office 'bit'. The frames of the internal windows would be slightly off-white, contrasting slightly with the external ones. The single upper floor door would also be slightly brighter that the the others.
the internal ground floor walls would be the same colour as the the external undercoat (a murky coffee colour).
Internal long wall showing the slot.
I carefully drew a line on each of the four internal walls showing where base of the upper floor would be, using the slots as my guide. This line was a very useful guide to where the colour changed from the blue of the upper floors to the coffee colour lower floor.
I could have made the doors on the building openable, but some tim ago I did realised that the upper door would have to open outwards (a rarity on any building in my experience) if it opened inwards the problem of having the removable floor re-emerges, so the upper door would be glued in place, in a closed position.
To disguise the two slots as best I could, the inner-sidse of the external walls both had a coating of the blue too.  Though I thought that  this was a very unsatisfactory.solution. I remedied this at a later stage by cutting two inserts from the cardboard scrap from the walls. If the walls had retained the cut-out bits then I would have used them, however they had dropped off  (through?) sometime during production.
Wall with new insert
 The inserts don't fit particularly well, but I do think that they're better that leaving that gaping slot and with a few posters/signs on the walls and a bit of office furniture to distract the eye, they'll hardly be noticeable.
The thinner of the two slots is well hidden by the depth of the larger windows  and only the two end bits are really in evidence.
 The large blue door, in the photograph  to the right, has been left in place and is intended to stay that way, whereas the other pair of large doors had come adrift at the unpacking stage of this build and will be glued in place slightly open (probably, possibly, maybe).
Other wall, with barely noticeable 'slot'
 The two longer internal walls both had a long strip of MDF, cut from the scrap (I rather liked the two bits I used as to me, they looked a bit more industrial than two plainer  rectangular pieces would) .
I used the bottom edge of where the slot is for reference for gluing them in position.
Throughout this build I've used multiple clamps in an effort to stop the cardboard curling from either glue or paint, mostly to little effect. Once glued and clamped to the external MDFwalls though, this will be assuaged somewhat. 


The roof. (yes, boring I know)
Whilst clamping and gluing was underway on the internal walls,m my attention was drawn to the external parts of the model. The roof had several coats of greys, blues and greens to get a neutral looking colour and similarly the ground floor, though this had brown rather than blue added as well as an off-white sandy colour 'highlight'

The fire escape was given an overall rust-effect treatment then gone over with black, so as not to lose its overall original colour completely. Doors were given their first rust-over too, but not to the same extent and the outside wall were all highlighted with a sandy colour,
Staircase, disappointingly hardly showing its rust
Once the inner wall were glued in place the middle floor would drop nicely in place on the two bits of scrap I'd glued in place and the roof would drop onto the upper card edges of the inner walls. (even though the card is only about 1mm thick the roof should be ably supported by them.
After which all that would remain to do was for me to decide the colour of the ventilation stack (and whether or not to remove the 'end piece'; finish off the roof hatch (deciding first if it's going to be openable or not);, glue the remaining three doors in place and I did glue the four inner-wall insets in place. Once all that lot was done then I can do a bit of tarting up (or detailing as some may prefer to say) and it'll be finished ! ^Yay^
I did manage to glue  the two shorter inner wall  to the inside of the building as can be seen in the photograph below

Two inner walls in place, holding up the roof 
Aaarrrggghhhh !!!
At this stage I though it would be all clear sailing, so to speak, but there was another 'problem', or at least something I wasn't at all happy about. 
The inner walls have to sit in the centre of the outer walls and therein lies the problem. Whilst they match up perfectly with the outer walls (door and window frames), they don't go all the way to the edges of the outer walls. The photograph shows the 2mm or so at each side of the inner wall insert that doesn't reach the outer wall

Enlarged view of the 'problem'  
 Rather than leave this as it is and just paint out the 'probleml from my view it would be a quick and
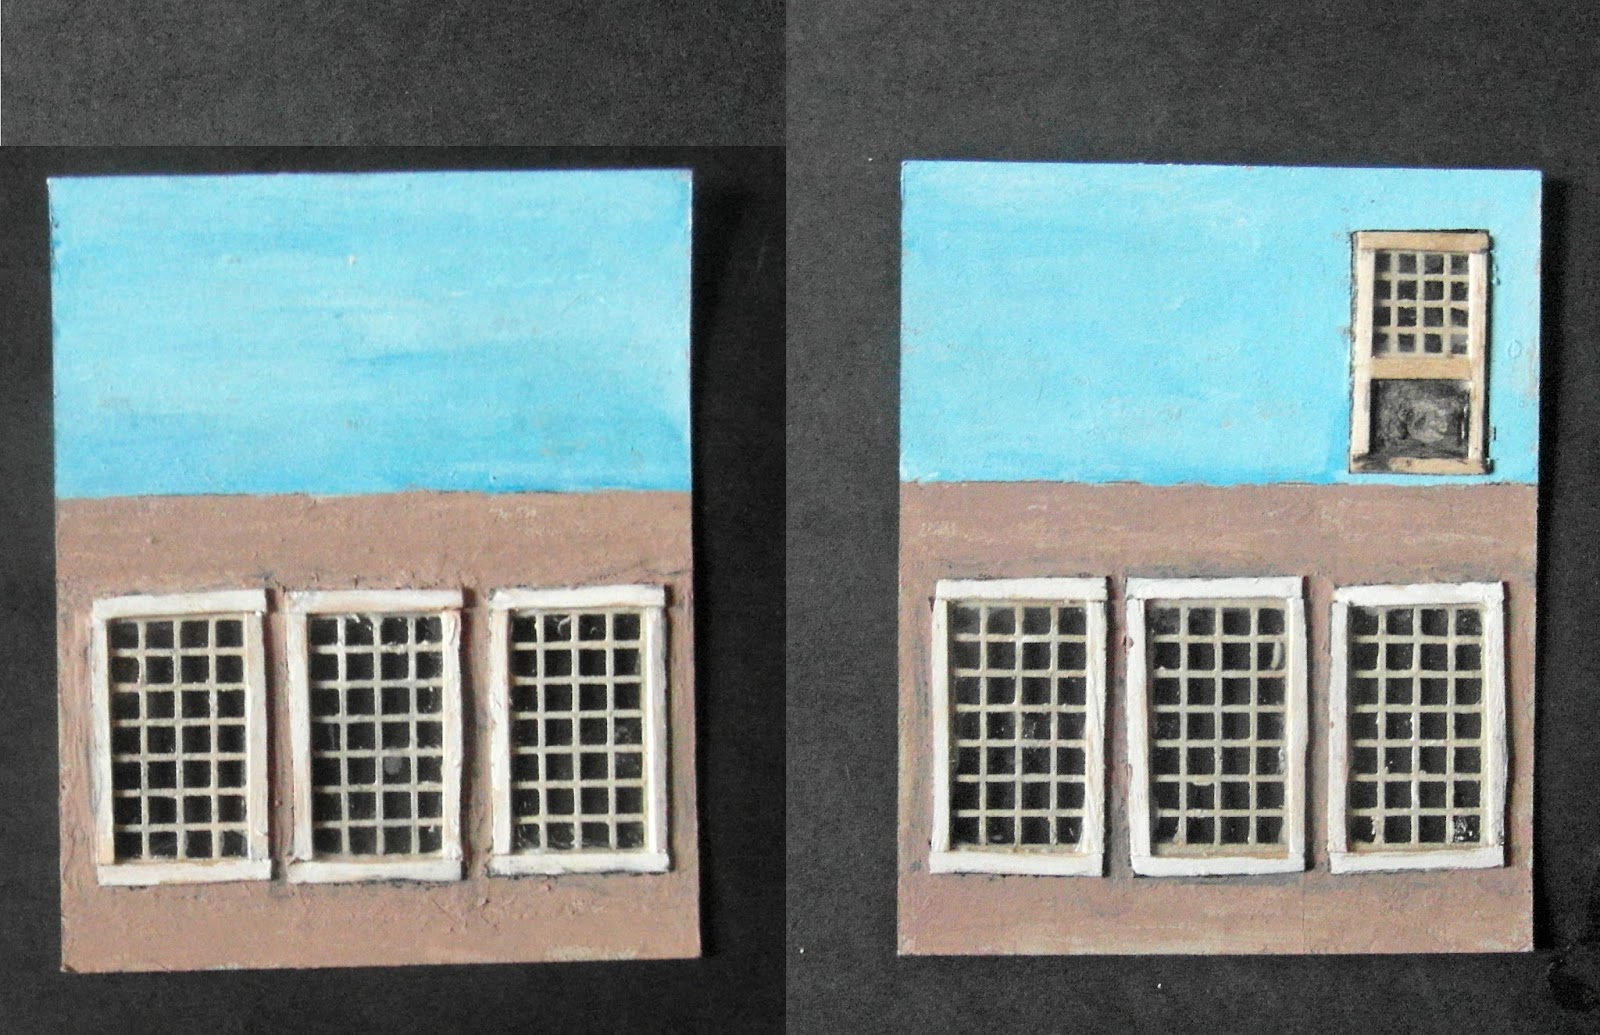
Boringly gratuitous picture of two painted doors.
dirty solution. To remedy this I'm in the process of making some narrow inserts from the narrower bits cut from the coffee stirrers (what else ?) that I'd used for window frames.
So despite my best efforts to finish the model this week I was still thwarted at the final hurdle and id didn't help that the hospital visit has to be repeated this week too!
 So that it's for this week (sorry C6 but it's going to take even longer), but at least, in my mind, I've made a great deal of progress and as there's little left that can go wrong (fingers crossed) I could well have finished this build.


Thanks for taking the time to read through this never ending build process or for just skimming and looking at the pictures and your comments, of course, are always appreciated. At the very least, I  hope you've found something of interest.


Monday 7 March 2016

Factory Offices (MDF3)

Undercoated building.
Unfortunately last week I was unable to work on my MDF factory building for more than a couple of sessions as real-life once more intervened and a long weekend away was the order of the day.
Nevertheless I did manage to maintain some enthusiasm for this project and worked a couple of extra hours in an effort to not lag too far behind from my target of "an hour a day" on my wargaming projects. I've also managed to fall behind on perusing and commenting on other blogs and will have to make an effort to "keep up".
The first order of business was to undercoat the building, pretty easy using a cheap grey spray (Paoundlandbargainworld special)., or so I thought.  After the initial coating the model  needed a second coat as I'd forgotten how much MDF likes to soak up paint.
Two hours of work, framing out six door pieces.
Whilst awaiting the spray to try I turned my attention to the inside walls of the building, namely the four card inserts with their laser-cut 'detailing', namely the windows and doors. I wanted to make a little more effort with this detailing and to continue adding a few more features to make this more of my own take. I'd therefore need to split a lot more coffee stirrers(to get slimmer pieces). This is of course a thankless task and card strips would have been an equally good solution and probably a lot simpler.   A straight edge, two clamps to keep the stirrers in place, a cut across the corner of a board (else the clamps get in the way) and a bit of patience is all that needed to get a lot of split stirrers, some of which are actually usable as is. I do this all by eye and consequently get a lot of very slightly different thicknesses of stirrer and some very uneven cuts - I'm sure card wouldn't be as difficult. Some filing and sorting of different widths later I had enough bits to get on with cutting and gluing the various bits in place.
As the large doors required a little more effort, due to their diagonal cuts, so  I worked on these first. The windows were the next to consider. I really wanted to have some perspex in them to represent glass and had to decide which wall these would be placed on - inside or outside facing ?
View of the inside  with invisible perspex in place
Paper strips added to corners
I plumped for the inside and realised that once the perspex was in place there would be no was to paint the frame parts, so consequently the frames had to painted first. Although it's not immediately obvious the window-pane frames have all been painted in the photographs, the colour I opted for being very close (but not quite) to the colour of the card being used and having to have an additional coat because, like MDF the card used likes  to soak up paint. The inside will have simple frames to hide the edges of the perspex I use. and whilst the nine individual windows and the two doors each had perspex cut to fit, the two long strips of strips each had a single piece of perspex. The latter will not be so obvious once a few bit of frame are added. 
 I was a bit unhappy with the very obvious corner 'joins' that I find the most obvious clue to a model being MDF and their least attractive feature in my view.
So, like the stairs, I hid these behind a folded strip of paper and luckily where the stairs met the building there was enough of a gap to slide the paper in. 


Base coat with camera flash being used


As time was really against me I finished off this week's work with a quick splash of colour on the outside that would be the base colour . Unfortunately the photographs don't really show the true base colour as it's coffee coloured, but this won't matter much when the lighter sandy tones are added.
The current true colour of the model is probably somewhere between the two.
Without the camera flash


You can just about see that there is a band of colour round the inside top of the building as this is the parapet above the roof and is outside. The inside walls of the building have all be left with just their undercoat for the moment.  
This week's plan is to finish off the framing, inside and out, now that the perspex is in place and, time permitting, getting some paint on the stairs and ventilation stack (which I'm now unhappy with btw).
All of which will leave the middle floor and roof to consider, both of which have their own 'quirks' to circumvent.
A final note, I'm sure that many of you, either those that have this model or something similar, will be wondering why it take me so long to just put together such a simple build even considering the bits I've added. Well, the simple answer is  I don't really enjoy making models, whether they be kits or simply gluing on arms a legs to a plastic figure and I really don't  painting them either!
The only enjoyment  I get from this sort of task is when they're finished and the implied promise that I may get to play with them.

That's it then for another week with the hope that it does generate some interest and that there will be some more progress next week.