Welcome to my blog, the story of my continuing journey into the World of Zombie Wargames.

Monday 29 May 2017

Star Fort

Not a star fort
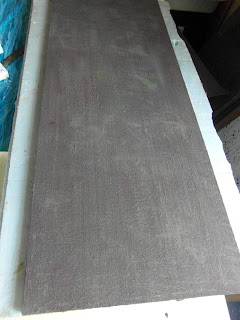
This last week saw me completely dissatisfied with my new terrain boards, the finish just wasn't what I was after, so I've decided to re-do them using more filler to hide the linear streaks that had appeared.


Above board covered in filler (still not a star fort)


As  I leave the filler to dry overnight and wanted to crack on with this project I cut out my template for the proposed star fort. It had to be fairly small, unlike the two I've made previously - a five bastion one needing about a 5 foot square to set up and a six bastion one needing a slightly bigger area.
Here's the boring steps:
The template (pretty boring huh?)

The top "layer" (only slightly less boring)
The lower layer (60mm blue foam stuff)
Top layer cut out (this will form the parapet)
The two layers with the middle cut out!
I used the top layer as a template for the central hole , the standing part of the parapet is about  50mm wide, the parapet itself is 25mm high and 15mm wide,
You'll notice the fort isn't at all square, this was intentional and leaves a little extra  internal space to fit some sort of building in it, but it'll still be tight.
I glued on the top layer and again used it as a template for the bottom blue foam piece (the foam fell off the back of a wagon - honest guv!), leaving about a 1cm 'sicking out' , this was then sawed down to an angle, with the parapet
losing about 5mm from it's 15mm thickness. The blue foam stuff I found fairly hard to work with, having never used it before but I got there in the end  and filler will cover up all the mistakes!
Start of the harbour board
I also started on another board, that will be used as a harbour, cutting two triangles into it and using the pieces cut out as extensions to the board.


And glued in place (Evo Stick PVA)
 I also did that to both ends and cut out the middle bit giving a bit of a bay.; here's the result
Here's the result (again ! - *yawn!)
"Lift that barge, tote that bale" - bear with me... 
I also managed to finish off and varnish (more or less) some of the figures I've been painting over the last, though I'm not happy with the basin, though they're not for the pirate project and not will they be seen in a Zombie game!
Yup, it's another 10-15 year old project being resurrected  (Clint does not have the monopoly) 
Monkey Island anyone ?
Lastly, I've also being digging about for other 'useful' for the new (ahem) project and came up with this  model I'd started all those years ago.
It's a plastic baboon/monkey from goodness knows where and that had a bit of  filler on it (it was also on a 5mm piece of foam with a screw through the base ?)
The base has been cut down and the model painted up a bit, though I've  yet to add a bit of jungle greenery!


 So I've had a frustrating week, especially with the boards, bought more filler and realised I can't tell the difference between 'Burnt Sienna' and 'Burnt Umber', but I've made some progress (- namely the boring bits - sorry).

That's it then for this week, thanks for taking the time to visit and as always your comments are both welcomed and very much appreciated.

Monday 22 May 2017

Four Rivers Gaming Convention

The bustling main fourth floor
Last  Saturday I went to the "Four Rivers Gaming Convention" held in the Discovery Museum in Newcastle (an excellent museum and well worth a visit btw) 
I can sum it up with "That's two hours of my life I'll not get back"..
I've been to some poor and very poor gaming events, but this just took the proverbial.
On the plus side first, I did meet up with a few of my friends (that I'd seen just two days before) that were involved with two of the stands. The setting in the main hall on the fourth floor is an excellent venue (a superb convention had been held there many years ago)
Larp weapons (the manufacturer of these is the guy on the right)
 On the ground floor,  were three (I think) traders
one of whom was a friend selling Larp weapons and accessories
Also on the plus side was free admission into the event and the museum itself.
I should have taken note of the omens even before I arrived, as the weather worsened and I had mi-read the starting time, arriving an hour before the official time of 11am.


The "competition" on the ground floor
At 11 am the doors opened and people flooded in, well into the museum at least (the topmost photograph shows the busy main hall at bout 11.30).
There really was next to nothing (maybe slightly less) to interest me in the whole event (I'd even recently been around the museum (just before Xmas) so it was time to go home, sometime after 12 noon.
I 'd bought nothing and the whole thing had cost me nothing, save for time.
The Curious Pastime 'stall'
I'd first found out about this event on FB, and found out later it was being run by a chap in my local gaming group (one I don't have much to do with) and that seemed to me to be the sum of his efforts in advertising  the event - tell your mates and hope they tell your mates!
It didn't help that another two events were on, on the same weekend (Partisan - wished I had the ability to attend) and a local "Comicon", a mere 5 minutes walk from the venue.
No matter, here's a round-up of the various games (and I use that term very loosely) and groups that were in attendance:


This stand had a connection with Super Dungeon descent

Some of the figures from the above Ninja-thing stall
The stall with the Ninja theme was, I think, trying to motivate people with their kickstarter and had some connection with Super Dungeon Descent (? - Explore?), but I find the figures to be gross and whilst the very nice lass behind the stand she wasn't appreciative of my comments (I wasn't rude though, despite by abhorrence of figures)
One of the games - some form of futuristic aerial thing,
Great looking models,  the players weren't very forthcoming
I got nothing - no-one at hand and no figures that I could spot
Another one....
Finally a game (Frostgrave) with someone chatting!
Good looking buildings (but bare boards)
Very good modular dungeon system, but no-one to enlarge on it
A space game I think, the single chap there  was very pleasant to chat to
A table of designer bags, I assumed you could buy them if you could find the seller.
Display by a historical theatre group
Just because....
On my way home I did buy a tube of polystyrene cement from a shop in the city centre, so not a completely wasted trip!

On a personal note, I haven't been able to much more to my projects this week, save for very disappointing efforts on my new terrain 'boards' (sadly, they may well have to be redone - arghh) and a little painting, but I should have some figures to show next week - fingers crossed!

I've also noticed that I have had an increase in followers and have been  remiss in my welcoming, sorry chaps but here's a belated welcome to you all.

That's it then for this week, thanks for taking the time to visit and as always your comments are both welcomed and appreciated

Monday 15 May 2017

New Terrain Boards

"Jablite" ((goodness knows why the black bits)
Although I have been very busy this week, it seems I have very little to show for all my efforts.
I purchased a pack of expanded polystyrene insulation sheets ("Jablite" from B&Q), iirc 8 sheets for about £14-£15. They're an awkward size (for me at least) being 4 foot long by 18 inches wide and about 1 inch thick. {1200mm x 450mm x 25mm).
They're only one step up from the old polystyrene ceiling tiles that very in vogue many years ago and not as strong as some polystyrene packaging that I've used in the past, but I reckon they're good enough for my purposes. There are other thicknesses available in similar sizes and larger, single sheets too (8' x 4' - 2400mm x 1200mm).
Each stage of prep work I left overnight to dry, so here's the pics:
The materials, filler, water, pva and paint.
                        
First step, pva and black paint covering the edges.
Pva, filler, water and paint
Final coat of paint (how boring is this?)
After coating the three boards I was working on with the pva, filler, water, paint mix they dried out to a much lighter brown than I wanted, but which I'd anticipated.
A further coat of brown was applied to get an even colour over all three boards; though it's not that apparent in the photograph on the right they are the same colour! (Blame my well-known photography skills).
These three boards will provide a gaming area of some 48" x 54", more than sufficient for a large skirmish and  well within the areas used by most "boutique" games (or games in a box as I call them) - "Frostgrave, Malifaux etc.).
Pirates, take 2 (- the four rows to the right are the newly based ones)


Most of my time however has been used either basing figures  (a thankless task I find no pleasure in) or painting figures (ditto) which can be seen in the  photograph below.
The figures below are from a project I started some ten to fifteen years ago, that I  came across once more during the upheaval that was my daughter's family living with us prior to getting their new home. (I'm as yet und3ecided if by finding these finding these, it  was a good thing or not!)


50+ figures - nearly finished.
So as was said at the start, a busy week (by my standards) with little to show for all the effort put in.

And that's it then for this week, thanks for taking the time to visit and as always your comments are both welcomes and appreciated.

Monday 8 May 2017

Palmistry, an experiment

No I haven't completely cracked up and gone all mystic, but rather I was looking at ways to speed up the painting of my vast number of palm trees. On my previous attempts I had no preparation to the plastic ,models other than trimming what little flash there was. So in attempt to see if I could get any better effects I decided to use two other methods of preparation with my two versions of 'painting'.   I used three pairs of identical models; in the photograph above the left hand pair have had no preparation, the centre pair have been washed in warm soapy water ( that well-known method) and the third pair have been dipped into acetone (nail varnish remover) - this latter process I hadn't heard of but, #1 son suggested it.
There are two pairs using each preparation process so that one will have a wash of green over the leaves (using a mix of Tamiya clear blue and yellow - as I'd ran out of green!) and the second one used a thinned acrylic green of a similar colour.
Here's: the results:
No prep, left a wash, right painted

Warm soapy water prep, left wash, right painted
Acetone prep, left wash, right painted
All six, top row washed, bottom painted.
My conclusion was that there was little to no difference in either method or in any of the preparations So to speed up the production of trees, I won't be preparing any of them! The variations in colour between the two methods and the slight variations in the initial plastic colours , imo give a nice variation too.
Here's: another variety of palm, given the no prep treatment:
Original on left and the washed version the right
The trunk have all been painted in the same way, a painted dark brown base with a high-lighted dry-brush of a lighter brown..
With the above methods I've finished about forty tree spending about five minutes on each, through the three stages, leaves, trunk and dry-brush..
About half-way there!
  In the above photograph, beneath the plastic the trees are lying on, is one of my new polystyrene sheets I'll be using . They're 4 foot x 18 inches and I'll be working on these over the next few weeks.

A fairly boring post this week, I know but thanks for taking the time to visit  and as always your comments are both welcomed and appreciated.

Monday 1 May 2017

Shipshape

As promised last week, here's the toy pirate ship I bought via Evil-bay a few weeks ago.
I hunted down this model having first seen it on fellow blogger Ptr's site Hugg Och Slag a couple of years ago. 
I must admit that on first sight it does look very usable (even more so on Ptr's blog), but unfortunately it's a little too small, even compared to the rather small toy ships I worked on recently.
Nevertheless I have a couple of ideas how I'll use it.
Fresh out of the Packaging
So here's what I found unboxing and 'disecting' the model:
It is quite an attractive model, despite its proliferation of stickers and very soft plastic bits (the orange parts).
There are no deck cannon, but the figurehead is good, as is the rear cabin decoration.
Pointy end figurehead (looks better of you squint in subdued lighting)

The blunt end - no silver !
"Yarr, we be calling you  'Short-arse' '"
The figure included are of course oversized for the model (I do wonder though why manufacturers continually do this sort of thing - but I guess it's a toy thing).
In their defence the figures are easily recognisable as to what they're meant to be despite their lack of eye-patches and peg-legs! 
"Room for two - just" ?
All the upper bits stripped from the hull,,,
...leaving access to the bare bones of the hull
The relative scale problems can be more readily seen when a 28mm figure is place on board.
The photograph to the right show a 28mm figure at the ships wheel (fairly good sized wheel btw), but with little to no room for anyone else  - and stay away from those very low sides!
The problem is magnified when trying to get cannon on the decks (with or without figures), as the same problems emerge.


"It be a bit  tight getting through that doorway"

Two cannon on deck and it's full!

It should be obvious from the last few photo graphs that as the model stands, it's completely unusable in it's current from with 28mm figure, though I suspect that it would be an ideal size for use with 15mm figures *unless they too have also fallen foul of scale-creep)
I haven't completely given up on using this toy and have a couple of ideas how I'll use it,  after some severe conversion, so onwards with the dissembling...
All the remaining bits separated out (obligatory boring pic)
Equally boring pic
So what are my plans for this ? Well it's obvious to me at least that it can't deploy a broadside of cannon, but could mount a couple of swivel guns or maybe a small chaser. If I use the original deck, it will have to have either raised sides (health and safety) or the deck itself will have to be lowered -(maybe a combination of the two)
The aft deck will have the ships wheel removed; in any event ships' wheels were not commonplace until well after the golden age of piracy and were introduced in about the 1720's.- Blackbeard probably never saw one!
So currently I have two ideas for this model:
Firstly turn it into a small civilian coastal vessel, a yacht, small sloop or similar, where the rear deck would be nothing more than a roof for the rear cabin (not unlike a Bermuda sloop)  
The second idea and the one I currently favour, is turning it into a governors barge. The rear deck would be removed as above, the vessel would maybe have a lateen (slanting) sail on a central mast and  the gun-ports would be utilised for oars (Rollocks !  - no honestly they would!)
Of course I'm always open to suggestions.... (hint, hint)

8 foot by 4 foot - in case you were wondering...
In other news:
I made up my mind to complete the tidying up of my games room, now that the shelving had been sorted, so I now have a table usable for games, though currently I'm working on palm trees and jungle and may have to hold off on games - more on that next time.


...and converted quickly to the Caribbean for this photo-session)
Next time I'll be posting the results of some palm-tree experiments and the progress I've made on my jungle terrain, plus for the first time in over a year I've slapped some paint on some 28mm figures, though not Pirates (or Zombie related for that matter) - more news on that particular foray when they're finished!.

So that's it for this week, thanks for taking the time to visit and as always your comments are both welcomed and appreciated.