Welcome to my blog, the story of my continuing journey into the World of Zombie Wargames.

Monday, 26 August 2013

Construction Site Hut

The work on my construction site continues (slowly); the basic structure has been completed  but each stage seems to take an eternity for the glue and paint to dry. It does however give me ample time to make a lot of bits and pieces to fill the site with.
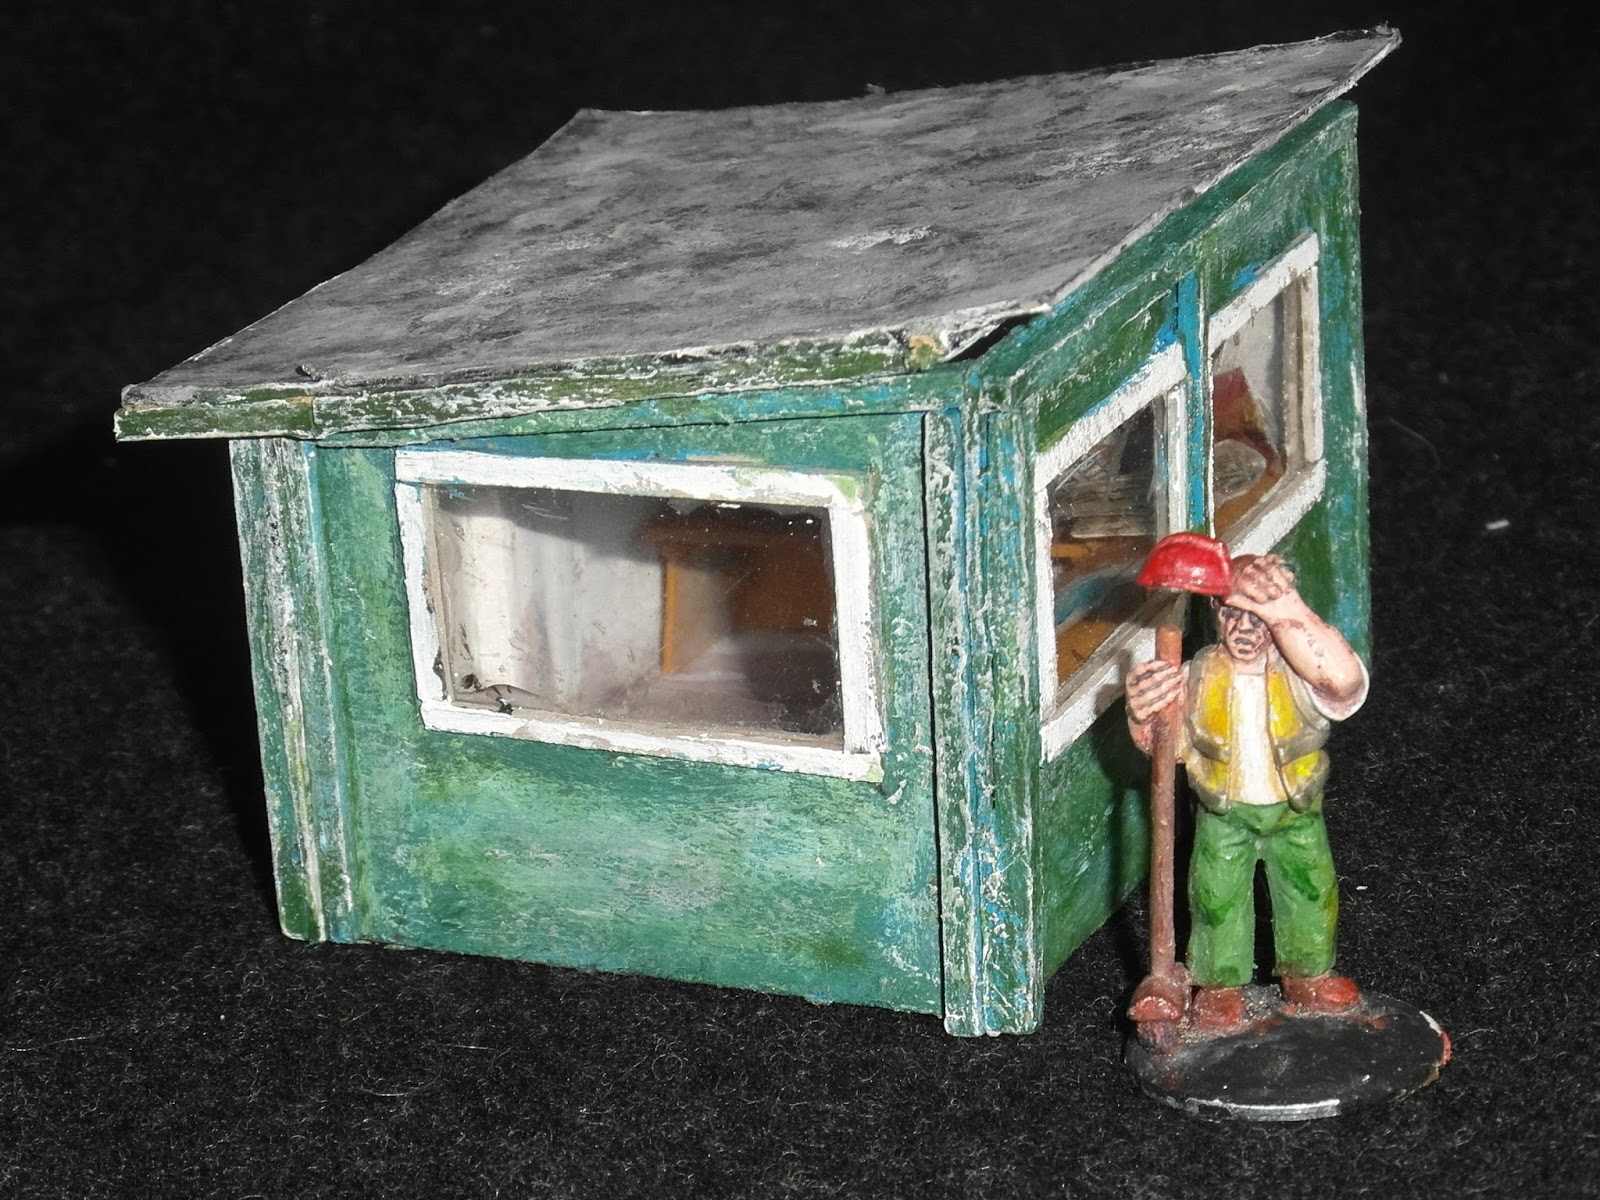
First if the many additional bits that I've made is this site hut, which I showed the initial stage of last week and  is now complete. The structure is fairly flimsy, being made from some very cheap scrap packing card  and matchsticks.
The use of matchsticks (they're actually bought
craft ones) determined the front height of the  building at just over 40mm.
The footprint of the building is about 2" x 3" (50mm x 75mm) which gives enough room inside to fit two figures comfortably even with the internal detail I wanted for this.
The windows frames are made from the same card, as is the roof (which overlaps the front of the building by about 1cm).
Even with matchsticks as support for the roof, it still managed to warp a little.
The rear door of the building does in fact open, though why I'm continuing to make more work making openable doors still eludes me, as I see them having little bearing on gameplay.
Again matches have been used as vertical support struts more for decoration than any true support worth.
Originally I had painted this building in blue, but realised I already had another fairly similar building in this colour and so It was repainted in  green (much darker than the photographs show).
The original blue paint can be just made out on the photos.
Another photograph showing the final side for completeness, note the roof  out of place !
The roof removed showing some of the internal detailing.
I made the internal detail concurrently with the hut and fitted it after the hut was assembled, so it was a complete stand-alone piece in its own right.
The two chairs I have been messing about with for a few weeks and they're not actually glued in place  yet, as I haven't determined whether or not I'll do so.The "blue prints" and the crap of card that resembles a clip-board are the only extras that I made specifically for this.
Another shot of the internals, showing the slope of the front desk slightly better (the side one is flat.
The rear wall has no detail on it at present and could really do with a chart or a H&S poster or some such as currently it's fairly bland.
The rear wall does have a coffee stirrer edge to the top for extra strength and as an attempt to stop warping.
All the windows have perspex panes to represent glass.
The model overall took a week to complete, but I doubt if I even managed an hour a day on it, as I was making many other bits as the same time.
 Finally, here's the initial stages in the two chairs you can see inside  the hut.
They may not be the most detailed in the world (Mathyoo), but I'm  quite pleased with my efforts.
You can just make out that one of the chiars has a very thin back and seat (card) whilst the other has a thick, cushion-like back and seat, made from plastic.
 They were very fiddly to make, but at least I now have an idea of making some passable furniture. I'm also going to try and make a park-bench, using the same technique.

In other news, in case you haven't checked his blog lately,  Brian/Vampifan is now out hospital and in a respite home.

And that's it for this week, as always your comments are both welcomed and appreciated. 

Monday, 19 August 2013

DVDs/Films page update


I haven't managed anything much of anything in the last week or so, so I've decided to update my DVD/Film section. I've added the following films in a more concise form on that page but here are some more detailed reviews than I'd normally give.

Zombie King aka Zombie Beach Party - (2003) An “Outlandish gore-filled zombie smackdown! ” was the accompanying narrative for this, unfortunately it was none of those. The story-line being vague at best but it was basically  a tale of Mexican masked wrestlers with some zombie moments thrown in. Score: 1/5 

Zombie Diaries - (2006). “In the early part of the 21st Century, an unknown virus began spreading among the populace. Within weeks it had engulfed the entire planet...”, so read the pre-amble. The story follow a camera crew’s attempt to document the outbreak, which could have been an interesting variation on the zombie theme but unfortunately turned out as a stale and boring trek through many clichéd scenes. A poor British effort overall even though it did have its moments (few and far between. Score: 2/5


Zombie Diaries 2 - (2011) aka "World of the Dead: The Zombie Diaries". This film follows on from Zombie Diaries but is set three months later after the events of the first film. It still has the feel of a pseudo-documentary from the various characters POVs and is a far better effort than the first in this respect. This time though action centres around a squad of soldiers who meet with some of the survivors from the first film. All told it’s a much better film than the first, but not one I’ll be rushing to view again. Score: 3/5

Autumn - (2009) A film with David Carradine in can’t be that bad - right ? Wrong! This is truly a dreadful film even by poor zombie film standards. There is little if anything to recommend it. I was very disappointed with this film as the book has a lot to recommend it even though not amongst the better zombie novels out there. Score: 1/5


Eaters - (2011) An Italian film with subtitles, but none the worse for that.Whilst it won’t win any prizes it is nevertheless a fairly enjoyable romp (but possibly for all the wrong reasons). It is difficult to know whether its self-contained story is meant to be tongue in cheek or not. The two main characters are believable enough whilst the rest are great stereotypes. The story is easily followable, but I got the feeling that the apocalypse took place in a very small area of Ital, rather than being a pandemic Score: 3/5  

Remains - (2011) The premise for this film is the usual “WTF everyone has turned into zombies !”, except of course the gallant band of survivors (who are holed up in a casino in Reno). The earlier portions of the film are much better than the latter parts where the storyline is stretched and the cast is thinned out or replaced. It had all the makings of a really good zombie film but that tailed off disappointingly quickly. Some good effects and some quite amusing bits though and whilst not on must see list, it is a cut of the rest of the “B” zombie films. Score: 4/5 for the first half and 3/5 for the second !


Zombie Flesh Eaters - (1979) The film started well enough, in New York harbour with a police launch investigating a drifting abandoned yacht. My alarm bells started ringing when I realised the cops were sporting an Italian flag from the launch. It also took a while before I realised that the film was dubbed. After the initial signs that this could go either way, it went the way most zombie films went – downhill fast. The mix of zombies (infected and long dead corpses rising from their graves) . Unfortunately I found that there was little if anything to recommend it. Score: 1/5

I've also managed a backlog of 4 films to add to my "On the Shelf" list, namely: "Undead or Alive" (2007); "Dance of the Dead" (2008); "Kill Zombie" (2012) and "Carriers" (2009), though the last is not a zombie film it does look the best of the bunch.
On a personal note, my after eye-op problems are slowly clearing (insert you own joke here about seeing the light at the end of the tunnel) which has unfortunately restricted me mainly to computer based activities and left me unable to visit Bryan/Vampifan these last two weeks, which I'm hoping to remedy soon (there is a recent update on his blog from his brother though.) I have still managed to make some progress on my construction site, little though it is. The photo shows the initial stages of a hut/site office that will appear on the model and some half-finished I-beam girders. The hut is obviously made from card, matchsticks and bits of coffee stirrer (of course), whilst the girders are plastic.

That's it for this week it just remains for me to welcome my two latest followers "Warlord Paul" and "Sean" - "Welcome Guys".
I should also mention that a lot of my followers have their own blogs which are well worth a look, that can be found on their profiles as well as on my own list of blogs that I follow. I also keep finding blogs that I thought I was already a follower of, but have realised that I probably linked to them from Bryan/Vampifan's Blog ! - No wonder I thought they hadn't updated in a while. My own favourite links is well out of date too with blogs that have come and gone, just another task to do.

As always your comments are both welcomed and appreciated.

Monday, 12 August 2013

Mean Streets

As I've not accomplished much in the last week, here's something I made earlier (as they say)
Nothing new I'm afraid as I made two very similar models way back at the beginning of March ("Flats"). The two buildings I made then were two single buildings basically butted onto one another to make a larger terrace.
In this instance I've put three frontages together to make a single model.
There is no internal detail to these models as they've been made to bulk out a city. They also suffer from being very small; with only a 4.5" frontage it would be very difficult to get sufficient internal detail inside and still have enough room for figures.
The second photograph shows a second triple frontage terrace alongside the first.
As with the first pair of double frontage buildings these were fairly tedious to make. The building weren't designed to be made with  5mm foamboard, as these are and it does make it more difficult to make these (especially the roof parapets).
As with the first two models I've dispensed with the card stair and scratch-built my own from foamboard exactly like the originals.
Along with the Triple fronted buildings I've also made two single fronted buildings along with another pair of double fronted buildings.
So I've now got two single fronted buildings, four double fronted buildings and two triple fronted buildings, which is the equivalent of 16 individual buildings. In the photographs the buildings are shown sitting on two of my terrain boards (each 2 foot x 2 foot square), which means I'll now be able to fill a 6 foot by 4 foot table with comparative ease.
Whilst these buildings all look fairly identical there are minor differences in each of them, namely in the colours of their doors. Whlst the body of each building follows the same pattern of build, each of their roofs have all been individually bodged to fit. I have already made some inroads into getting roof exits for each building, which I'll be making happen asap.
I would have shown all the models together on a single set-up had it not been for the fact that most of my table is cluttered with things from my current project.
This photo shows what I have managed to achieve in the last week despite the after op effects of my eye surgery (soon to be resolved  - hopefully !)
It's the start of what will be a construction site.
The base is about 16 inches square which, as can  be seen fits nicely into one of my terrain boards.
Whilst the base is plastic, the perimeter fence is
lolly pop sticks, which I've used before in other projects. I've cut each stick in half to make two "planks" each about 40mm high. They've been glued to the edge of the base and to one another's edges. You can see from the photographs that this is not an exact fit by any means. As the sticks were difficult to hold in place whilst the glue dried (PVA) I was only gluing about a third of a side at a time. Barely noticeable on the photos is the supporting internal beam at the base of the fencing (coffee stirrers), and the beam about 30mm up the fence. As for detail, I've made provision for two public viewing windows the one shown has had a matchstick frame added to the external (public) side, I may well add an internal mesh to it as an extra feature.
The main gate to the site I've made from two pieces of sprue, one from the fence sprue I got with the farmhouse (the brown one) and the other from some EM4 plastics minis, whilst the mesh came from my Wilkinsons Bird feeder
The gate will be openable using hinge posts (the silver sprue).


And that's it for this week

It remains for me to welcome my latest follower "Kasper" and to wonder which of my erstwhile followers has departed and why.

As always your comments are both welcomed and appreciated.

Monday, 5 August 2013

Eyes ? Right !

So today I'm  doing a very poor impression of Zabadak the Grey pirate scourge of the seven seas.

Okay, I know it's also a pathetic title for this week's blog.
Today I was treated to eye surgery (again) in our local Infirmary which to all intents and purposes went well as far as I can see (which isn't very far currently).
I have to wait until mid September for my follow appointment and then probably another fortnight before I get new Spectacles, from then on I shall be trying to tackle my back-log of figure painting (not that anyone would notice the difference I reckon)

 I recently went on a spending spree to my favourite shop (Poundland )and along with all the tubes of UHU glue that I normally buy I made two purchases that may be of interest.
The first, shown on the left, was actually purchased from Wilkinsons for the princely sum of £1.50, I;ve already taken it apart as it was bought solely for the wire mesh.
The mesh is currently under investigation as a source for making furniture from (chairs initially), an idea passed on to me by one of my followers via a You-tube link)
The second purchase (which was from Poundland) is shown here on the right.
As can be seen, it's a roll of mesh, though in this time it's plastic.
The intention is to use it for fencing, even though the "holes" in the mesh are a bit on the large side at about a centimetre square.
The roll is 5metres long though and 16cm wide wish is a heck of a lot of mesh for a pound !
It has an advantage from my perspective in that the mesh is diagonal to the length - I've always been a bit on the skeptic side of square mesh for fencing. I bought a sheet of mesh a while ago and cut it to size but it's been a nightmare trying to get it to glue to anything, hopefully I'll have more success this time round with this stuff.
I've also managed to just about finish off the buildings that I hinted at two weeks ago and they'll probably end up being the subject of next week's blog.

Finally let me give you an update on my friend (and probably most of your's) Bryan/Vampifan who you will undoubtedly know by now is currently hospitalised (I blame his wanton life-style).
Suffice to say here that's he's doing fine and I've managed to visit him twice in the last week. On my second visit he looked a lot better than he had the previous visit and is making good recovery.
I have of course passed on all the many messages he received on his last blog.
For a further, fuller account of my visits to Bryan I've posted on The Board of the Living Lead in the News Section; the link for that site can be found on the right of this page.

That's it for this week, as always your comments are both welcomed and appreciated.

Monday, 29 July 2013

Farmhouse (2)

I've struggled to find any enthusiasm over the last week or so but nevertheless I've stuck to the task of completing the Farmhouse - or at least I've got to the stage where I'll not be doing anything more on it, - I'm that bored with it now!
The reasoning behind the larger-than-necessary front to the base was that I'd contemplated putting a picket fence to the front of it. Several permutations later of the three inadequate fence pieces that you get with it  and I gave the idea up, shelving it until I get some more fences (I'll not be holding my breath on that one).
I've shown two photos of the front of the house, to give some idea of how small the model is, both in height and width. It's probably an ideal  size for most wargames, but is a bit smaller than I'd like. (For the actual dimensions see last week)
I've omitted two of the three front porch supporting posts, leaving the single one shown to accomodate figures more easily and in additiion I've glued in an additional cross-brace to support the remaining post for when the roof is detached. The bench at the front is scratchbuilt and is not as yet a permanent fixture, as I'm still undecided about it.
The rear of the building has had a small porch added, the roof of which was a cut-off from barn project, the upright posts are scrap and the wood pile is cut up pieces of garden cane.
I've used garden cane for all manner of things in the past, especially for stockades and the like, in preference to the uniformity and slenderness of  barbeque sticks.
The bits of "grass" dotted around the building are of course sisal and the patches of green are flock.
The side view of the building  has no interesting features in particular. I was unhappy with my initial efforts at the chimney stonework, but I eventually got it to a point where I was happy enough.
The inside of the building is really tight to get any detail in at all and still leave enough room for figures
The chimney breast and hearth are both scratch-built from plastic and card respectively.
I've added a shelf, armchair and side table (all scratch-built) along with the chair provided in the kit.
Another log-pile in the corner and some "embers" in the fireplace (from cane) was all the detailing I allowed for this end of the room.
In the centre-right of the photo a door can just be made out, which leads to the peculiar front add-on.
On the floor I've added a paper carpet, goodness knows from where I got it from.
Another view showing the chimney end of the building. I've deliberately tried to keep the internal areas in front of windows clear of clutter to allow figures to stand in front of them. The extra bit of wall and door were of course scratch-built - frame, plastic; door, card.
 The other end of the building shows just how tight space is inside.
I've managed to cram a single bed in (just) and the only other detailing I've added is the "painting" above the bed.
This photo also gives a good view of he extra support  I gave to that front post and eagle eyed readers will notice the bench is not present !
What the photo doesn't show is that Sid the sweeper only just clears the slope of the roof. I guess no figures holding their weapon upright in here !
  View of Sid just crammed in behind the bed, and as a reminder Sid is on a 20mm washer, those of you with figures on 25mm slotta bases will probably find this building even more cramped.
In case you were wondering what was behind the internal door, all now is revealed :
 Sorry, no hidden armoury or stairs down to a cellar or fallout bunker, just the "facilities".
 Finally here's an aerial shot of the finished model (sans roof):
 And that's it for this week.

As always your comments are both welcomed and appreciated.

Monday, 22 July 2013

Farmhouse (now with added ramblings)

As stated in last week's blog I have made a start on my Perry "North American Farmhouse"
which I'm pleased to say went together well.

I'm no great shakes with plastic kits, I've either got too much or too little glue in the wrong places.
 So far I've got to the stage where I'm putting detail onto (and into) the model.
Here's a few photographs of the story so far:
The kit in it's original form in the top centre of the photograph is a peculiar looking shaped piece which is actually from the Barn. I'll be incorporating it into the model.
The white sheet of plastic in the bottom left was going to be the base, but proved just too small.
 Internal detail is going to be sparse as it's a very small model. In this photograph I've added a fireplace and window frames (the windows all have perspex in, but I've since thought that this is a bit pointless for this model) Because of the verandah deck I've added an internal floor, otherwise there would be a step down into the main internal area which didn't look right to me. Hardly visible in this photo is the the hearth, made from scrap card like the floor.
 Front view showing the internal frames for the windows and rear door.
 Similarly a shot of the rear of the building showing frames but also showing what happened to that cut-off from the barn. (It's a rear porch roof above the back door now). You can also see the  ragged white plastic that will be the new base.
This photograph shows the two pieces of roof glues together. Roofs are notoriously weak in my experience and I tend to brace them if they're going to be removable. Here I've filed a piece of sprue to loosely fit in the internal 'v' of the roof and glued it in place. Next I've added more glue and plastic dust from filing more sprue, it makes a very firm join.
 The first stage of painting after the black undercoat a brown layer of paint to alleviate the harshness of the black.

The back "porch". I've added two posts to support the porch roof and a card piece as the ground for the porch. The back wall shows the the first layer of grey over the brown. Successive layers will be a lighter grey then white.
As I stated at the start of this blog the farmhouse isn't quite finished and whilst waiting for glue to set and paint to dry I've added the buildings below to my wip's.


They're going to be more "flats" as I did earlier this year, thanks to a friend who gave me six sheets of foamboard (each about half the size of a sheet of A1.) (they can be seen here)
Finally here's a photograph of six huts I made for a colonial game set in a fictional part of Africa.
There's no real reason to show them here but it gives a good chance to link to Clint's current project (Project number 87 for this year I believe) and you can see his progress on his blog here.
You may want to back-track a few posts though and read about this project from the  beginning.

As always your comments are both welcomed and appreciated.

Monday, 15 July 2013

The Red Barn

I finished painting the Barn to a standard I was happy enough with and added some detail to the interior. I decided to go with the archetypical red and white seen on so many US barns (and is still as typical today as  it was during the 19th century)
  The exterior didn't require that much extra done to it.
After undercoating in black spray I used a very bright red red almost like a highlight.

The base was used as a pallet whist I added the various shades of red that I added as I built up the colours on the barn itself.
The two rough pieces of planking to the left centre of the photo are for the loft .
The clockwise tour of the barn, showing the left side (viewed from the front)
The rear of the barn whose only difference to the front is the narrower doors.
The rear and back of the lean-to with a bit of the base detailed. That gravity defying chain on the rear door still bugs me.
The side  lean-to shed. I added some flock to the base on a very limited basis, the base was many different colours and shades of brown, which was then painted a dark green in the places where I would add the flock. My flock is home-made  - one of many different mixes I made years ago.

The photo on the right shows the inside of the lean-to roof, to which I have added a bar of sprue, to prevent the roof sliding off; it would of course not be necessary if the roof wasn't of the "lift-off" variety.
Moving on to the sparse internal detailing:

A view of the front upstairs, with the loft "planks" in place. There's really so little detail in the interior not just to accommodate figures, but mainly because I just couldn't be arsed.
The rear upper loft, again with a minimal amount of detail. Currently I've left both the front and rear upper floor pieces removable.
The ground floor with a stack of wood by the corner, some form of rag and a pile of newspapers.
In the opposite corner to the wood pile I've put an old tire, which brings the interior at least into the 20th/21st century!
There's not that much space in the lean-to for anything other than figures, so I added some "straw", made from coarse string, cut into short lengths and patted down into a pool of PVA glue.
The cut-out from the shed into the barn proper should really have had some framework added to it but it was an oversight.
The final detailing in the rear corner was this bench/desk made from card in about ten minutes, again with minimal detailing added from bits and pieces.
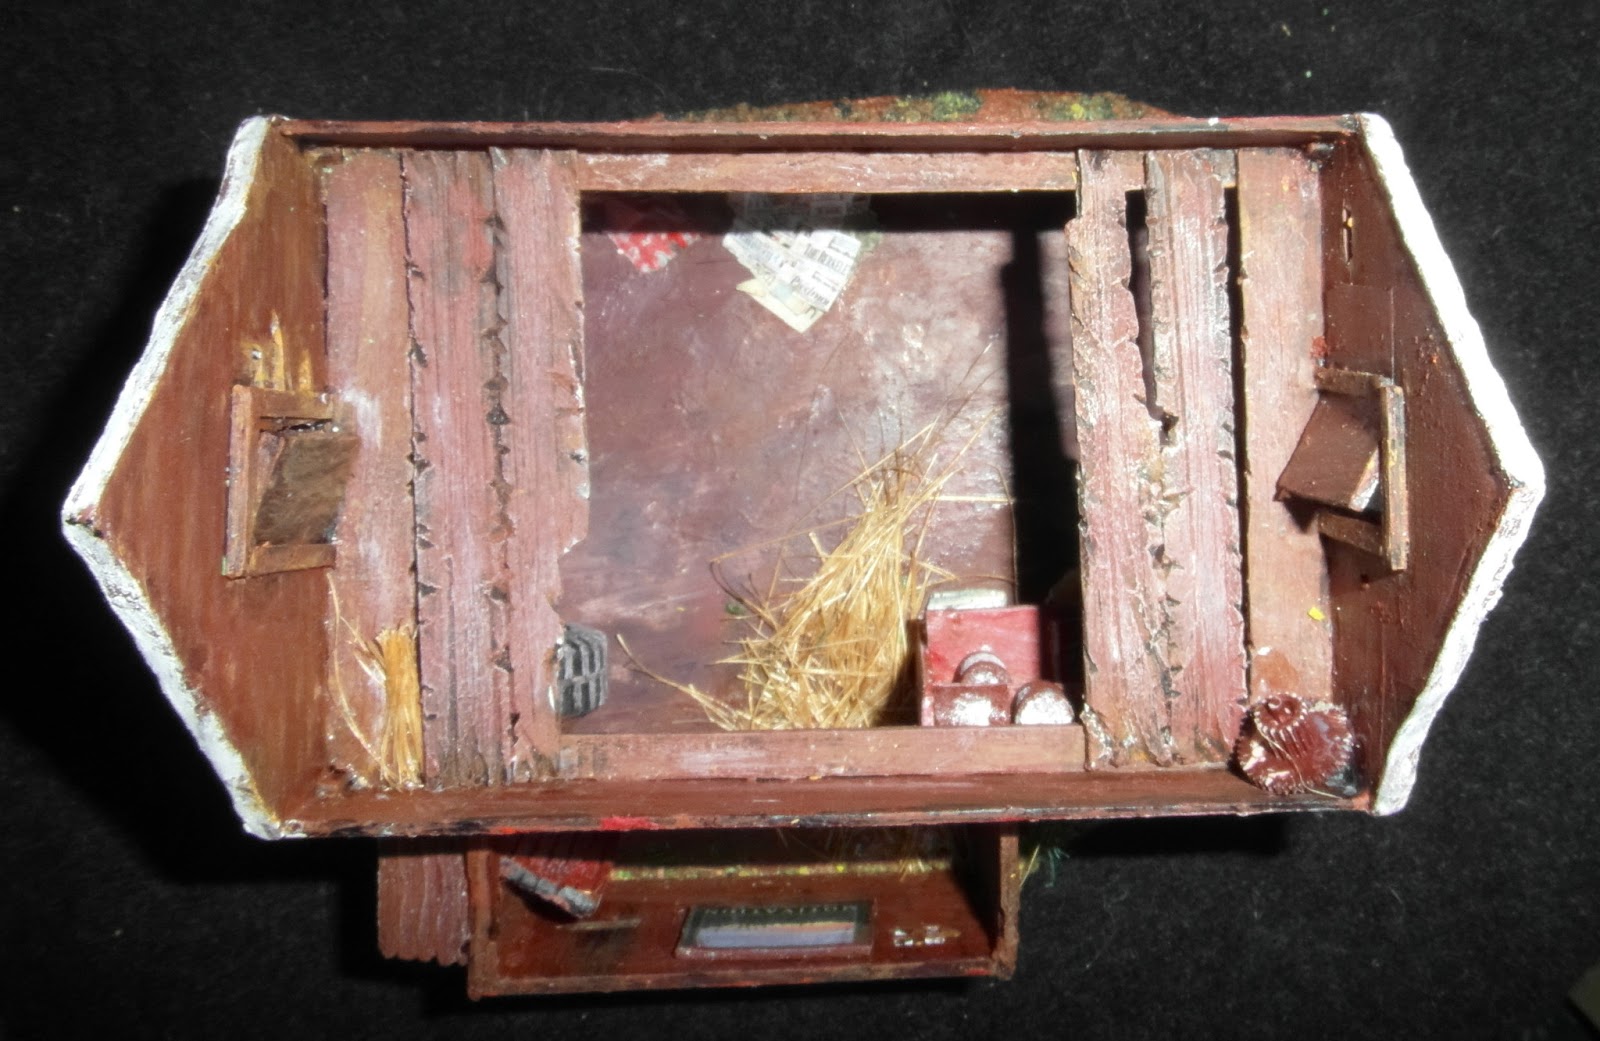
The view from above, in the lean-to a motivational poster can just be made out on the wall.
 The whole barn measures just less than 5" lengthways and just over 3" width-ways (125mm x 75mm); the lean-to footprint is about 1¼" x  2 ¾" (30mm x 70mm).
The height is about 4½" to the barn roof ridge and about 2 ½" to the eaves, the lean-to is substantially shorter.
Just to show that there is space for figures in the loft space, here's Sid for a size comparison.

And that's it for this week, I've already made a half-hearted start on the "Perry" Farmhouse.

As ever your comments are both welcomed and appreciated.