Welcome to my blog, the story of my continuing journey into the World of Zombie Wargames.

Monday, 29 July 2013

Farmhouse (2)

I've struggled to find any enthusiasm over the last week or so but nevertheless I've stuck to the task of completing the Farmhouse - or at least I've got to the stage where I'll not be doing anything more on it, - I'm that bored with it now!
The reasoning behind the larger-than-necessary front to the base was that I'd contemplated putting a picket fence to the front of it. Several permutations later of the three inadequate fence pieces that you get with it  and I gave the idea up, shelving it until I get some more fences (I'll not be holding my breath on that one).
I've shown two photos of the front of the house, to give some idea of how small the model is, both in height and width. It's probably an ideal  size for most wargames, but is a bit smaller than I'd like. (For the actual dimensions see last week)
I've omitted two of the three front porch supporting posts, leaving the single one shown to accomodate figures more easily and in additiion I've glued in an additional cross-brace to support the remaining post for when the roof is detached. The bench at the front is scratchbuilt and is not as yet a permanent fixture, as I'm still undecided about it.
The rear of the building has had a small porch added, the roof of which was a cut-off from barn project, the upright posts are scrap and the wood pile is cut up pieces of garden cane.
I've used garden cane for all manner of things in the past, especially for stockades and the like, in preference to the uniformity and slenderness of  barbeque sticks.
The bits of "grass" dotted around the building are of course sisal and the patches of green are flock.
The side view of the building  has no interesting features in particular. I was unhappy with my initial efforts at the chimney stonework, but I eventually got it to a point where I was happy enough.
The inside of the building is really tight to get any detail in at all and still leave enough room for figures
The chimney breast and hearth are both scratch-built from plastic and card respectively.
I've added a shelf, armchair and side table (all scratch-built) along with the chair provided in the kit.
Another log-pile in the corner and some "embers" in the fireplace (from cane) was all the detailing I allowed for this end of the room.
In the centre-right of the photo a door can just be made out, which leads to the peculiar front add-on.
On the floor I've added a paper carpet, goodness knows from where I got it from.
Another view showing the chimney end of the building. I've deliberately tried to keep the internal areas in front of windows clear of clutter to allow figures to stand in front of them. The extra bit of wall and door were of course scratch-built - frame, plastic; door, card.
 The other end of the building shows just how tight space is inside.
I've managed to cram a single bed in (just) and the only other detailing I've added is the "painting" above the bed.
This photo also gives a good view of he extra support  I gave to that front post and eagle eyed readers will notice the bench is not present !
What the photo doesn't show is that Sid the sweeper only just clears the slope of the roof. I guess no figures holding their weapon upright in here !
  View of Sid just crammed in behind the bed, and as a reminder Sid is on a 20mm washer, those of you with figures on 25mm slotta bases will probably find this building even more cramped.
In case you were wondering what was behind the internal door, all now is revealed :
 Sorry, no hidden armoury or stairs down to a cellar or fallout bunker, just the "facilities".
 Finally here's an aerial shot of the finished model (sans roof):
 And that's it for this week.

As always your comments are both welcomed and appreciated.

Monday, 22 July 2013

Farmhouse (now with added ramblings)

As stated in last week's blog I have made a start on my Perry "North American Farmhouse"
which I'm pleased to say went together well.

I'm no great shakes with plastic kits, I've either got too much or too little glue in the wrong places.
 So far I've got to the stage where I'm putting detail onto (and into) the model.
Here's a few photographs of the story so far:
The kit in it's original form in the top centre of the photograph is a peculiar looking shaped piece which is actually from the Barn. I'll be incorporating it into the model.
The white sheet of plastic in the bottom left was going to be the base, but proved just too small.
 Internal detail is going to be sparse as it's a very small model. In this photograph I've added a fireplace and window frames (the windows all have perspex in, but I've since thought that this is a bit pointless for this model) Because of the verandah deck I've added an internal floor, otherwise there would be a step down into the main internal area which didn't look right to me. Hardly visible in this photo is the the hearth, made from scrap card like the floor.
 Front view showing the internal frames for the windows and rear door.
 Similarly a shot of the rear of the building showing frames but also showing what happened to that cut-off from the barn. (It's a rear porch roof above the back door now). You can also see the  ragged white plastic that will be the new base.
This photograph shows the two pieces of roof glues together. Roofs are notoriously weak in my experience and I tend to brace them if they're going to be removable. Here I've filed a piece of sprue to loosely fit in the internal 'v' of the roof and glued it in place. Next I've added more glue and plastic dust from filing more sprue, it makes a very firm join.
 The first stage of painting after the black undercoat a brown layer of paint to alleviate the harshness of the black.

The back "porch". I've added two posts to support the porch roof and a card piece as the ground for the porch. The back wall shows the the first layer of grey over the brown. Successive layers will be a lighter grey then white.
As I stated at the start of this blog the farmhouse isn't quite finished and whilst waiting for glue to set and paint to dry I've added the buildings below to my wip's.


They're going to be more "flats" as I did earlier this year, thanks to a friend who gave me six sheets of foamboard (each about half the size of a sheet of A1.) (they can be seen here)
Finally here's a photograph of six huts I made for a colonial game set in a fictional part of Africa.
There's no real reason to show them here but it gives a good chance to link to Clint's current project (Project number 87 for this year I believe) and you can see his progress on his blog here.
You may want to back-track a few posts though and read about this project from the  beginning.

As always your comments are both welcomed and appreciated.

Monday, 15 July 2013

The Red Barn

I finished painting the Barn to a standard I was happy enough with and added some detail to the interior. I decided to go with the archetypical red and white seen on so many US barns (and is still as typical today as  it was during the 19th century)
  The exterior didn't require that much extra done to it.
After undercoating in black spray I used a very bright red red almost like a highlight.

The base was used as a pallet whist I added the various shades of red that I added as I built up the colours on the barn itself.
The two rough pieces of planking to the left centre of the photo are for the loft .
The clockwise tour of the barn, showing the left side (viewed from the front)
The rear of the barn whose only difference to the front is the narrower doors.
The rear and back of the lean-to with a bit of the base detailed. That gravity defying chain on the rear door still bugs me.
The side  lean-to shed. I added some flock to the base on a very limited basis, the base was many different colours and shades of brown, which was then painted a dark green in the places where I would add the flock. My flock is home-made  - one of many different mixes I made years ago.

The photo on the right shows the inside of the lean-to roof, to which I have added a bar of sprue, to prevent the roof sliding off; it would of course not be necessary if the roof wasn't of the "lift-off" variety.
Moving on to the sparse internal detailing:

A view of the front upstairs, with the loft "planks" in place. There's really so little detail in the interior not just to accommodate figures, but mainly because I just couldn't be arsed.
The rear upper loft, again with a minimal amount of detail. Currently I've left both the front and rear upper floor pieces removable.
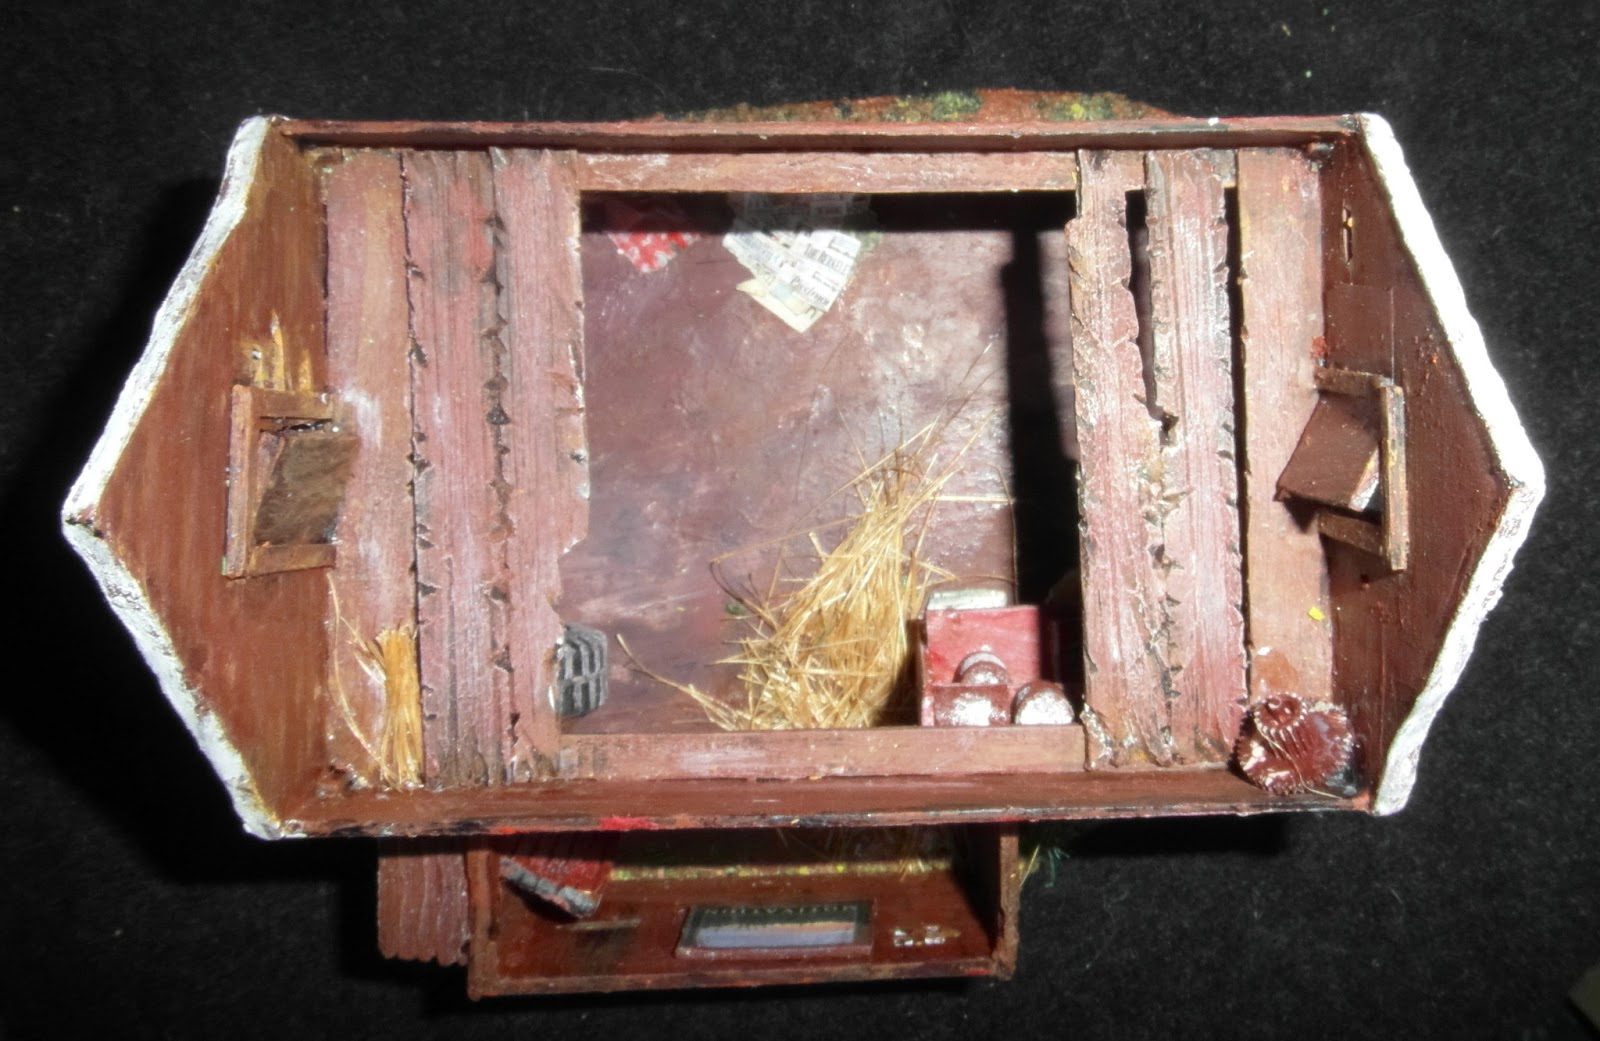
The ground floor with a stack of wood by the corner, some form of rag and a pile of newspapers.
In the opposite corner to the wood pile I've put an old tire, which brings the interior at least into the 20th/21st century!
There's not that much space in the lean-to for anything other than figures, so I added some "straw", made from coarse string, cut into short lengths and patted down into a pool of PVA glue.
The cut-out from the shed into the barn proper should really have had some framework added to it but it was an oversight.
The final detailing in the rear corner was this bench/desk made from card in about ten minutes, again with minimal detailing added from bits and pieces.
The view from above, in the lean-to a motivational poster can just be made out on the wall.
 The whole barn measures just less than 5" lengthways and just over 3" width-ways (125mm x 75mm); the lean-to footprint is about 1¼" x  2 ¾" (30mm x 70mm).
The height is about 4½" to the barn roof ridge and about 2 ½" to the eaves, the lean-to is substantially shorter.
Just to show that there is space for figures in the loft space, here's Sid for a size comparison.

And that's it for this week, I've already made a half-hearted start on the "Perry" Farmhouse.

As ever your comments are both welcomed and appreciated.


Monday, 8 July 2013

Barn Raising

After my purchase of the Renedra "Ramshackle Barn" at the Durham Show four weeks ago I finally made the effort to build it. I haven't really had that much enthusiasm for anything hobby related lately so progress has been decidedly slow, but I have managed to force myself into about an hour's work a day on the Barn.
The plan for the barn was to have removable roofs and opening doors - With the front doors of the barn overlapping and askew, it didn't look that easy a task.
I also wanted to have some internal detail in the
building and provision for figures to use the upper front and back hatches.
The two sprues shown on the left are identical (one being the reverse side of the other), which on first glance seemed OK until I realised that the side lean-to shed door has no reverse and that the other end of the shed will have a door on the inside that will lead to nowhere in particular.
The lean-to roof  (top right in the photo below) would also need an internal brace to allow it to be removable in play and not slide off down the roof. 

The main doors had to be cut from the front and rear walls of the building then they had to be further cut into two doors. This was not a problem with the slightly narrower  rear door,but the overlapping front doors had to be delicately sliced across the door. (where the overlap was there was actually a fairly substantial thickness
to the door which was a great help). The front and rear hatches also had to be cut from their respective walls.
If the lean-to was to have access to the main part of the barn then one of the side walls had to be cut to accommodate that too.
 Above are all the pieces cut from their sprues and the individual doors cut from front and rear walls.
The lean-too shed "ghost" door has been filed down in an attempt to hide its origin.
The side wall where the lean-too will fit onto has had a section removed which will allow access to the main part of the building. - Note the removed section in the top left of the photo, I used the window frame part of the cut-out for the internal frame of the window, although I also had to add a lintel as the cut couldn't have been any higher because of the height of the lean-to.
The front door had the (what I considered to be) awful piece of "rope" removed from it. It wasn't until the final stages of this build that I noticed the gravity defining piece of chain on the narrower rear door and it was left as it was. If I had of noticed it at this stage then I would have removed it too.

This view show the model roughly assembled (specifically for the photo), the lean-too still hasn't been attached, but the doors are all in place.
The internal top floor of the barn proper has had the supports glued in place. The lengthways beams are coffee-stirrers (of course), whilst the two shorter widths are lolly pop sticks.
At this stage I hadn't decided whether or not to have a full internal upper floor  (removable) or not.
I resolved eventually to have a two part upper story, so basically a ledge at each end, this would enable figures to be placed aloft and with the gap in the middle I would still have access to the lower part of the building.

This view from above the model shows the plastic tape I used for the "hinges" on all the doors well and gives a better idea of the upper floor's supports.
The large piece of white plastic that can been seen in both these last two photos is the base for the model. It's quite a substantial thickness and only slighlt large than the model itself. The edges of the base have been chamferred.
Eventually I was satisfied enough with the final filing and fitting of the relevant pieces and glued the lean-to to the side of the building.
The main roof parts were glued together and some supports for the door hinges were  also
 glued into place.

A this stage the various bits gluing were held in place with some clips and rubber bands.
The rubber bands were specifically used for the roof, as it not only had to be removable it also had to fit in place and the two halves had to line up.
In the photograph can be seen the whole base  with a basic outline of where the model will sit. The four pieces of wood (lollypop sticks again) are cut to length for the upper "floors".
Before the whole thing was was ready for undercoating, I added a few more features.
The first was a small porch-type roof over the lean-to door, made from a part of the discarded wall. Secondly I cut a couple of the transoms out of the large window so that I'd end up with just four "panes" and did the same to the cut out window frame. A piece of perspex was glued between the two to represent glass and the inside window had a lintel made from a bit of scrap.I also made some very thin frames for the inside of the loft hatches.
All the completed pieces were then undercoated with matte black spray (Poundland's best) and left to thoroughly dry.
By this stage I think I'd spent about 6 hours doing the bits and pieces above over the course of several days. 

That's it for this week, next week I'll hopefully be showing the final model, because other than some internal  detailing and a little painting (aarrgh) it's all but  done.

As always your comments are both welcomed and appreciated.

Monday, 1 July 2013

Voodoo Jake's

"There's far too much filth in this city"
It seems like many other of my fellow bloggers I too am beset by lethargy.
As I've used this building in both of my games so far I thought I'd show it this week (a quick recourse, for having done next to nothing this last week).
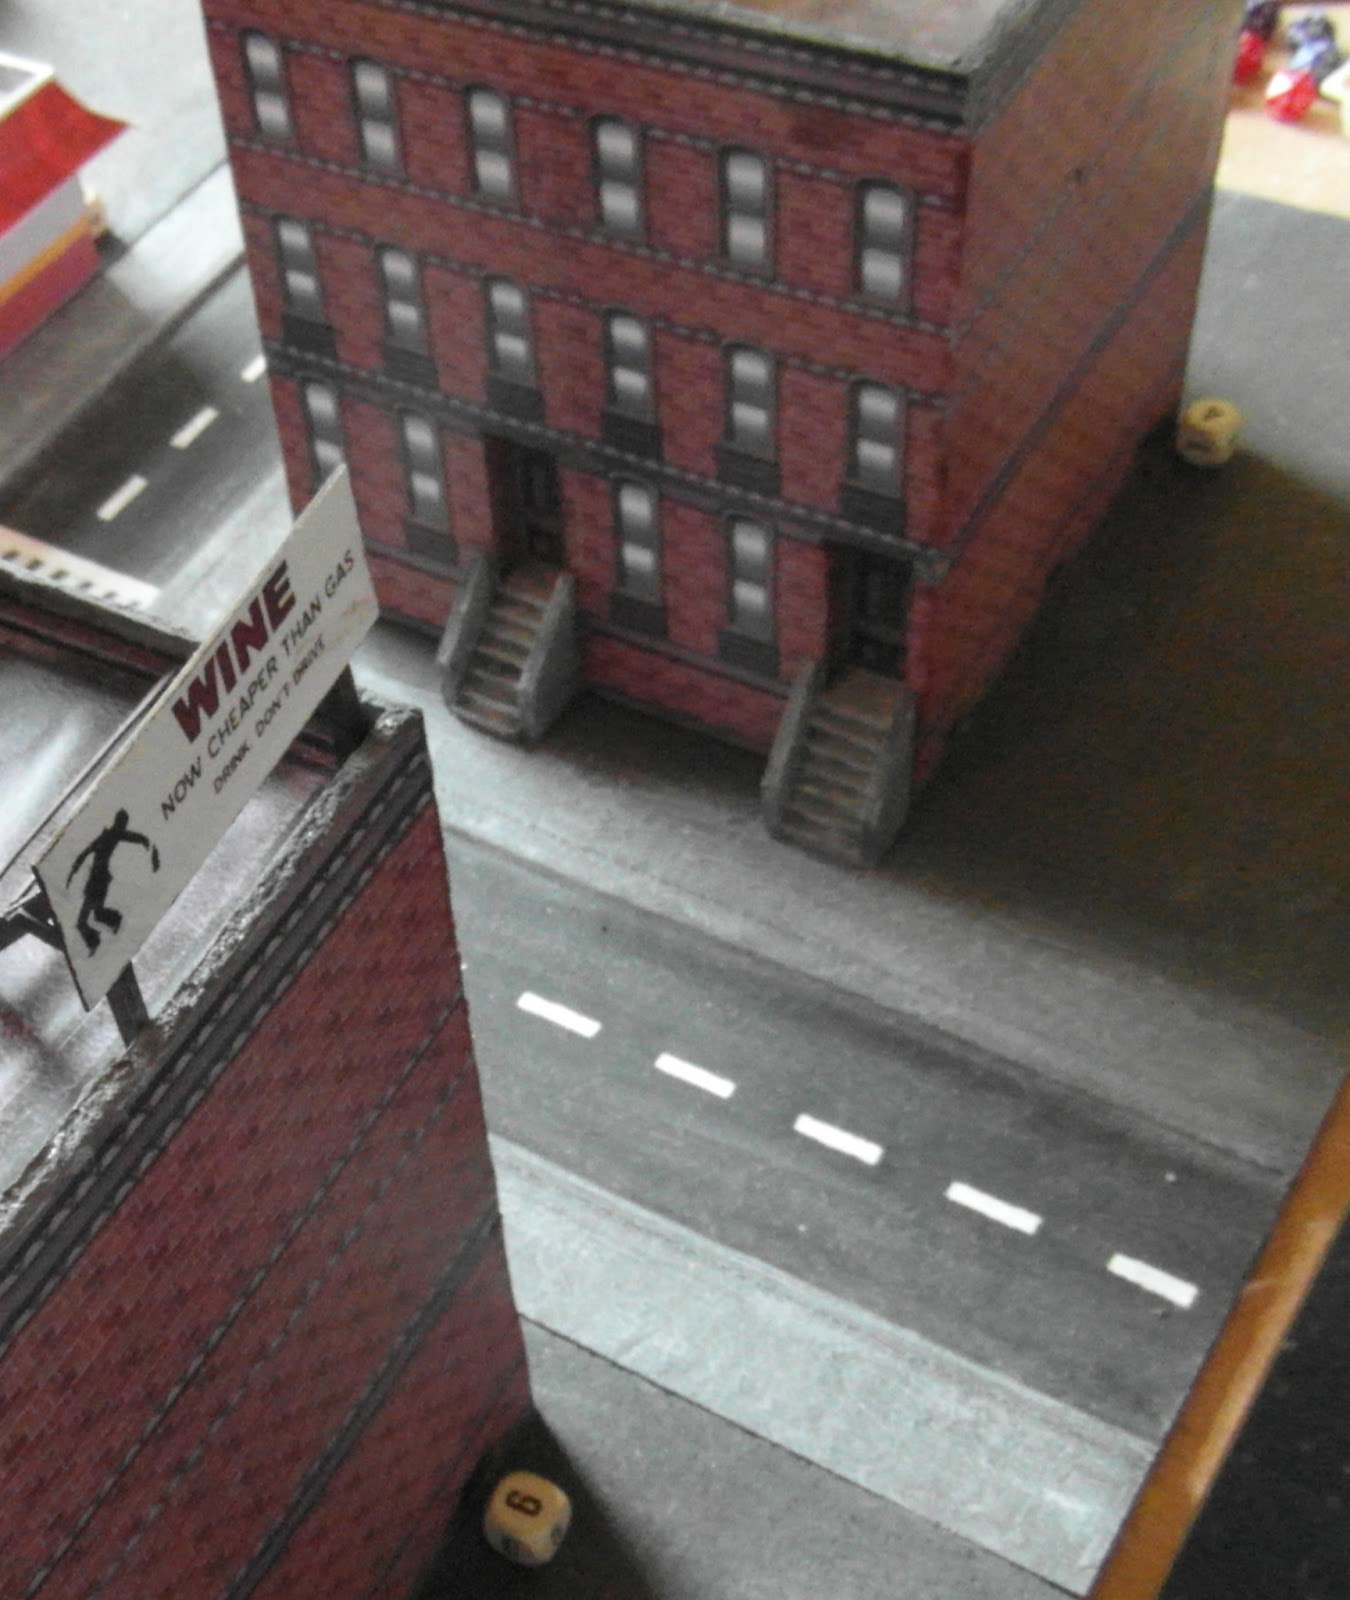
This model comes from the Microtactix "Twilight Streets" Set #2. Those of you familiar with these sets will know that originally the building is depicted as derelict, with its windows boarded and bricked up. I didn't want a ruin as such but it was fairly easy to "renovate" the ruin to its original former glory.
Sets #2 and #3 of the "Twilight Streets" series are both under-scale for 28mm figures (set#1 has a "heroic" alternative) and the model had to be scaled up.
As I was already doing quite a bit of photo-shopping to the model I also decided to give it a 'L' shape, as the original was a very plain box type.
One feature I didn't incorporate into the model that was on the original was the indented back door, which although would make pretty good cover , did mean there would be less room inside for figures.
The remaining two side of the building are nothing spectacular, the shorter back and sides merely being copies of the other walls, copied and pasted.
The sign board on the front of the building was also re-modelled as a lot of the lettering was askew or missing.
All the walls and roof are made from 5mm foamcard,whilst the shop sign is card supported by coffee stirrers.
The roof was gunged over with "Modelling Paste" (which the label says is "For use on canvas in collages and for decorative deigns") which is a bugger to work with as it's very, very gritty and dries to the constituency of concrete embedded with glass., but as I got it for nothing it serves my purposes well.
The gunge also takes acrylics well (it must do, it says so "Dyeable with acrylic paint").

 I made a token effort on the interior, again with the help of photoshop, copying and flipping the walls before finally giving them a wash of colour. I thought the fade pink gave it a very retro salubrious look.I do have intentions of outfitting the interior with a desk (or counter), a chair and possibly a safe which will occupy the 'L' part of the room, with a central display in the main area of the shop and some shelving for a wall or two. Numerous adult posters will decorate the walls of course.The carpet is actually patterned but it's difficult to make out on the photographs.
The base of the building is a scrap of some form of plastic sheet that I was given.
 This was actually my second attempt at this building, my first was based on the original form of the building (i.e. a shoe-box) and although I was not too unhappy with it I abandoned it just as it was virtually finished.
Voodoo Jake's (Mark 1)

As you can see this version had actual see-through perspex windows (no opening doors though) and it took an age to cut out the panes. However, as it was nearing completion it struck me just how large the front doors were.  I hadn't actually over-scaled it as such, but the photocopier had !  Apparently there is a feature that allows the print to "fill the page" or whatever and hence Voodoo Jake's (Mark 2) came into being.

That's it for this week it just remains for me to welcome my latest followers "Paul Smith" and "Hobby Worker" and unless you haven't heard Bryan (Vampifan) is recovering although he's still in hospital.

As always, your comments are both welcomed and appreciated.

Monday, 24 June 2013

Night Cops


I retained four of the boards from my previous scenario, rotated them 90 degrees and added my SuperDuperMart and a parking lot for this scenario.
This was the night after the events of "When Jimmy met Milly".
The alley between the bank and the burger joint are at the bottom of the picture.
  The object of this scenario was a try-out for my driving rules, and would basically have a cop car drive around the table, spotting various markers. The route for the cops is shown by the yellow line and the objective markers are within the red circles, though they can't all be seen. Only one marker wasn't visible from a vehicle, the one just off the top of the picture.
 This would mean at least one cop would have to leave the vehicle and move to a position where he could spot the objective.
The markers do look out of place but it didn't really matter to me as they served their purpose for the game and were obvious to the player who would play as the cops.
As this is only the first night of the coming apocalypse there would still be civilians on the street and traffic - there was a lot fewer of both throughout the game. As I'm slowly introducing new elements of play to my scenarios, this game would feature PEFs (potential enemy forces) and the use of Events. For the latter I used the excellent set of cards produced by Colgar6 . I determined the Encounter rating of the Area to be 6 as it was really just a continuation of the previous scenario, This meant that every turn when two initiative dice were thrown any doubles of  '6' or less an event would occur.
Cop start position
As the chance of this happening is one sixth, to simplify matters we threw a d6 at the beginning of each turn, a '6' indicating that an event occurs.
PEF '5' start position.
All three PEFs
 Three dice were used to mark the positions of the PEFs, which were a '4',  '5' and a '6' for initiative and they were all positioned in the bottom 2/3rds of the table.
The three PEFs can just be made out out on the photographs.
PEF '6' is in the bottom left of the photograph whilst  PEF '4' is in the top right; PEF '6' can just be seen in the top left of the photograph.
The player  playing the cops (my son-in law) had two cops at his disposal.
Officer Gunther Toody and Officer Francis Muldoon. As cops go neither of them are at all special, I've assumed that they were drafted in from their day-time desk work as the ongoing crisis develops in Perdition.
The stats for the pair of cops were:Officer Muldoon: Initiative 4, Leadership 3, Shooting 3, Melee 3, Driving 3
Officer Toody: Initiative 4, Leadership 3, Shooting 3, Melee 3, Driving 3
Both are armed with BA pistols (and a back-up pistol) and a nightstick. there is also a pump action shotgun in their vehicle.
On turn 1 the cops entered the table from their start point as planned and turned into the car park, they're travelling at speed (2) which with their bonus die gave them 15" of movement. The picture below shows their position after their movement. The die at the rear shows a '2' which is their current speed. One of the few civilian vehicles that entered the game can be also seen (no dice were used for the civilian vehicle speeds, they were all travelling at a uniform speed of '2'). Other vehicles and civilians on foot moved around as in the last scenario. The three PEFs all moved toward the cops location (they had actually activated  first).
Two joggers arriving
PEF '6' arriving fast.

The start of turn two set the tone for the rest of this scenario with an event.
The cops had ran out of fuel ! So rather than just sitting idle.
Muldoon elected to leave the vehicle  to investigates the objective marker whilst Toody called for help.
We decided upon three possible outcomes for the call for help, A tow truck (1), a tow truck with petrol can (2-5) or a new vehicle (6).  the result was a five and the tow truck would arrive on turn 5, from a random road entry point (there are 6).
On turn 3 Muldoon checked the first objective and the marker was removed and other than the normal civilian traffic nothing much else occurred.Turn 4 saw Muldoon moving towards the second objective which he could spot and Toody sat in the car eating pizza , whilst PEFs '4' and '6' continued their inexorable movement towards the lawmen. PEF 5 had decided to play at being a yo yo and move back and forth from its original start position.
[Somehow I'd missed moving PEV (6) allowing PEF (4) to catch it up, but it wasn't noticed by either of us whilst playing].
It was probably inevitable, given the way thing were going, that on Turn 5 another event occurred.
Was it officer Toody caught somehow in the handbrake reaching for a piece of fallen pizza  No, of course it wasn't ! It was Muldoon snagged on the pallettes he was near.
Coupled to this was the fact that all three PEFs would activate before the three cop groups. (Muldoon was now far enough away from Toody that they were now two groups of' '1' and the civilian driving the tow truck was about to enter the table too)
PEF (6) activated and made a bee-line for Mulhoon and was resolved as 3 zombies, perilously close to Muldoon. Luckily PEF (4) had stayed in place. On the cop activation they both passed their Zed or no Zed test. Toody exited the cop car and both drew their pistols and shot twice at the three zombies, two of whom died (again). The civilian in the truck with the jerry can of fuel drove entered at the same point ads the cops and drove into the car park blissfully unaware of the current events.
(The yellow counter shows the "dead" zombies)
Turn 6 and the single remaining zombie activates first and charges Muldoon; Muldoon's shoots manages to kill the Zombie. PEF (4) activates next and enters the fray, revealing itself to be a single zombie. The single remaining PEF decided now would be a good time to make a bee-line for the cops.
On the police activation Muldoon shoots twice and misses whilst Toody also shot twice and got a '2' and a '20'. The '2' is a hit and merely knocks the zombie down whilst the '20' is a possible Out of Ammo result.  Rolling for Out of Ammo (based on the Target value of the weapon) of course resulted in Toody being Out of Ammo! Mulhoon is still snagged on the palette too!
The driver of the truck (now named as Mitchell Davis for reasons that escape me) slows to zero speed but takes his 1d6 bonus inches of movement.
Turn 7 opens with yet another event (the player playing the cops threw all the dice throughout this game).
Another die was thrown to determine which of the six possible roads this dog (and the zombies closely following it) would enter from and of course it was the one nearest the cops !

Luckily the cops acted next, Mulhoon fired once more at the downed zombie this time  successfully ending its existence. Toody, having heard the ruckus behind him turned to see the dog and the four pursuing zombies then made a dash for the car to retrieve their shotgun.
"Mitch" accelerated to speed (1) and started to turn towards the exit. PEF (5) continued its movement towards the cops and was revealed as three civilians.


Turn 8 heralded yet another event, although at least this one was potentially beneficial to the cops. this bit of luck continued as the cops activated first.
Muldoon took advantage of the short lull to free himself whilst Toody takes advantage of the shotgun and lets blast at the first two of the approaching zombies, hitting the first twice and the second once.
The result being that the two zombies are knocked down. Mitch stopped the truck and watched.
To determine what the civilians would do we gave them three possible courses of action, this resulted in one going home, one going towards the cops "to help" and one watching the events as they unfolded.
The zombies and dog of course had their own agendas, the dog continued running and the two remaining standing zombies moved towards the cops.

 Turn 9 saw no event but did see two of the zombies shuffling forward whilst the other two stood back up as they activated first.
The now freed Muldoon closes on the zombies and shoots twice whilst Toody once more with the shotgun opens up.
In the picture the white dice represent Toodys three shots, the yellow dice represent Muldoon's
and numbers show the order of their shot.
The gunfire result means the front two zombies have shook off their mortal coil, leaving just two more to deal with. It also results in Toody's once running out of ammo ! (for the shotgun)
The civilians decide that they've both had enough and head for home.
Turn 10 and the zombies activated first, but are still out of their 6" range (which would allow them to go into frenzy and "charge") and so continue their shuffle towards the two cops.
Muldoon shoots once at each zombie and misses both. Toody draws his small backup pistol and rushes a couple of shots off, getting a single hit but killing the zombie.
Turn 11 and once more there is no event and the single zombie activates first and charges Toody who manages to get off two shots, hitting and killing with  one of them.
 Up to this point we'd been playing for about 4 hours (with a short break). As there were no more PEFs we calculated how long it would take for the pair to get their  patrol finished (12 turns). We next threw for possible events getting events on turns 5, 8 and 12.
Turns 5 and 8 were "none events", in that they didn't apply, but turn 12 summed up their patrol and yes, that is the edge of the board, just by the carpark.
At that stage we called it finished.
 

I know how I get frustrated with some bat-reps leaving you dangling, waiting for the next part so although this is a very long report I thought it worth the effort of posting it all at once - congratulations and thanks to all those that managed to read it through this far.


As always your comments are both welcomed and appreciated