Welcome to my blog, the story of my continuing journey into the World of Zombie Wargames.

Monday, 27 May 2013

When Jimmy met Millie


The street between the two crossroads is where all the action takes place
I make no apologies that this post will be fairly verbose as I try to explain some thoughts on how I wish my campaign to “feel”, though I've kept most comments to notes at the end, should you just wish to read through the "action". 
Rather than following the story of one character or group I’ve decided to give the bigger picture of the city.
When Jimmy meets Millie
As a first outing for my rule changes and amendments I wanted to take a little more time over the game and it turned out to be much more time consuming than I’d thought it would. This was not only due to me wrestling with the tangle of rules from ATZ and FFO and my own but also I hadn’t anticipated how many notes I’d need to take to explain everything I wanted to and how many photographs I’d have to take to show the action.  I know how much readers like the photographs, so I won’t be scrimping on those.
The City of Perdition has sixteen urban and suburban districts surrounded by the eight rural districts that make up Harbinger County. USA
This action takes place in one of the urban parts of the city, it’s mid afternoon. There are no PEF’s (potential enemy forces) not are there any “players” in the true sense, that is to say the population’s actions are entirely decide by the dice and some obvious choices.
A lot happened that didn’t affect the actual “action”, civilians and vehicles moved on and off the table throughout the game, not all of which have been shown, but can be deduced from some of the wider shots.


Turn 1
Initiative (1d6): The civilians threw a 3 and the Zombie (Old Jimmy) threw a 5, which in my game I ADD to their Initiative rating to give final scores of Civ: 6 and Z’s 9. [i]
(The raw dice rolls for initiative will also determine events in future games.)
 Had the Civilians won the initiative then I would have deemed them to have just moved to their starting position and then it would have been the Z’s turn in any event)

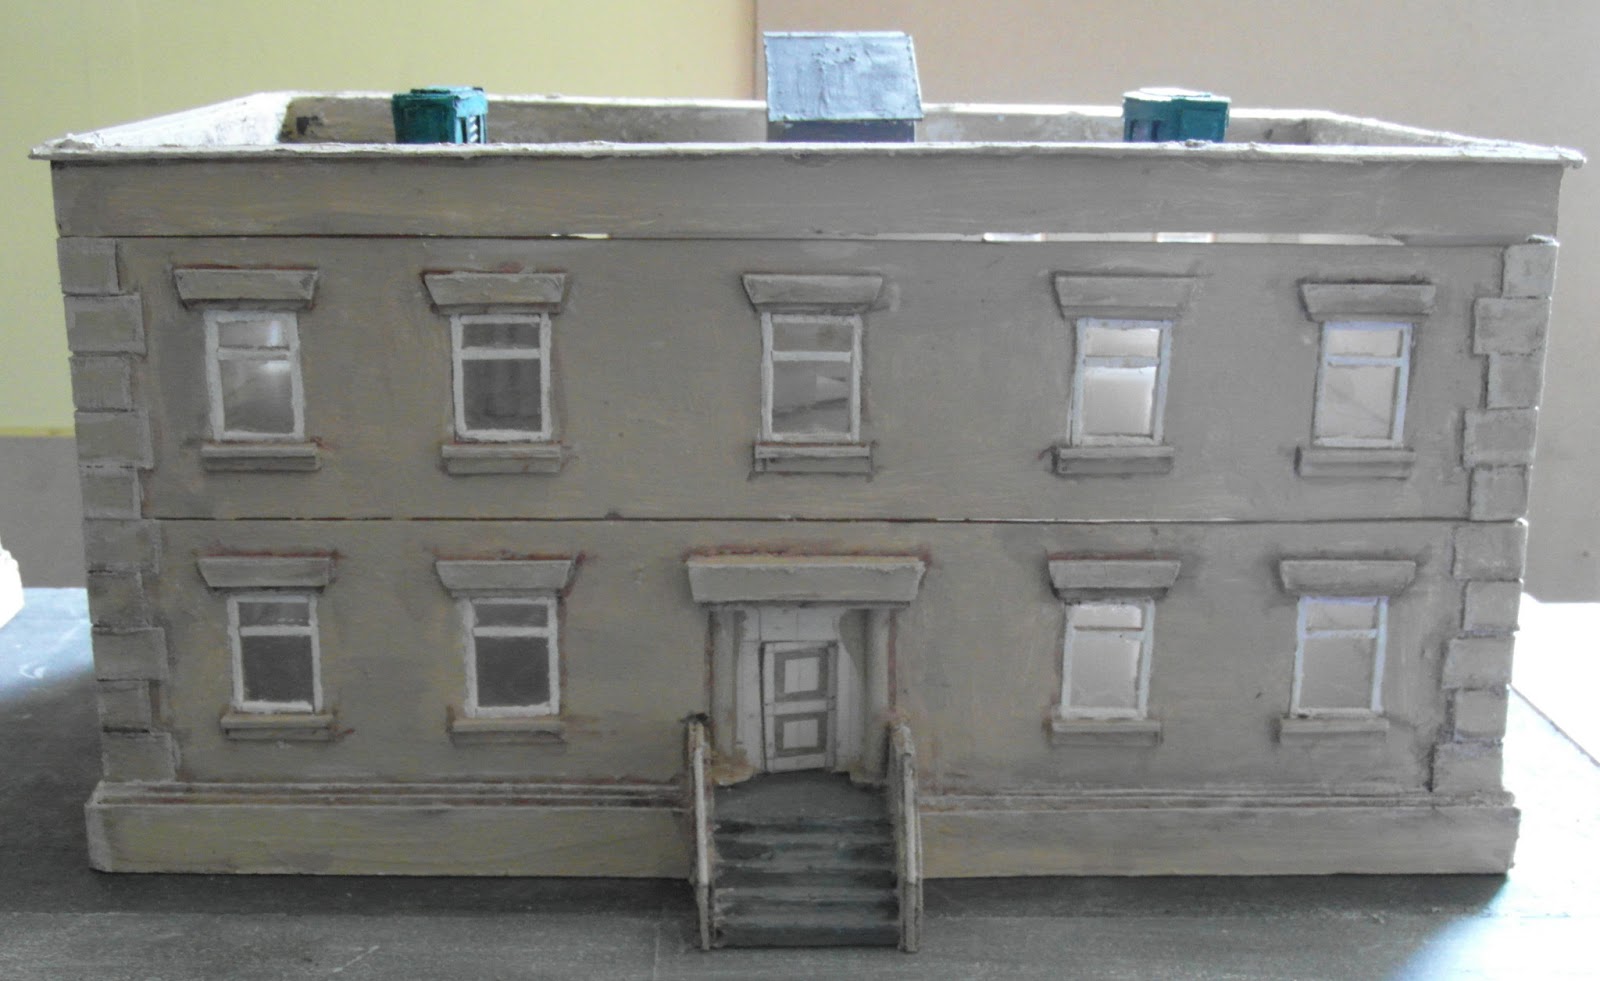
General view of the action area
After initiative the zombie attacks its victim (and with it came the first frantic search through the rules for a solution to the first “problem” - see note[ii] )
In melee the zombie and Millie each get 3 dice per their melee ability.
In my games humans don’t get the single automatic success against a zombie as I wish to make zombies a little more fearsome than they are in FFO and not just a hindrance.
Anne Nhon pulling up and getting out her car.
The results of the melee were: Millie 1 success, Old Jimmy the Zombie 2 successes, the impact die after the melee indicated Millie was out of the Fight (OOF).
This action concluded the Zombie initiative for turn 1.
The civilians in the area now have their activation.[iii]
The only other person of note in the area is the occupant of the silver car, which when diced for turned out to be a single woman.
She sees the Zombie and I suffer the same dilemma as above over what she does, (see note 2).  All dice results indicate she should charge into melee but she’s in a car currently travelling at speed[iv]
She therefore slows to a stop and gets out to confront the Zombie !
General view at the end of turn one

Turn 2
Initiative results: Civilians 9 and Zombie 6, the civilians move first.
The situation just before the civilians move.
I’ve adopted a convention of moving all vehicles first before pedestrians.
All the civilians on the table were moved.
Only the civilian driver from the silver car (now named Anne Nhon) had a decision to make, having passed the Zed or no Zed test, she immediately failed the Brown Pants roll and stood for the time being.
Situation after the civilians have moved
Five citizens entered into range of seeing what would become the Zombie Feast

After moving all vehicles and civilians on the table I again diced to see if any new vehicles or civilians entered (a 5,6 on a d6 indicating that a vehicle would, whilst a die roll of 1,2, 3 indicated a single civilian, a 4,5 indicated two and a 6 indicated 3. – further dice were thrown to indicate which side of the street they would be on etc.).
Old Jimmy the zombie’s action was mandatory in that he had to start his feast.[v] – on poor Millie.
The zombie’s action of feasting also meant that all within range had to take the “test of seeing the feast”. [vi] In the game I replaced poor Millie with a large red counter. Seeing the feast, results in two civilians running away (indicated 
by a red counter), one civilian ducking back (yellow counted), and two civilians stunned (blue counter)
The erstwhile have-ago heroine Anne Nhon in the silver car also erred on the side of caution and ducked down back inside her car (yellow counter).
It can be seen from the photograph that “Jimmy the Zed” has his back to these newcomers to the party and so no Zed or no Zed tests were taken.
I justified this by thinking that from their point of view, he could equally have been a mugger or trying to give help to an injury on the prone victim (mouth-to-mouth anyone?).
The driver of the red car is more than 6” away from the feast and it’s debateable whether or not he could see it due to the silver car blocking the view.
 To get this far into my game had taken about two hours and I was quite done in, having moved figures and vehicles about and taken 2 pages of scrawl which only just passed as notes. The write up has taken about twice as long.
The scenario has actually been completed and part two will follow next week.

[i] I use five characteristics for figures, more or less in line with what I’d came up with about a year ago, I feel any more would be too cumbersome.
Initiative (a general catch-all for everything the other characteristics don’t cover)
Leadership (for interaction with others and in groups to determine whose Initiative to use)
Shooting (for all (non-exotic) firearms.
Melee (for all brawling and hand-to hand combat)
Driving (For driving all vehicles)

Zombies always have Initiative 4 and Melee 3 .

For this encounter and for ease, all Civilians have a characteristic of 3 for everything, the Emergency response units were determined to generally have 4’s.
Civilian vehicles moved at a more or less constant rate of 12” whilst on the table.
 
[ii] First the victim (whom I’ve called Millie) has to take a Zed or no Zed Test, with three possible results:
ATZ: Carry on; take being charged test; zombie charges with an advantage,
FFO: Take charge into into melee test;  Zombie charges and you can take a shot; zombie charges.
The ATZ being charged table again has three results:
Have a shot, melee normally; melee normally; retire (ie runaway)
The FFO Charge table has four possible results all basically ending with a melee
The ATZ result of “carry on” doesn’t make sense when the zombie is charging you – (Carry on being charged?) whilst the FFO results all end with a melee with no chance of running away.
I opted for the ATZ result and allowed poor Millie to take the being charged roll, but alas she opted to stay and fight !
However in FFO she would also have to take the “Citizens Brown Pants – Part two” rule which gives two possibilites: got to the charge table or runaways and got to the breaking off melee table (there are two distinct sections of rules in FFO for this which is highly confusing as one refers to characters and the other to Grunts, but both could easily be rerering to a Player’s figures)

[iii] Both cars and civilians reaching a junction throw a die to determine their route, civilians move 6” per move (Zombies move at a rate of 4” normally but 6” if within 6” of humans”.  I felt a movement rate of 8”/6” was too much given the size of table generally being used. On a four foot wide table a human moving 8” with fast move can clear the edge of the table in 3 turns from anywhere on the table and with smaller boards even faster.

[iv] It’s a speed of 2 (12”). Each “speed” a vehicle does equates to a 6” mandatory movement” in my driving rules. Vehicles can go up one speed per turn or down two. They also have a “bonus” die of 1d6” which drivers can use all, some, or none in their turn. – This enables a bit more precise movement.

[v]  Normally, in ATZ, the zombie feast lasts a number of turns equal to the throw of 1d6 but I really don’t like the predictive nature of this. Instead I determined that a die is thrown each turn after the the feast has started to see if the feast is concluded, a 5 or 6 on a d6 indicating that it has. This obviously means that you can’t predict or know when it will conclude.

[vi] Both ATZ and FFO have similar results although ATZ take two tables to get there.
ATZ does have a chance to “Carry on”, whilst FFO doesn’t’ and FFO doesn’t have the “Hunker down” reaction.
I prefer the “cleaner” FFO version (but see note iv above.)
I also consider the feasting of zombies on a fresh corpse to be a mistaken view of a zombie’s frenzied biting of its victim, to try and make sure the victim is infected.


 That's all for this week then except to welcome my latest follower Phil C, I hope there's something here to interest you.

As always your comments are both welcomed and appreciated.


Monday, 20 May 2013

Welcome to Perdition

As the title says, "Welcome to Perdition" and smallish city in Harbinger County.
This set-up will be the one I'll be using for my first test-game, which I'll report on next week.

Although the photograph shows six of my smaller  terrain boards (two foot by two foot), the playing area will be slightly smaller as I'm discounting both the top and bottom six inches or so of the short ends.
The outbreak hasn't yet started in any big way for this scenario, think of it as Apocalypse day minus1.
I wanted a fairly urban setup with six easily defined areas for the single zombie in the scenario - He by the way can be seen on the roof of the building in the bottom left of the photo. I'd placed him there solely for convenience and forgot to remove him for the photos.
He'll be playing the part of  "Old Jimmy"  a well known "down and out"  in this area  of town.

The table wasn't completely set-up randomly, I used dice to determine all manner of things.
A d6 was thrown to determine how many civilian types were present on each road segment, then again to determine which side of the road they were on and lastly to determine which way they were walking etc.
Similarly I threw a d6 again for each segment of road, twice for vehicles, once for each side of the road.
A d6 determined if there was to be no traffic (1, 2 or3), a single car (4, or 5) or two vehicles (needing a 6 !)
I haven't got a lot of vehicles and I didn't particularly wish to have regurgitate them as they left the board at one end and entered in the opposite end.
The photographs roughly follow an anti-clockwise view of the table, with the well-known (at least here they're well known) of the McDoom's Franchise (soon to come under new management), the Horseman' diner chain and Nippers newsstand empire.
For this particular game I'll not be defining any of the civilians, they'll all have the same stats to begin with.
I, doubt I'll be naming any of them either until after the game though "Sid the Sweeper" is present on the table somewhere, but no clues as  to exactly where !
Yet another view of the same set-up
As mentioned above, the road in the right of the photograph will play no part in this particular engagement.
The vehicles that can be seen not on roads are merely there to fill up the space and aren't necessarily part of the game. This photo also shows my quick attempt at some greener, using a couple of left over foamboard boxes from my supermarket build and some loose plastic foliage.
"Old Jimmy" lurking behind the vending machine between the bank and McDoom's  burger joint.
And the final photo showing his first potential victim, Old Jimmy's base can just be made out.

 Next week I'll hopefully be showing the results of my first game (or games?), it'll be a pretty simple affair but it will give me the opportunity to show some of the many rules I've changed, amended or altered.

Finally let me take the opportunity to welcome my latest followers "Doomonyou" and "Phil C", hope you find something here to interest you and as always your comments are both welcomed and appreciated.


Monday, 13 May 2013

Cityscape

I'm sure I've heard or seen the term "Cityscape" used in some other context but be assured that this  merely refers to me showing the other buildings that weren't shown last week.

Here's a general view of the table layout in much the same form as last week's blog but I've taken off two of the wider road boards and they've been replaced with the narrower roads I made originally.

Here's another view of the same layout; the more astute amongst you will see that my convenience store has lost its roof.
I blame this on moving stuff I made sometime last year from one room to another
There's not much really to say about the set-up but from my perspective there seems to be a lot of open space that need fences, walls and other such obstacles.
I've put out nearly all my scratch-built building materials in one corner, just to fill the space, but I do have plans to make a proper construction site.


Here's another view showing the layout and you can see that the cottages in the bottom corner are crying out for fencing around them to afford them some privacy.

Close up view from the "other end" of the table.  


I had forgotten to place another building that I've yet to show, the original one that kicked this all off - A Sarrissa "Cityblock Residential", but it's still in the stages of being finished off.
   
I've decide that I'll be playing most of my games using only three-quarters or a half of the table as this will allow me be able to have a moving terrain - as the characters advance up the table, then I'll be able to take terrain boards off one end and replace them at the other end. I only have a limited number of terrain boards and using fewer of them at a time will enable me to have greater variations in the terrain.

Following on from last week's wide roads I re-arranged the above board, replacing my curved one with another to come up with this arrangement.
As can be seen there is a central boulevard which could have traffic going in opposite directions each side of the central reservation, though the central reservation does need some flower beds, trees or similar to break up its grey monotony.
Another view of the "boulevard" set-up,
The tenements were made with this size road in mind as it gives a lot more space around the back using the narrower roads rather than the wider ones. You can also see that I've only used three-quarters of the table, having removed the wide road terrain board leaving a two foot space at the top of the picture.The boards will be pushed up a foot when playing, leaving a foot at each end for  rules, dice, tea mugs and all the other crap that normally clutters the playing area and which I hate.

And that's it for another week. Next week I'll hopefully be showing the layout for my first game and revealing  the setting for my campaign (the city name, characters etc.).

Finally let me welcome my three latest followers, "Danisnotatree", "Mac" and "Gimzod" I hope you all find something here to interest you.

As always all your comments are both welcomed and appreciated.


Monday, 6 May 2013

Tenements (2)

As a pre-empt to my campaign I've been tidying up ,my playing board/work area and playing with a couple of trial layouts to show the models I've built all in one place.
This first shot shows the four "tenements" that I featured in last week's blog, just to prove that I did actually have them. The more astute viewers will notice that the one in the foreground has it's roof on back to front... Oh well.
 The first building has a set of double dooors and arched windows and with the photo below, best reflect the true colour of all four buildings.
This second building has a single door flanked by two columns with the window lintels squared off.
The third building again with a single door flanked by columns with angled window lintels.
 Finally the only building to have its doors painted, the lintels this time being triangular (obviously).
 Although I've called these tenements since starting the build my mind isn't completely made up as to their future purpose. Originally there were to be four apartments in each (two up and two down), but since finishing  the structural exterior I had other thoughts on their use. So far I've decided one at least will be four apartments and I'm considering another to be a single house, allbeit a bit grand. (I'm sure someone commented on the lack of a "nice" area). Another building I've thought could be used as offices and the fourth as offices downstairs and an apartment above (a Doctor's or a Dentist's practice perhaps ?)
I haven't shown any shots of the backs of these as they are truly indistinguishable .
To finish off this week's blog here's a couple of shots of my trial set-up using the tenements.

 I changed the layout slightly for the next few shots, the most noticeable change being the position of the car-park.
 You should also be able to notice the small road to the left of the photo above that's not present in the other photos above.
 You can play "Where's Sid ?" on all the city-shots, he's there somewhere but I can't spot him either.
 The last shot shows a fairly good overall view of the table, it's eight foot by 4 four foot (2440mm x 1220mm) with just enough space around to be able to walk and sit.
As for last weeks "mystery", it should now be solved and yes the tenements are big buildings. (sorry C6).
Next week I'll be having another re-arrangement of terrain boards and using the buildings I've got that haven't used in these shots.

I don't think I've any new followers to welcome this time around, but in case I've missed you somewhere along the way "Welcome".

Finally as always your comments are both welcomed and appreciated.

Monday, 29 April 2013

Tenements

It seems I started this build way back in early September 2012, (and it's still not finished), but as always I hadn't finally decided on one or two aspects of the build.  I always intended to have some internal detail and that plus the decision of roof access delayed me a lot whilst I wrestled with the decision whether or not to have a staircase up to the roof or a ladder to a hatch (like in my supermarket). As you can see from the photographs I plumped for the former; it gives the roof a more interesting aspect with the roof exit structure.
 Here's a close up of the roof, showing the rear of the roof exit and the HVACs I showed in blog last week.Rather than a single central HVAC unit I opted for two, it provides for a more interesting roof space and of course more cover for those roof-top battles.


The structure itself is basically a box built from foamboard.
There are windows in the front and rear of the building, I'm sure I had a good reason for having no windows in the sides but whatever the reason was, it's now lost to the mists of time.
Lintels and sills were either made from card, matchsticks or stirrers and various combinations of all three.
The photo on the right shows (from left to right)
Ground floor front, upper front, ground floor back, upper floor back and finally sidewalls.
Here's the rear of the building, showing the roof exit and rear door, both as yet unpainted.
The "plinth" surrounding the base of the building was a complete pain to make mostly due to the amount of strips that had to be cut.
Base measurements are about 16 inches by 10 inches (including the base) and the base surround itself is about 1 inch high. You get a good idea of the size of the thing from Sid. The height of the building (to the parapet is about 8 inches. (That's 400mm x  250mm x 200mm for those of a metric persuasion)

Final view, just to show the remaining side wall.
Early in this build I'd decided on the colour scheme  not being grey as I thought that I already have sufficient grey from the terrain boards and I wanted a brighter colour.
The colours I used came from B&Q
from their selection of tester pots (Acylic emulsions).  I bought two of each of three colours (in a buy three for the price of two deal).
Unfortunately none of the three were quite what I was looking for, but by mixing two of them together  I got the result I wanted (the colours were Sunflower and Wholemeal)
The third colour was Sandstone and was far brighter than I wanted, but I have used it as a highlight and I'm intending to use it on my "Sarrisa" residence.

That's it for this week, over the next week  I'll be having a major tidy-up in my wargames room and I'm hoping to be able to put out all the models I've currently made.
And for those of a detective disposition there is a bit of a mystery to be solved from the colour photographs

The painting has all been somewhat rushed so far on this build, but I did want to be able to post this, this week. I've fallen behind in my self-imposed schedule even more so that when fellow blogger Mathyoo (blog) visited but mostly because of an early arrival.
I am again a grandfather, this time to my eldest son's son, all three of their family are fine and well and like me a bit surprised that my grandson arrived two weeks early.

Finally, let me welcome my latest follower who I believe is Cash1204, (there's no way of telling who joined when as far as I can tell) I hope you find something here to interest you. If I haven't already welcomed you then apologies and "Welcome"

As always your comments are both welcomed and appreciated.


Monday, 22 April 2013

HVACs.

 I know I'm probably trying to teach Grannies to suck eggs but just in case you don't know what HVAC stand for , it's Heating Ventilation and Air Conditioning. HCACs are mostly to be seen in films involving roof-top chases and are both ideal cover for figures and help break up the boring expanse of flat roofs.
 The top photo shows two of the card air conditioning units I've made. They're from either WWG, Twilight or Fat Dragon, but I can't really remember which. 
The second photograph shows a homemade HVAC unit shown against the commercial one

My unit is about the same size as the commercial ones at approximately 2cm x 6cm x 3cm high.
The original idea was to use the base of a plastic pork pie tray to substitute for the wire mesh, unfortunately this had many disadvantages. Firstly being see-through didn't help and secondly the glue I used seemed to have a very strange melting effect on the plastic.(I later found an exceedingly good cake tray packaging in red that would have helped). Other materials used were scraps of card, coffee stirrers and some boxes which were the "body" of the units, something akin to a normal matchbox could easily be used.
To give them some strength I cut and inserted polystyrene, before gluing the various bits to them. On the later units, because of the problems I'd encountered, I used wire mesh for the grills (the type you buy for repairing car bodywork)
The actual construction was simpleI glues a frame of strirrers around each on the long sides of the central core box and then added the mesh. Each end has a couple of cardboard bits added as does the tops of the unit. The vertical panels are once more stirrers cut to fit.
This last photograph shows the end view of the HVAC's and the card panel. The tops, as well as the fronts do have some variation as i was mainly using up scraps of card.
As usual, for some reason the photographs don't show the true colours of the pieces, it's not just my crap painting !

This week's blog post has been a bit of a filler as real-life events caught up with me last week, but next week I should have at least one or more of the four buildings I've been working on at a stage where I feel comfortable enough to post pictures. The internal walls and fixtures are however another matter, as I continue to chop and change my views about the buildings' purpose.

Finally I'll welcome my latest follower "Zed Monkey" whose blog can be found here and as always your comments are both welcomed and appreciated.

Monday, 15 April 2013

More Rubbish

In between all those bouts of apathy, whilst waiting for glue or paint to dry I came up with this small bit of scenery for my games probably inspired by Vampifan's and another's Black Cat Bases fly tipping model (I can't for the sake of me find the reference to the other)
"More bloody rubbish, my brush just isn't going to hack it this time"
My model is about 8 inches by 6" (200mm  x 150mm), which is slightly larger than the Black cat one, but I did want it to look like it could also be used as cover.
The photographs pretty much speak for themselves and I've more or less presented them in a clockwise fashion from what I consider to be the "entrance" to the dump.
My attempt at a fridge was made from cork scrap, from my terrain board builds.
The book that can be seen was an earlier effort too.


The next view shows a couple of old mattresses I made specifically for this .
The bricks were made a while ago from scraps of cork.
Some of my homemade plastic rubbish bags, which are dotted around the entire piece can be seen in the shot, as can a couple of tins, left-overs from my supermarket build.


This next shot shows  a broken toilet (although the obvious break in it unfortunately can't be seen in this shot).


There are more rubbish bags than can be seen in both these shots dotted around.

I've used some coarse string  (sisal or in this country often referred to as Post Office string) to represent the overgrown nature of this tip.

To make this bit of scenery I started with an irregular shape of card and filed the edges down then made a rough outline of  where I wanted the actual rubbish and a rough shape of the area I wanted left "clear"

To fill out the tip area I glued down bits of polystyrene and glued cork filings over it.


The next shot shows a sofa that I made especially for this piece, again using cork scrap.
It was made in an identical fashion as my other sofas and armchairs save for the fact that I made the seating have only two cushions instead of the three it should have had,
The missing sofa cushion can be found on the pile opposite the sofa.
This view also shows a couple of newspapers that I added as well as yet more bin-bags.

The photographs also show the smashed pallet that, again, I made especially for this piece.

The "tour" finally returns to what I designated as the entrance and again shows the broken pallet and a couple of bags spilling their contents over. Once more the bages were purposely made for this.
The pallet was made from matchsticks and coffee stirrers as were the bits of wood scattered around throughout.


There are a few bit and pieces that can't be easily made out from the photographs, there's wire mesh, a tire, various bit of planking and a car seat too.
As I glued an item in place I put a little more glue than necessary onto the base then scattered some cork filings to "bed-in" whatever it was into the model.
I used dark colours throughout for the bulk of the tip but the scattering of what colour there is really makes it for me, as anything less would probably have darkened the model too much.

So, whilst I think the Black Cat fly-tip is indeed value for money, by my best estimate this cost me less than £1 in glue,materials and paint. It took about a week to finish but that was at the same time as I was building Skips, working on my next four buildings and HVACs (the subject of next  week's blog - probably, maybe, ish).
Time-wise - I reckon I spent no more than 4 hours making this, after all it's just a pile of rubbish.

Let me finally welcome my latest follower who could be Chris or David, but I'm at the stage now where I'm losing track, I blame the drugs or my age (probably both) or the fact that blogger doesn't help, nevertheless welcome guys, hope you find something here to interest you.

That's it for this week and as always your comments are both welcomed and appreciated.