Welcome to my blog, the story of my continuing journey into the World of Zombie Wargames.

Monday, 25 February 2013

Supermarket Sweep

To round off the previous two blogs I thought I'd share some of the "behind the scenes" things and a couple of things that didn't get a mention.

I realsied that all my pictures last week were viewed from the exit end of the supermarket, so this first photograph shows the view from the Entrance end, not much I know but it's included for the sake of completeness.

Next up is an item that wasn't in last week's photographs as I was undecided as to whether or not to actually include it in the finished model, even though it was finished.
 It's obvious (hopefully) as to what it is meant to be and it would have been situated opposite the tills (top left of the photo above).
 It may still be added to the supermarket at some future date or held for use in some future build.
The newspapers are reduced photocopies of newspapers made about the time of Obama's November election, hence the headlines.

It was impossible to show the back of the deli counter once it was in situ, put here's a photograph showing it before it was glued in place.
All the products are off-cuts of cork, cut or filed. The trays the cheeses stand on are card. The counter itself sits on two layers of 5mm foamboard, which you can just make out.

The back store shelving was made from the stuff I call "plastic canvas" available from places that sell embroidery stuff.
The supports are all matchsticks.

The final photograph, shows some of the things that I'd made, but for one reason or another, they were never included in the final model.

All the box-type packages are layers of foamboard, scored or cut with a razor saw after they'd been glued together. I more or less stuck to a rule of no more than three colours per item.
The ball with the slice cut out, is upside down and was meant as another cheese (there's another tray in the background too that wasn't used)
The newspaper was going to be left somewhere (probably for Sid to clean up), but it was left out to be used elsewhere .
The circular things are my attempts at pizzas and they'll certainly feature in the future, as will the few tins.

That's all for this week.

Comments, as always are both welcomed and appreciated.

Monday, 18 February 2013

Clean-up on Aisle Four


As promised here's the inside of my SuperDuperMart.
From top-left going clockwise:
In the top left corner is a toilet, then an office followed by the main storage area, all at the back of the building. Though not obvious on this view, the right wall of the storage area has the shuttered door.
Following on  to the guts of the building is the sales floor, with my fruit and veg stall from a previous post. The front door can also be seen here.
The two adjacent shelving units contain various products before we come to the tills and the exit.
After the tills there is a small frozen food section and finally the cheese and meat deli -type counter.
To the left of the deli area is the employees entrance.
"Aisle four" would be the far one.
Here are some more closer views  of the various shelves in the body of the store.
"Drinks Shelves"
"Frozen Foods"
I think most of the photographs are self explanatory
"Deli Counter"
The various signs and posters to be seen around the store were mostly gleaned from the interweb.
 The left-hand poster is entitled "Cheeses of the World" though it is really difficult to make out when it's been reduced to such a small size.
Checkout
Toilet
The tills were printed card models, but I can't recall where from whilst the counter and most everything else in the store was scratch built.
Office  

Both the toilet and the office have had posters added and the toilet has rubbish in one corner (a newspaper).

 The rear of the storeroom , showing the roof access ladder and the storage door.


View from office to storage door.


That's it for this week, I hope the wait to see the inside of the store was worth it for you.

Finally let me welcome my latest follower to my blog "Grigork" and as always, comments are both welcomed and appreciated.


Monday, 11 February 2013

ALLDIE

This particular build, I suppose, started way back in October 2012 with my fruit and veg stall (here) but the main work really started on it in November.
I thought I would have it completely finished in about a month or so, but as my eyesight worsened and the usable daylight hours got shorter progress was very slow.
 Now however I am at a stage where I can at least say that the model is usable, even though there are many more things I'd have liked to have either added to or changed on the model. 
This photograph shows the front of the building (duh) with Sid shown for scale.
The width of the building is about 16" (400mm) and the depth is 14" (350mm).
Height to the roof is about 4" (100mm), then there is a 20mm parapet on three sides. with the front facade being 40mm. Originally the building was going tp be 16" square but the realisation that this would mean the back of the building would sit on the edge of one of my terrain boards made me decide to shorten it by 2", thus allowing figures to get around the back.

The signage was all garnered from the interweb and things like the supermarket sign were photo-shopped.
I know that they're not  all really relevant in the context, but when they're only about 15-20mm x 25mm who's going to know?

 This photograph shows a general shot of the roof of the building and does look a bit bare.
I had wanted to put some features on the roof, electrical casings or HVAC units or some such, but by the time I got this far I was really bored with this model.
On the roof then are merely a hatch (on the right), general detritus (achieved by using cork filings) and a newspaper  can just be made out on the left of the building.
The truck cab that can be seen was recently purchased at a table-top sale for the princely sum of 10p but alas no trailer was to be found.
Moving around the building the door to the store's storeroom can be made out.
The close-up shows the door in its open position.
All door on the model are openable. (After all, we all know what flak we'd get from certain quarters if they weren't)
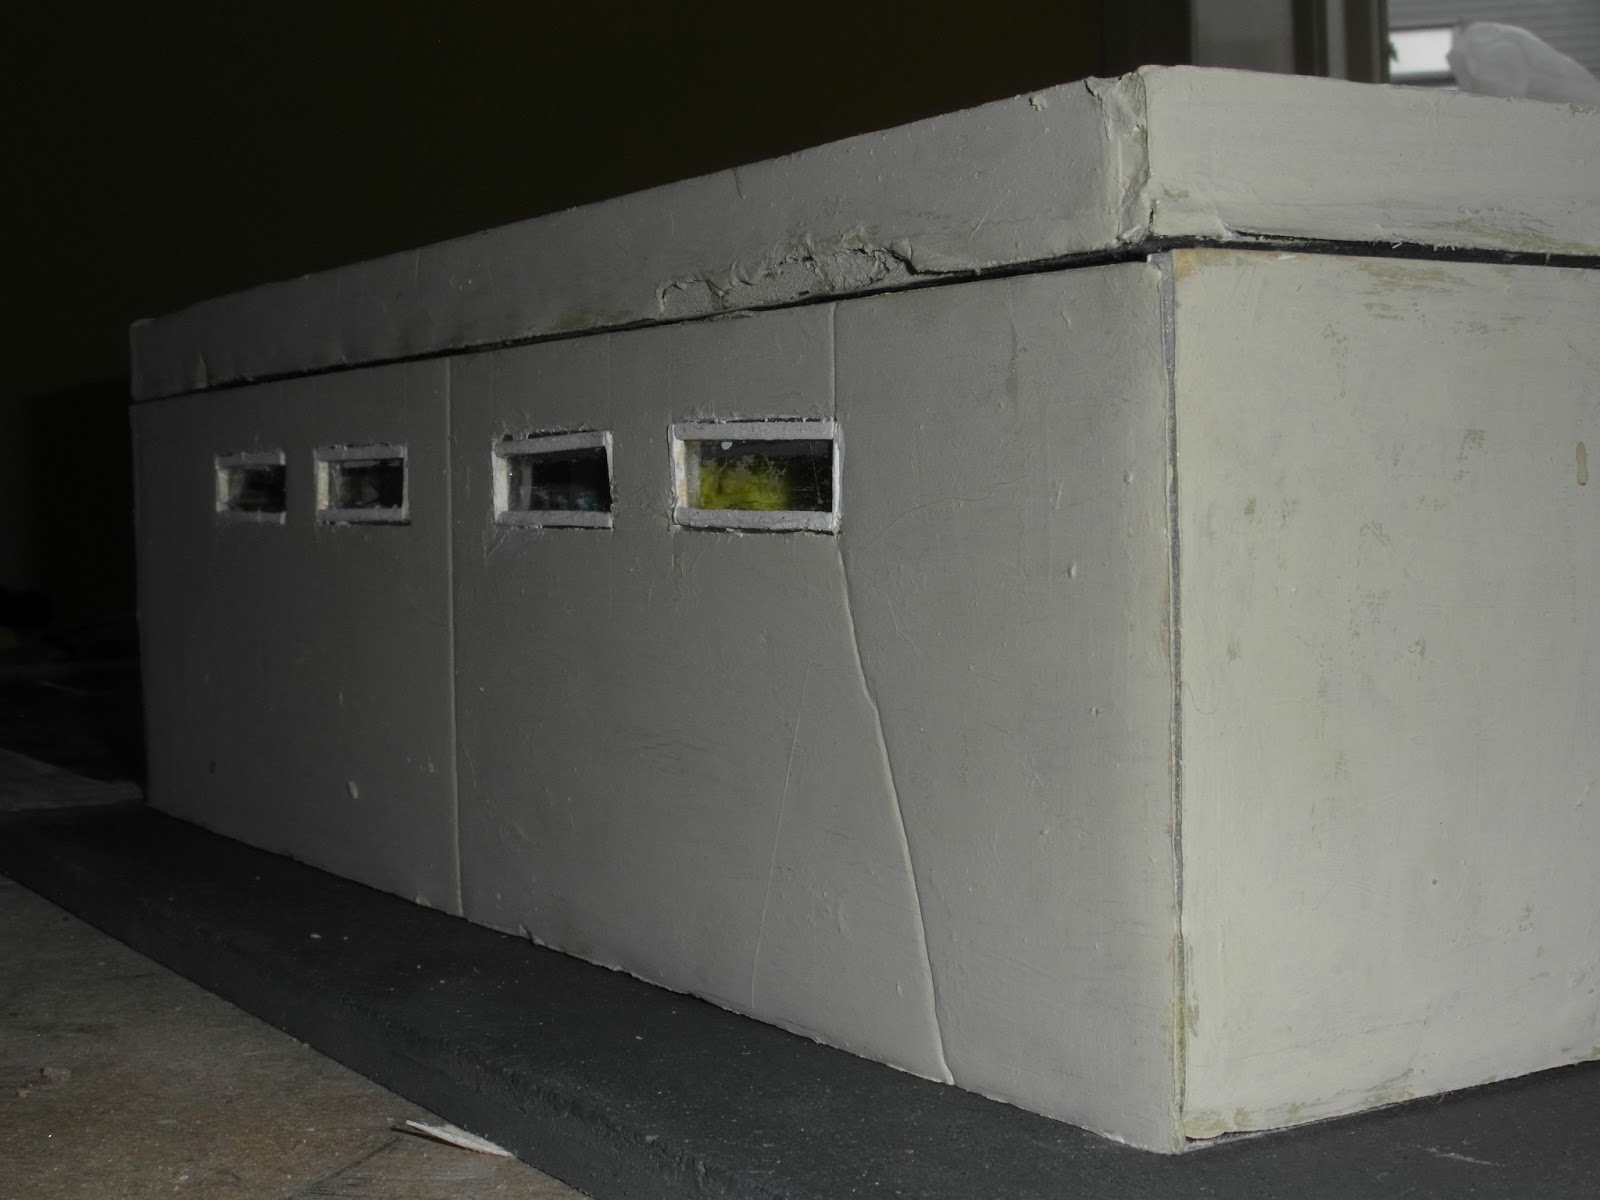
The back of the building is nothing remarkable by any means.
The four windows being the only features present. If I had more of am artistic leaning then I would probably have added some graffiti. Posters of course would also work but who puts posters on the rear of a building ? When the building is in a game situation I'll be able to put dumpsters, rubbish piles and so on there to liven it up a bit.

The final side of the building has two doors in it.
The employees entrance (left) and the store exit (right); unfortunately I didn't take a photograph of the entire wall.
The major part of the fabric of this model was made from 5mm foamcore, but card, matchsticks, paper, perspex, barbeque skewers and a couple of coffee stirrers (of course) were all had a part too,
Finally, if you think you can make out things inside the store, then you're absolutely right. There are indeed many things to behold in the fully outfitted interior. All will be revealed next week, if anyone is interested, so look out for "Clean up on Aisle Four !"

Thanks for taking a look and as always your comments are both welcomed and appreciated


Monday, 4 February 2013

A Distraction

I've been more or less incommunicado this last week as myself, my wife our eldest son and her eldest brother attended my wife's investiture at Buckingham Palace on Friday (1st Feb)

My wife was awarded an M.B.E. in last year and in the autumn she received her certificate, but it wasn't until this year that she actually received the gong itself (presented to her by HRH Charles) and then the reality of it all set in.

Her award was for her work in the community where we live, at the local community centre (a charity), in childcare, and a whole host of other things.

There have been many times that I've felt very proud of the milestones in my life, my wedding day, the births or our children, the marriages of our children etc. and this has to be right there at the top of the list. Maybe, just maybe, the births of my grandchildren this year will top even this, but that remains to be seen.

There were very few photo opportunities that may be of interest to many of us hobby-wise (I'm certain I didn't see any cockneys fighting zombies), but this guardsman was on duty outside the palace when we arrived at about 10 am in the rain.

When we exited the palace in the afternoon the guardsman I saw on  duty then was in a bearskin but still wore his greatcoat.

In attendance at inside the palace were  members of the household cavalry, both the Life Guards and the Blues and Royals were on guard duty, but as photography was strictly forbidden inside the palace and you tend not to argue the point with big guys with swords drawn, I've borrowed the photograph.

At the ceremony itself  other than the military recipients of various awards HRH Charles was attended by two Ghurkas in their dress uniforms and chests full of medals (very impressive), which is a throwback to the reign of Queen Victoria. There were many other flunkies of course attending to the needs of the Prince, but there also five Yeomen of the Guard, presumably a tradition that's been around since Henry VIII's time. These chaps were kind enough to stay around after the investiture to enable photographs to be taken.

 
They are all wearing royal livery, the sergeant in the centre carries a cane with which he gave commands with a single tap on the floor. The four "rank and file" Yeomen carried very lethal-looking partisans whilst in the palace but had stored them by the time we exited, probably for safety reasons as they're more than likely razor sharp and still very useable.
The Yeomen departed in style from the inner courtyard of the palace in a carriage that we had actually followed into the palace in the morning although the back cover was down (due to the inclement weather probably), so we didn't know if they were inside then or not.

So, our five day marathon of travel (about 400 miles there and back) has now finally ended and it seems likes a lifetime ago.  We were in London less than 24 hours and now I'm now going to attempt to catch up on all the blogs I try to follow and have missed.

Next week it'll be back to normal and I hope to have finished something I've been working on for a good while to showcase.

In the meantime it just remains for me to say, "Many thanks for looking", "Welcome to my latest follower Louis Britton" and as always comments are both welcomed and appreciated.

Monday, 28 January 2013

Books

It would have been fairly easy to have picked a better title for this week's blog,  but I've gone with the mundane. 
Last week's blog featured a few books I'd made to enhance a desk and the photograph to the right shows a similar idea, the model also features a newspaper which I've made.
The model desk is another of my early attempts at making a card model (WWG I believe) and is in fact the same desk and not two desks.
The idea to make books started quite a while ago and I used up any paint still left on a brush  before finally having to wash the brush out.
I started with a rough rectangular grid on paper and filled it in as time went by.
The grid was not measured in any way., though an effort was made to keep it at 90 degrees.
The next step, once all the sheet was filled in was to cut it intoi strips.
I cut most strips the length of the sheet and a few the width of the sheet. Lengthways cuts would give me books more or less the same width, whilst strips cut width-ways gives me books the same height; both have advantages and disadvantages, though I prefer the length way cuts.
The photograph on the right shows the strips, with three of them folded, ready to receive the middle.
For the next step I cut and glued several layers of newspaper.
There was no need for any great degree of accuracy here.
In the photograph can be seen a black strip which has not been folded; this strip was going top be treated in a slightly different way.

I next glued the paper inserts into the folded strips and used clips to hold their shape whilst they dried.

The black strip didn't need clips at this stage, as the newsprint was glued directly onto it.
 Once glued (more or less), the strips were trimmed of excess newspaper and I did some painting on the "books" to represent titles, pictures, authors etc.
It'll be noticeable that the black strip got slightly different  treatment to the other strips.
After finishing what little painting I thought appropriate I cut and trimmed the books from the strips. Books that appeared too tall were merely cut in half and made two books of a more acceptable size.
The black strip again got a slightly different treatment as I cut these to the same lengths; as they would represent volumes of the same set. They were then stuck together, as if on a shelf and a bit of detailing added to them.
The final results can be seen on the photograph.
I did varnish the books and hence the glare , but the overall effect I think is pretty good considering that the smallest ones are about half a centimetre square.
All the books in the picture came from just one strip  and I've got a lot of strips !

That's it for this week and as always, your comments are both welcomed and appreciated.

Monday, 21 January 2013

Hotchpotch

I think the title says it all as I haven't really got that much to offer this week.
About this time last year, when I was contemplating setting up this blog I was surfing the interweb looking for US Police cars, Taxis and Ambulances, none of which were forthcoming (the quest goes on). I later decided to venture in the field of card modelling some vehicles, alas this project was quickly squashed after the disaster that was my first attempt at a police car, from (WWG).
 I think I built the model sometime last summer.  I have got a few vehicles that are suitable for games, but I don't think I'll ever approach gridlock on my table.
The photograph on the left shows one of my recent Poundland finds.

It's a mesh (obviously) that I'll use for many different things in making scenery.
The most obvious use is for fences, but window frames, iron grill-work and industrial flooring all spring to mind too.
 Materials like this have been around for ages of course, I still have some platci canvas that I've used on all sorts of projects  over the years.
There is also the metallic stuff used in car body-work, that ttoo has been around for years and makes excellent fences, razor wire etc.
It wasn't the fact that its dishwasher and freezer-proof that attracted me to it but its size.
The mesh is about a quarter inch (6mm) but the whole sheet is far larger than a sheet of A4 paper, measuring about 14 inches x 10 inches (approx 350mm x 250mm).
It has the same flexiblity and rigidity as plastic canvas but is a lot thinner (but thicker than the metal stuff).
I haven't a clue as to how it glues yet, but it can easily be cut. I'll be making something out of it in the near future.
Whilst waiting for things to dry out, (mostly walls) using my new acrylics  (125ml from Poundland) I made this desk.. The whole thing took about an hour to make and paint (excluding drying time).
The leg looks a little wonky, but that's because it is. It's easily remedied as the whole thing is made from card and paper and card bends  !
Here's where the desk will eventually end up (even if it still has a wonky leg)
There's next to no more space in the room as it will only measure 2" x 3" (approx 50mm x 75mm), which doesn't leave a lot of room to put figures in, let alone a chair and filing cabinet that I envisaged.
Putting a chair tucked in under the desk will help save some space though and rather than putt a filing cabinet in I may just add something to the walls  for decoration.

Adjacent to the office above will be the toilet (restroom. bathroom). I've already figured out half the furniture for the interior, but I wasn't happy with my last attempt at a wash-basin.
I've been eyeing various packaging with a view to using it in models.
As can been seen from the photograph, the sink unit was made from tablet packaging (I get through a lot of these things every week) and a piece of card. It's not the best stuff to work with, but it does cut easily. There a lot of different tablet package designs out there and look out for square ones that could make skylights, capsule type ones that could make bath-tubs etc.
It's not just tablet packaging either, in the past  I've made domes from the tops of shampoo bottles; toothpaste caps make excellent flower pots, litter bins, waste-paper bins and so on.
The final photograph shows the next stage in a project that I started weeks ago. It started out in life as a sheet of paper to which I added a grid of rectangles. the grid was slowly filled in with paint randomly.
I've now got to the stage where I've cut the sheet vertically into strips and the three strips to the right of the photo have been folded over. On that note I'll leave you to ponder what it all about.

That's it for this week, comments as always are both welcomed and appreciated.

Monday, 14 January 2013

BOG OFF

Back in October I briefly dumped this photo of Sid and my prototype toilet in another article.
Since then I have  made  a lot  more of them using more or less the same process.
Because I was going to "mass-produce" these, I used strips of cork left over from my terrain board endeavours.
Each strip was about 300mm long and about 35mm wide (4mm-5mm thick cork).
I drew out two rows of 15mm squares for the upper parts of the toilet.
For the lower parts other scrap strips were used approximately 10mm wide, but as can be seen in the photograph this was not always the case.
 An interesting bonus occurred when I came to cutt the individual top part out in that because I had an extra 5mm width to the original 15mm square I decided to retain it and use it to support a cistern. The original prototype had the cistern flush with the rear of the toilet, but this extra 5mm give me a ledge to sit a cistern on.
All the upper 15mm squares (with and without the 5mm lip) were then given a hole in the centre using a craft knife,
Once all the necessary holes were roughly cut through the bottom pieces were glued in place.
The next stage was the interminable filing of the base and the upper bowl to get some semblance of a real toilet shape. This was the most time-consuming part of the whole task, taking probably more than 5 minutes per unit.
The close up on the left shows the wide variations in style and size that I accidently acheived though I did try and make a few more or less the same.
The odd bit of cork in the top left of the photograph are the already formed cisterns, though not glued in place.
 The next stage was to cut mor scraps of cork into a cistern like shape to fit on the rear of those toilets with the 5mm lip. A quick bit of filing later so that it doesn't look completely square cut and the toilet would be almost complete.

The last bit of "modelling" to do was to put a handle on those that had a cisterns .
The others would be put up against a wall with a hidden cistern as seems to be quite common nowadays and the handle for those would consequently would go on the wall.
Lastly here's a close up of Sid with the finished gloss-varnished product, which it doesn't show up well in my photographs (but then again what does ?)

The uneven appearance of theses is due to the black cloth I use for backgrounds and the crap that was underneath it, plus some of the units with the cisterns on the rear were a bit unstable and tended to lean backwards. This won't matter if they rest up against a wall or are glued into position.
These of course are fairly rough, but do pass the two foot rule (I can make out what they are meant to be at arm's length) and I'm quite happy with them. An obvious improvement woould be to have an actual seat on them and that's a possiblity that I'll consider when I actually get to place them into a building. An alternative to the white porcelain bowl would be silver as used in prisons and possibly cells, though I'm no expert. As I've still got several in various stages of build, this is again something to consider for the future.

That's it for this week; as always all comments are both welcomed and appreciated