 |
| A "single" unit yard |
All the fencing now had a slender base, which had a small amount of filler added plus a sprinkling of sand to get some sort of scenic effect.
You'll notice that I've also added corner posts , for added strength.
 | ||||
| "Double" yard and the "single" one |
The "double" yards had the same treatment as the smaller ones, with the same basic scenic basing and the addition of corner posts (made from four layers of coffee stirrers)
There was one other element to take into consideration and that was that all the pieces had to align with the wall of the building, which meant a bit of filing here and there.
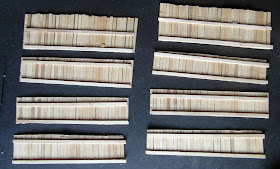
Two shots next of all the units I've made so far.
They don't look like they take up much space when intertwined together and laid like this (before undercoating obviously)
But It's a different matter when you see them separated out.
Each section of fence is about 4" (10cm) long whether it's a plain fence or a section with a gate, so that's 26 sections so far or about 8'6" (about 2.5m) of fences ! A lot more than my original estimate of about 6', it does make me wonder how much it would have cost in plastic !
After a very quick paint-job (unfinished at present) I decided that these would need a base for them to sit on and so I could glue some scenic items in them.
They sit on very thin card with a piece of scrap foamboard that will fit underneath the building they're against and prevent them from drifting around the table during play.
The single yard (top left in the above picture) with a few bits added; its base is hardly noticeable even at this stage, without anything being done to it.
Similarly a "double" yard , on its base, which is tucked under the building.
And just in case, if you're wondering where all these will be stored, here's a picture of a possible answer.

I have got two more building to make yards for both of which will require three yards each and because I've ran out of stirrers I've resorted to using my very limited supply of old lab tapers (the sort you would light a Bunsen burner with - "when I were a lad")

Exactly the same methods was employed as with the coffee stirrers except because of their length I could get 4 sections of fence from them rather than the three I got from the stirrers.
The two final units will be done sometime in the near future, as I have all the bits ready for them but I've also started a very simple building (a box) which should be at a stage where I can post about it next week.
That's it then for another week thanks for taking the time to look and as always your comments are both welcomed and appreciated.


Great job!
ReplyDeleteThanks Tito, just some final finishing touches still to do, but they're usable
DeleteOh now they look cracking :-) Great posting Zabadak. Really nice write-up and some nice photos to boot. Love the different looks to the fencing you've come up with.
ReplyDeleteThanks Blaxkleric, I hope others have a go at something like this too
DeleteThey've turned out great Joe. I don't suppose you want to make a 1:1 scale version in front of my house do you? :-)
ReplyDeleteThanks Paul, the problem with 1:1 scale is that if they're not vertical it really shows and SWMBO is always looking over your shoulder.
DeleteWargamers do tend to ignore back yards and yet these have come out tremdously well. Bravo sir. Bravo.
ReplyDeleteThanks Clint, I needed something ot fill in the terrain.
DeleteThey have turned out really well, Joe. Cheap they may be, but they still look very good.
ReplyDeletethanks Bryan, they still need a bit more paint on them (some haven't even been touched) and indeed they are cheap - my best estimate to actualk cost is approximately £5
DeletePerfect! A great build Joe, well done Sir.
ReplyDeleteThanks you michael, maybe not display standard, but certainly wargame standard
DeleteThey look fantastic when put next to the apartments!
ReplyDeleteI almost started working on my own but I can't help but think the coffee stirrers are too narrow...must be GW scale creep and my idea that fences should be cartoonish!
Thanks Mattyoo, they'll look pretty good en-masse too I hope.
DeleteIf you take a scale of 1:60 (a 30mm character would be 6 foot [180cm]) then the individual fence slats are about 1 foot wide (!) which is far too big for a normal fene imo.
The lolly-pop sticks work out almost like overly large railway sleepers.
Nice job. They all look great I notice a distinct lack of large wheelie bins though!
ReplyDeleteThanks Brummie, but I haven't got around to putting any detailed peices in the yards and I certainly would put in wheelie-bins, if I had any.
DeleteGreat post Joe. Lovely yard fences, an idea I'm sure I'll steal at some point.(What else am I going to do with all these coffee stirrers!).
ReplyDeleteThanks Bob, they're easy enough, with no tricky precise measuring needed.
DeleteThe uses for coffee stirrers is of course many-fold.
The Yards looks great!
ReplyDeleteI have just got my hands on some coffee stirrers so i will try to make fences and perhaps a yard or two with them, thx for the great ide.
Thanks HW, luckily I have fairly easy access to coffee stirrers (at less than £2 for a packet of 1000) and I found many, many uses for them.
DeleteReally great job!
ReplyDeleteThat will give lot of flavour to your settings.
Merci Shuby, I hope they give a better feeling of urban living
DeleteAmazing work as always, Sir. I want to live in your toy army man room.
ReplyDeleteThanks BC, much appreciated. Until recenlty there was actually someone living in it !
Delete