Pages

Monday, 30 August 2021

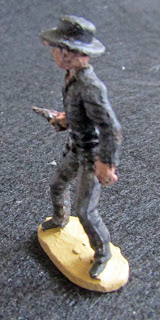
Gunfighter #2

 So, continuing on my quest to get ffinished at least a-figure-a-week, just so I have something to post about, here's my latest addition, though I also started on another two, who are well on the way to completion.

Apologies for some of the poor photography (as usual), but for some reason I got an attack of the shakes, but nevertheless here's  the best of the twenty-five photographs I took.
(Obligatory blurry picture)

That's it then for this week, but maybe next week I'll have another two figures finished - not  a lot I know, but I have also made a start on planning building #1 - a church !

Thank for taking the time to visit and as always your comments are both welcomed and appreciated.

Monday, 23 August 2021

Gunfighter #1

I've had a very languid week, mostly watching films, with little hobby stuff done, but nevertheless I decided to 'attack' my gunfighters with their inordinate amount of flash. In an attempt to close in on my target of 500 posts. I'm reckoning on getting one of these gunfighters done a week over the coming weeks, which should easily be attained. So here's the first and a couple of photos of the surrent stage with the others. 
The photograph on the right shows the leader of the group , with three shades of black clothing - a very dakr hat, a charcoal shirt and almost grey trousers. Other than his gunbelt, which has been gloss varished, he still need a matt varnish .
 
The remaining gunfighters
Reverse  view

That's all I've got for this week, a single figure ! 

Thanks for taking the time to visit.

Monday, 16 August 2021

'Bank' Bits

 My enthusiasm for this is rapidly dwindling towards zero, so over the last week I've achieved more or less zero. The photograph on the right is the rear door of the bulding, looking a bit skew-wiff, but it's usable (just).
This was the major piece of work on this building all week. The white bits on the lintels above the door are plaster/filler, filling a small gap above the lintels. I also used the plaster on the upper surface of the building's roof parapet and the final detail on the front entrance.
WIth a new scalpel blade I tackled the start of the rear verandah roof strips that would later have corrugated card tiles added and got as far as sticking the strips together. 
It was when I reached this stage that I realised the futility of continuing this project - it's huge  and I doubt I'll ever be able to get the minimal area of a six foot square table to put it all together. I also wondered where I'd store all this, if I ever managed to get the three foot square boards needed to mount all the buildings on. 


Front door - note the new small pillars.

Plaster work on the parapet (barely visible)

Rear view of front door.

Strips cut for more roofs

And glued together to form 'steps', all  for...

...the rear verandah roof (1) - that's a tree on the right !

... and the second part of the verandah

I think overall I managed about 2 hours hobby time this week, though I did dig out the gunfighters to cut the flash off them, but looking at them was as far as I got !

Considering that I have large numbers of painted figures/armies in many genres and haven't used them in a game for over a year, at least, (and many years in most cases) I'm wondering why I'm bothering to do anything.at all.

That's it then for this week, if I manage to do anything this week I'll post again next week, or maybe I'll dig out another one of my 'forgotten armies' just to have something to post !

Thanks for taking the time to visit and apologies for the lack of content.

Monday, 9 August 2021

One Down (Store) and one to go ('Bank')


Even with all the normal real-life issues, I've managed to finish off the Sore (Blg #4) and made some in-roads on finishing off the main structure of the 'Bank' . 
The photgraph on the shows the ridge tiles have been haphazardly placed but will be better looking when some filler has been added.
The next few photographs show why the tiling was imperative to the model and the extra work involved.
Rear of the 'Bank' showing the rear roof of the Store (Top left)
Another view, from the front, again showing the rear roof of the Store
With these two photographs, it meant I had to have a rear piece of roof, which meant additional tiling.
I think I managed it fairly well.
Side view, showing new roof bits and finished wall of lean-too


Rear  view, showing the rear roof supports and finished doors.
The roof of the Store does lift off, but leaves the roof supports still on the body of the model.

With the store's main building work finished I returned to finishing off the main building work for the 'Bank', namely the front double doors and the rear glazed door and side panels.

The front doors, pretty plain, but with a little more detail on the rear.

The rear door needed a little more work.
Prep work on the door assembly.


Rear door assembly in place, with door slightly ajar.

It was when the rear door assembly was in place that I noticed I hadn't put the transoms in the two side panel windows. The whole assembly was removed for ease of working on over he next week.  
So that's it, at least another week's work on the 'Bank's' rear verandah roofing and the rear door assemblt to finihs properly, plus the roof to fit. I'm still at a loss of how to replicate the walls around the verandah though. *see the second photograph).
 
Blogger seems to be playing up again, so despite this short post, it has taken me twice as long as normal - very disheartening.
 .
Thanks for taking the time to visit, hopefully you've found something of interest and as always your comments are welcomed and appreciated.


Monday, 2 August 2021

Bank and Store (2)

After the initial surge of progress on these two buildings, I've reverted to my more typical regime of an hour a day working on these two with sometimes needing a huge effort to face the challenge of doing more 'work' . I have managed to make progress on both buildings, namely finishing the facade on the 'Bank' and its two internal roof supports. Both buildings have also had all their windows added - which needed some remedial work too, to make them fit. Finally I started on the tiled roof of the store (previously referred to as Building no.4.) . I happy enough with what I've managed and both building should have their roofs finished this week. 
The photograph on the right above, shows the roof parapet 'trim' of the 'Bank' completed 
I also 'fixed' 'the Blue house' - building #8. It's been bugging me that the rear looked wrong and I finally found out why - I'd glued the rear wall on back to front, this wasn't too difficult to fix, but still a pain having to do it. 
Here's the phots of this last week's efforts:
What the door facade is meant to look like...
... and my efforts to match it.
Internal window by front door.
The window above was one of the reasons why I made the walls of this building so thick and I've tried to reproduxe it,
Photo showing that window and the arched roof support .
Matchstick window frames with cellophane 'glass'.
All window frames in place, though all sightly larger than planned.
'Tiled' roofing well underway...
...and the finished article (or at least half of it! - Ed.)
The 'Blue' house with correctly orientated rear wall.

This is my 488th post and I'm beginning to wonder if it's worth carrying on, but will probably try and make it to my 500th post.

That's it then for another week, thanks for taking the time to visit.

Comments, as always, are welcomed and truly appreciated.